Making of "Green-eyed foreign woman"
It was an absolutely usual evening. I was drinking tea and watching some 2d and 3d art galleries. Suddenly I saw something special, Bao Pham’s green art of girl, who has incredible gaze. Everything was saturated with harmony and serenity. So I angry and said “Why it’s so beautiful?!” Then I left my tea, opened Zbrush and started sculpting furiously.
This Making of is available on Russian.
Sculpt
I usually start from DynaMesh064.zpr sphere and use these brush set.

When I becomes bore, I set SkinShade4 material to the model, turn RGB mode of standart brush and paint!
Here I cooled down, said to myself “Looks good!” and went to sleep. I didn’t remember this about a week.
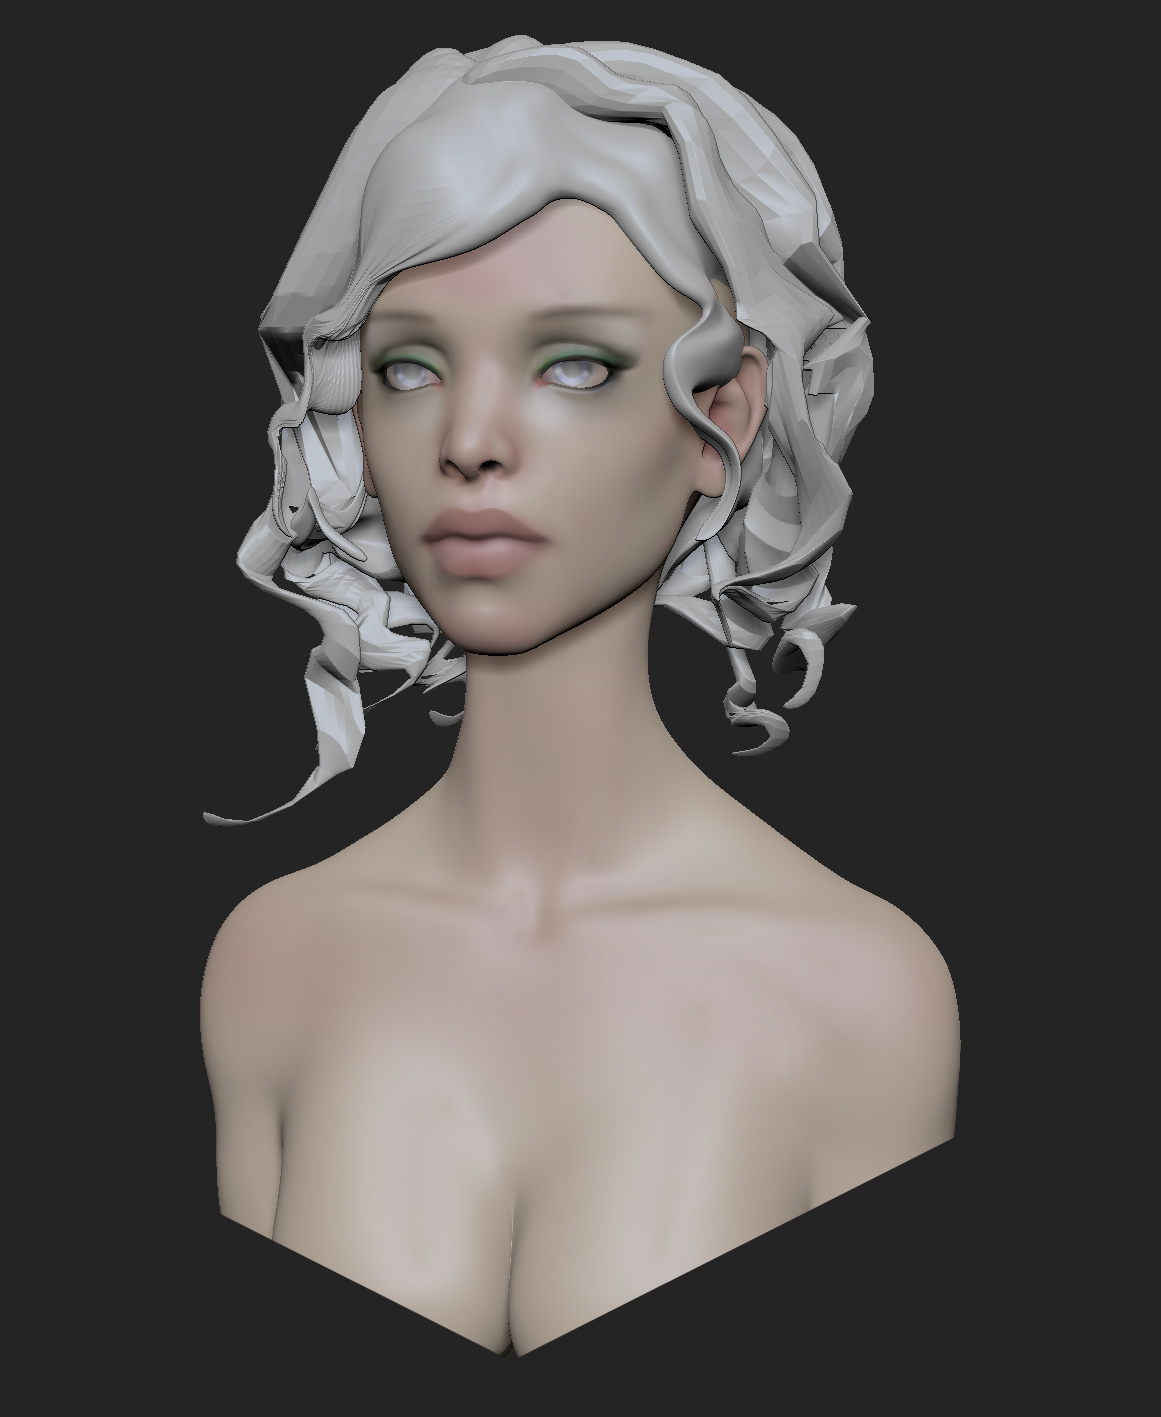
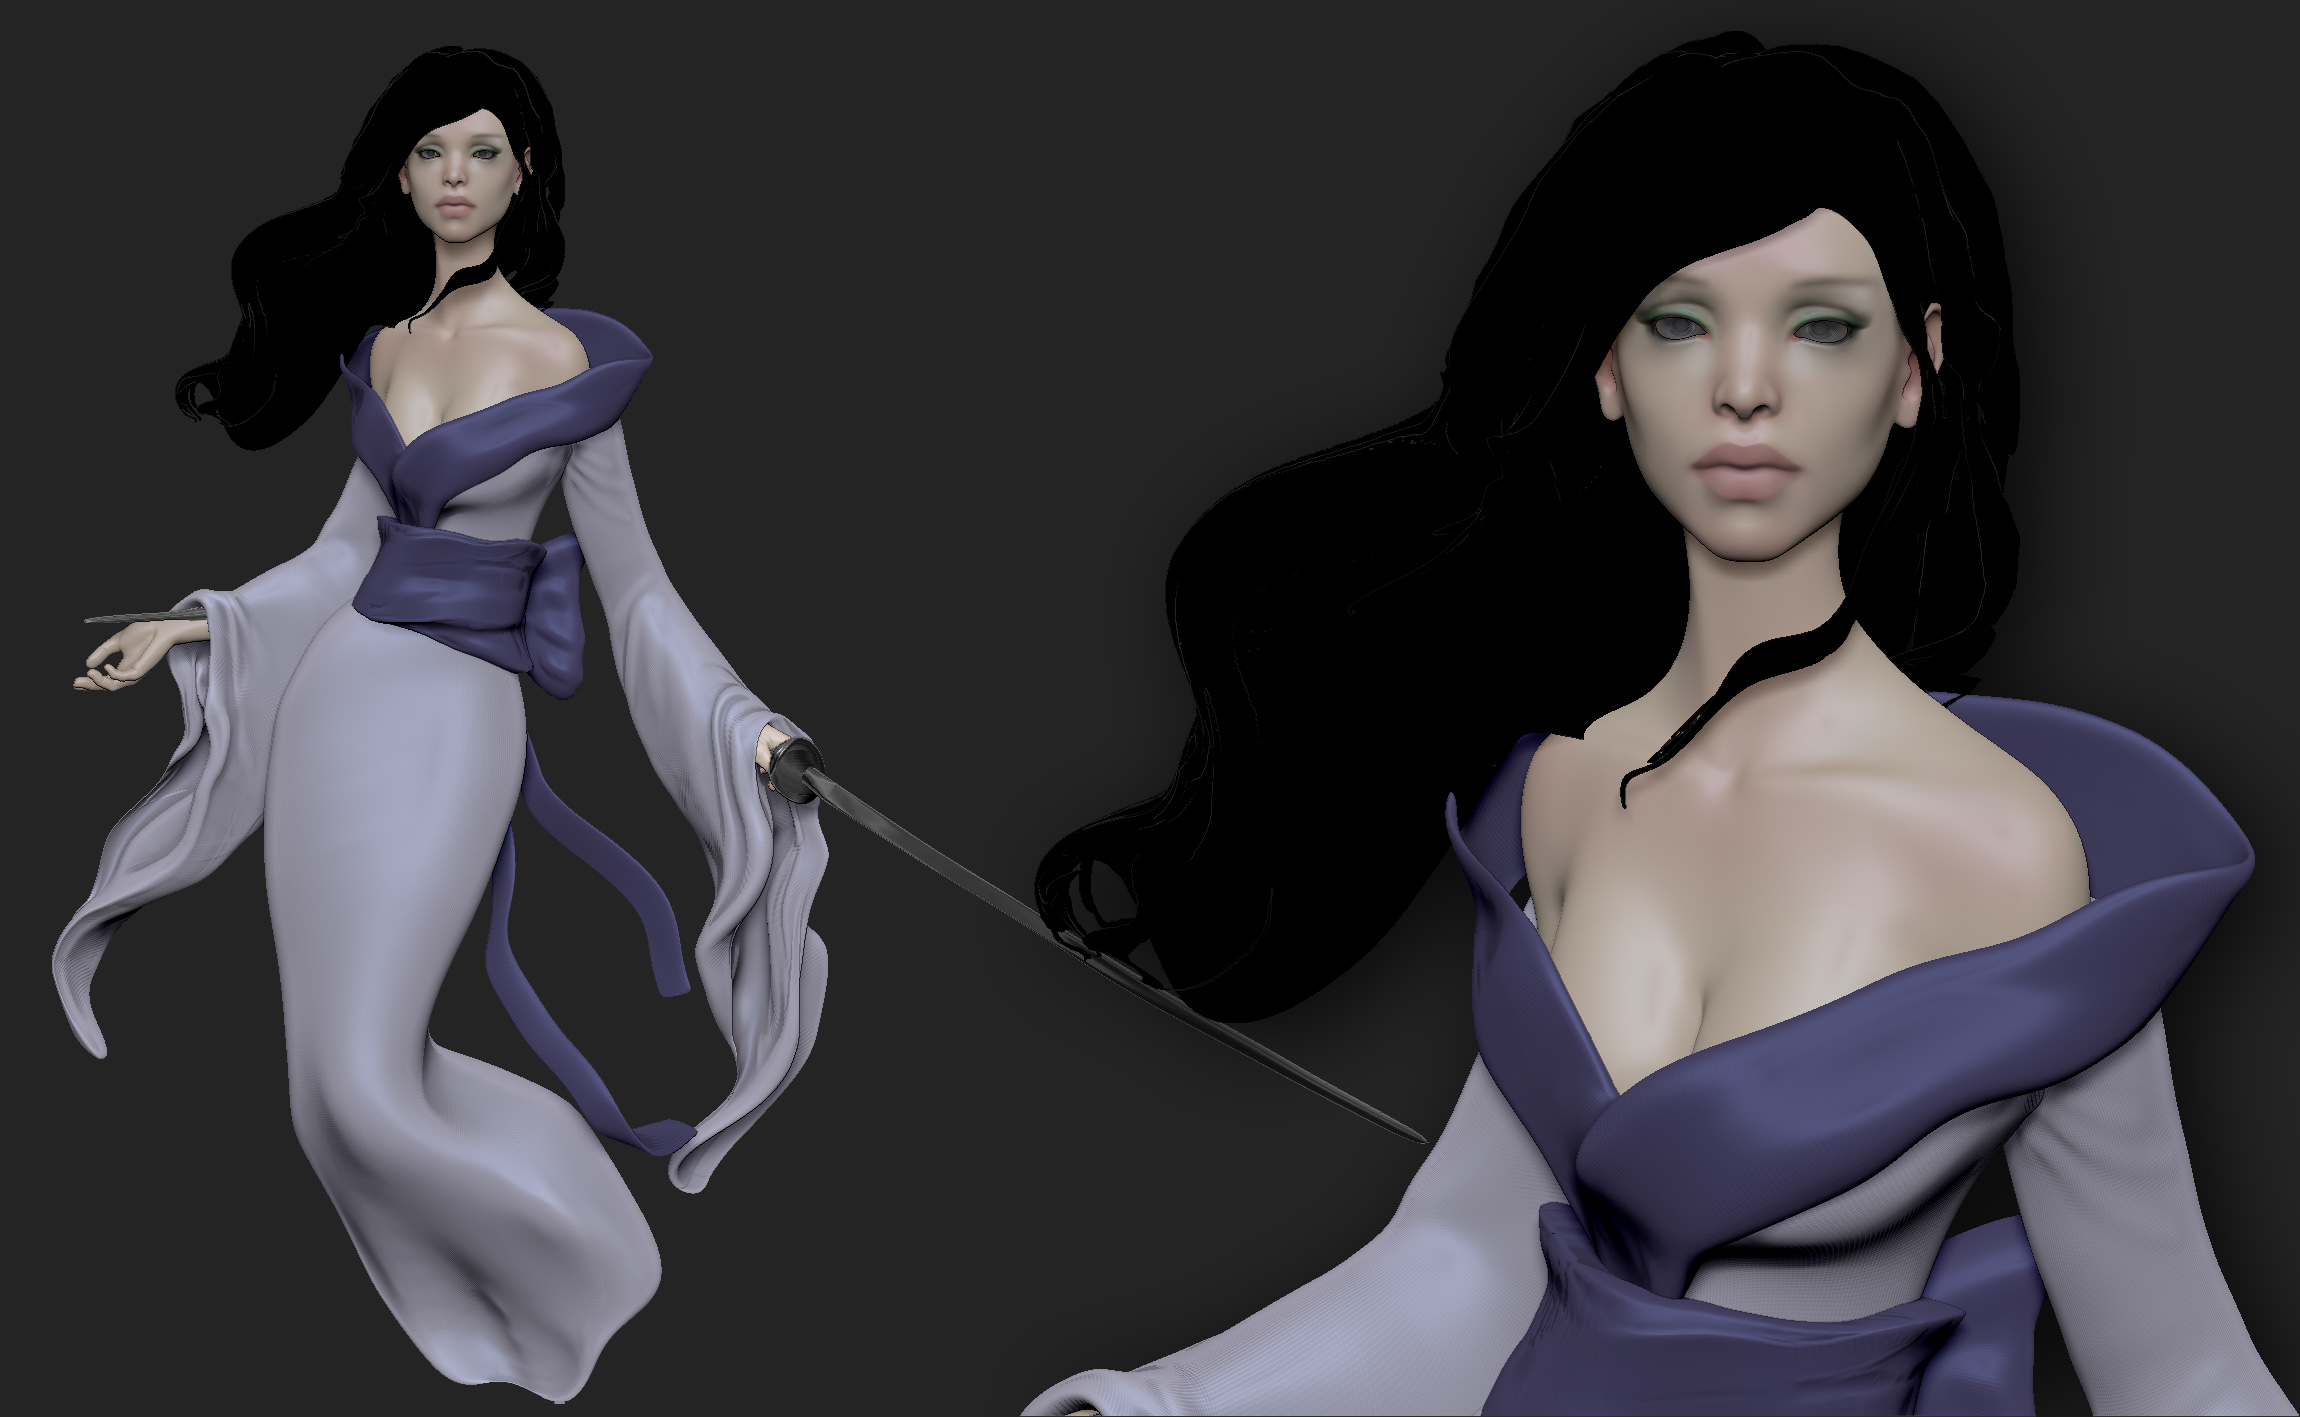
Test render
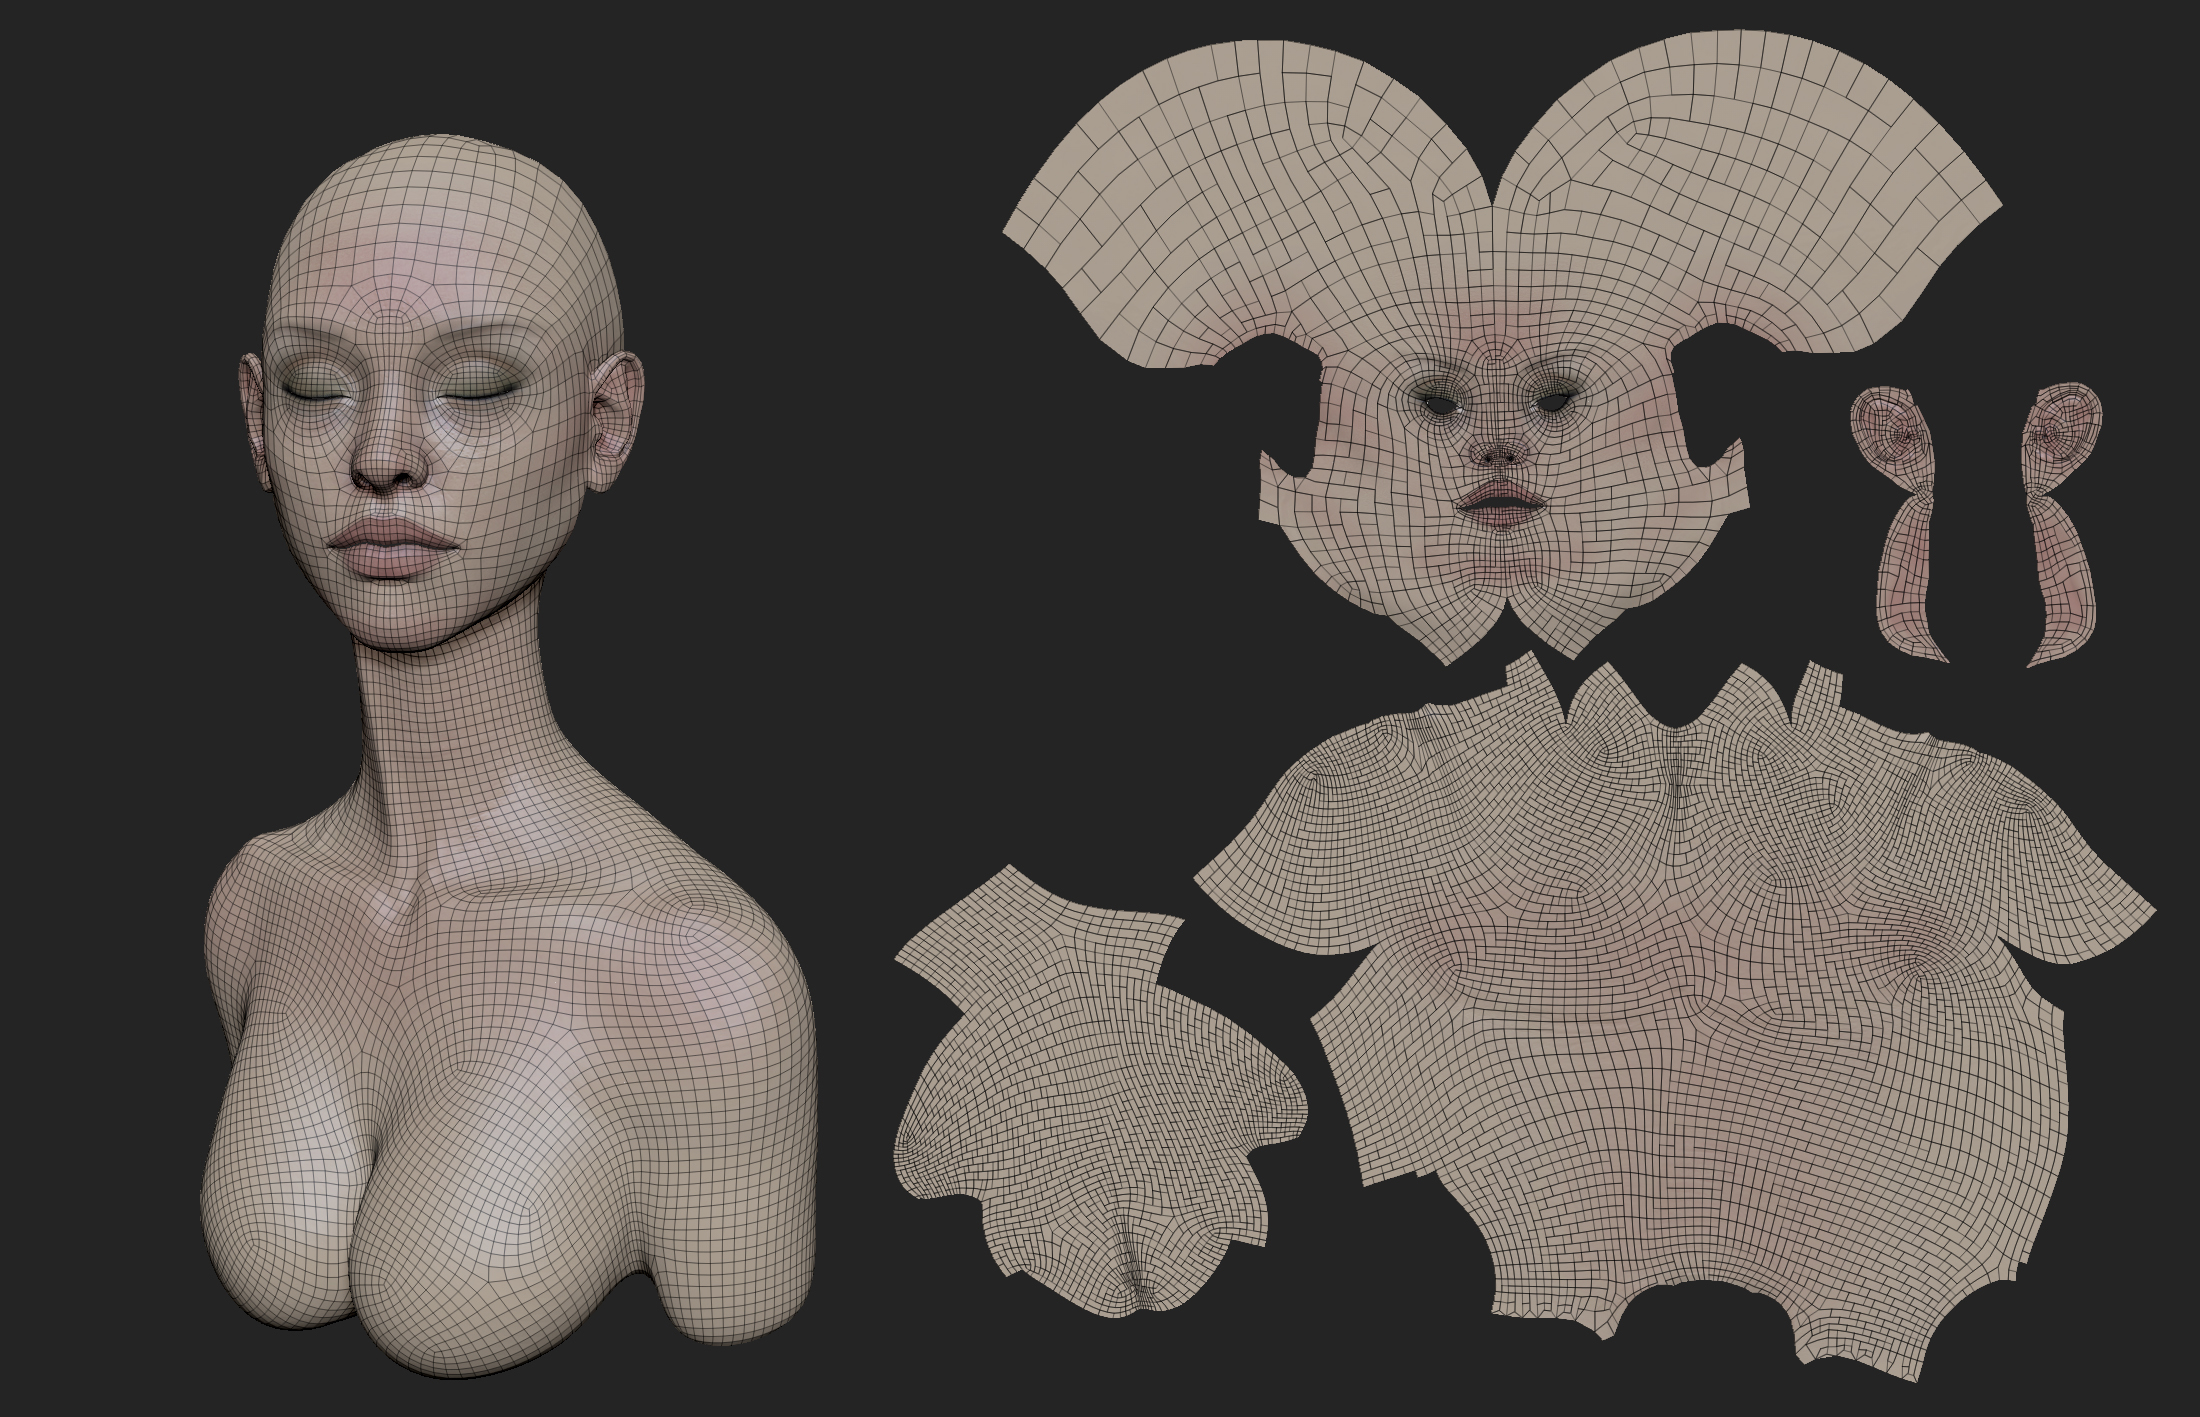
I had a nice render in plans, but I didn’t decide what to do with her head yet. First of all, I should render her and draw some sketches over it. This method helps always. I shut down her eyes, so she can’t see this madness. Then I made retopology. The wireframe of the head was made using 3Dcoat. The rest was made by Zbrush with wonderful tool Zremesher. Then I merge all together in 3dmax and made UV.
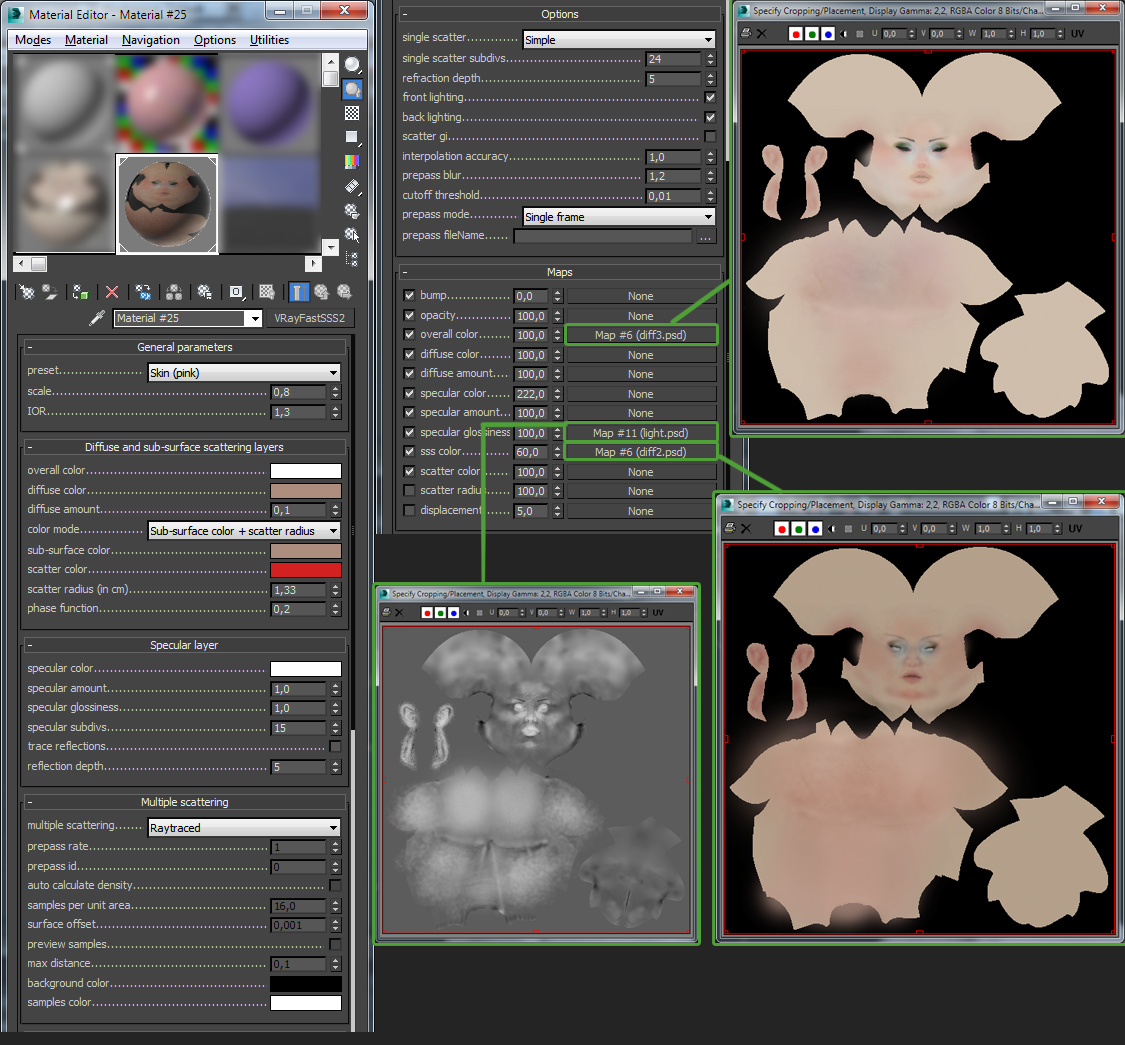
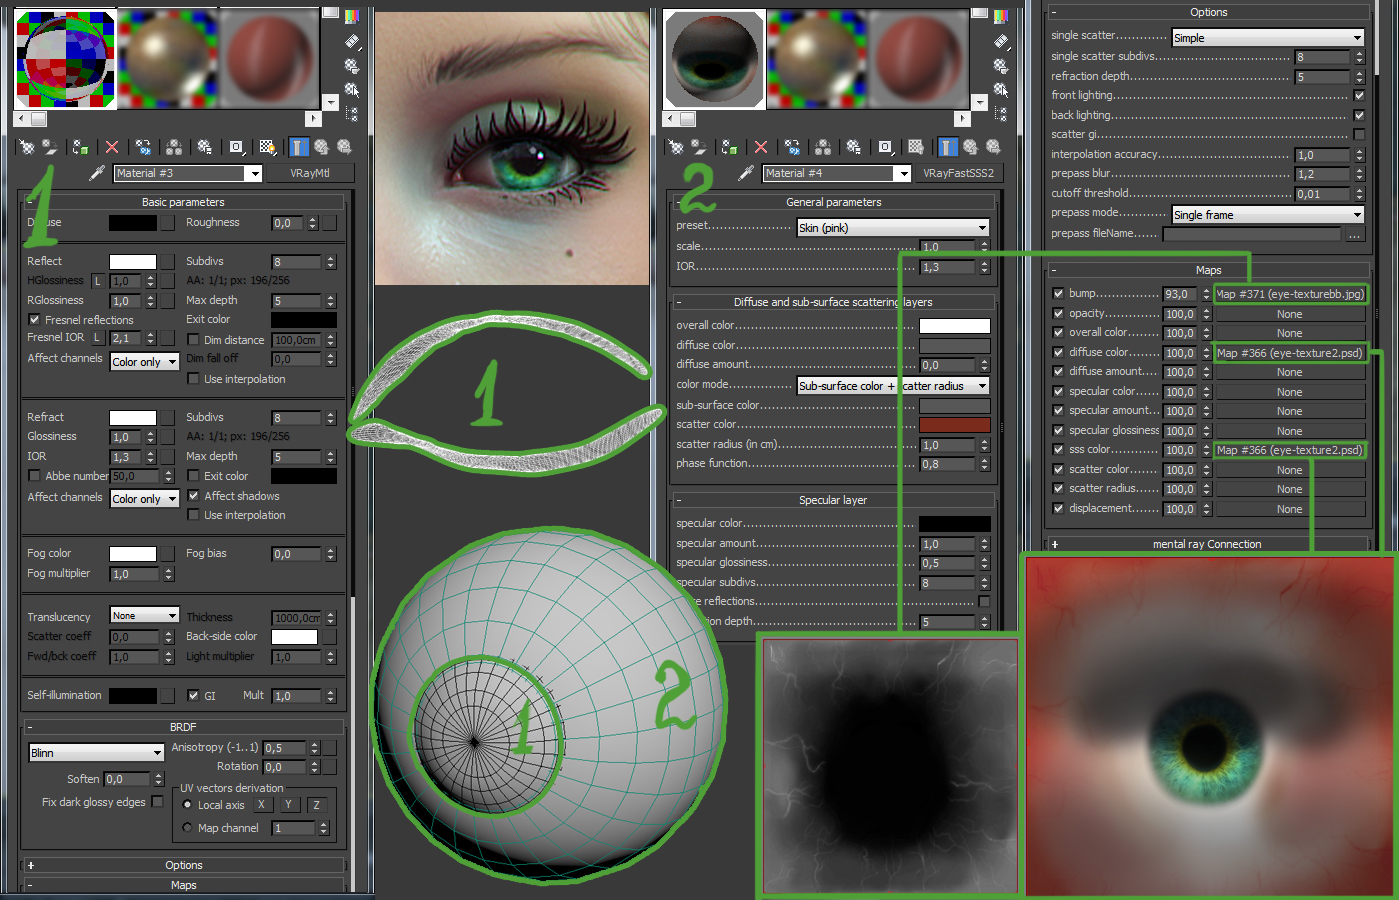
I set VrayfastSSS2 material to model and customized it for test render. Light texture was drawn with Photoshop basing on color map which was imported from Zbrush. Other two textures were made similarly.
I set approximate light and rendered.
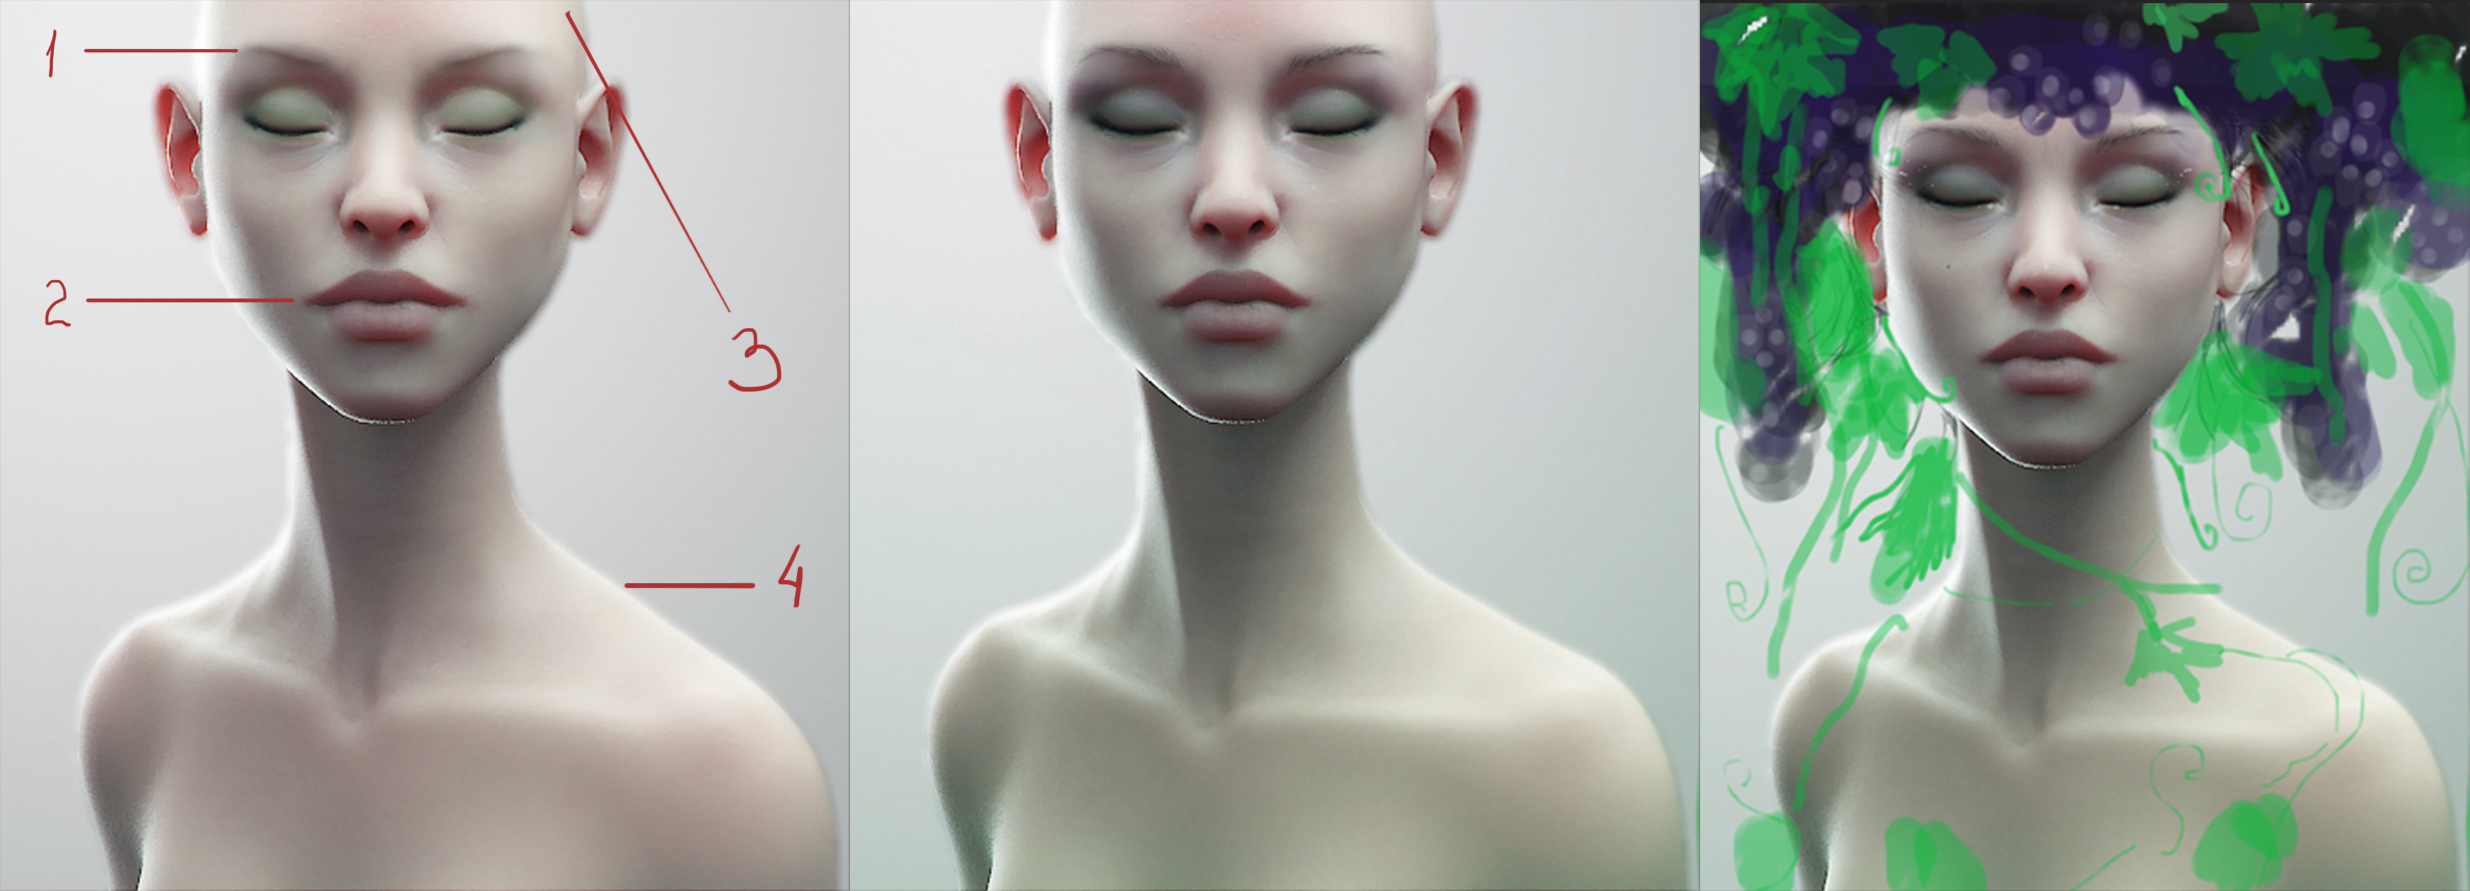
All these is need for realising some shortcomings.
1- Eyebrows should be more dark and relaxed.
2- Upper lip is too long. Mouth should be smaller.
3- Think about head decoration. It should be something interesting, unusual.
4- To clear up shoulders line.
I did corrections, but still didn’t devise head decoration. Grape variant wasn’t persuasive. So I left it way for a while.

Searching of idea
I opened her eyes, because I have made UV. Then I made this variant, but didn’t like it, so left it as just variant.
It is usual for me to do too many superfluous things, when I work for myself.
By the way about variants.
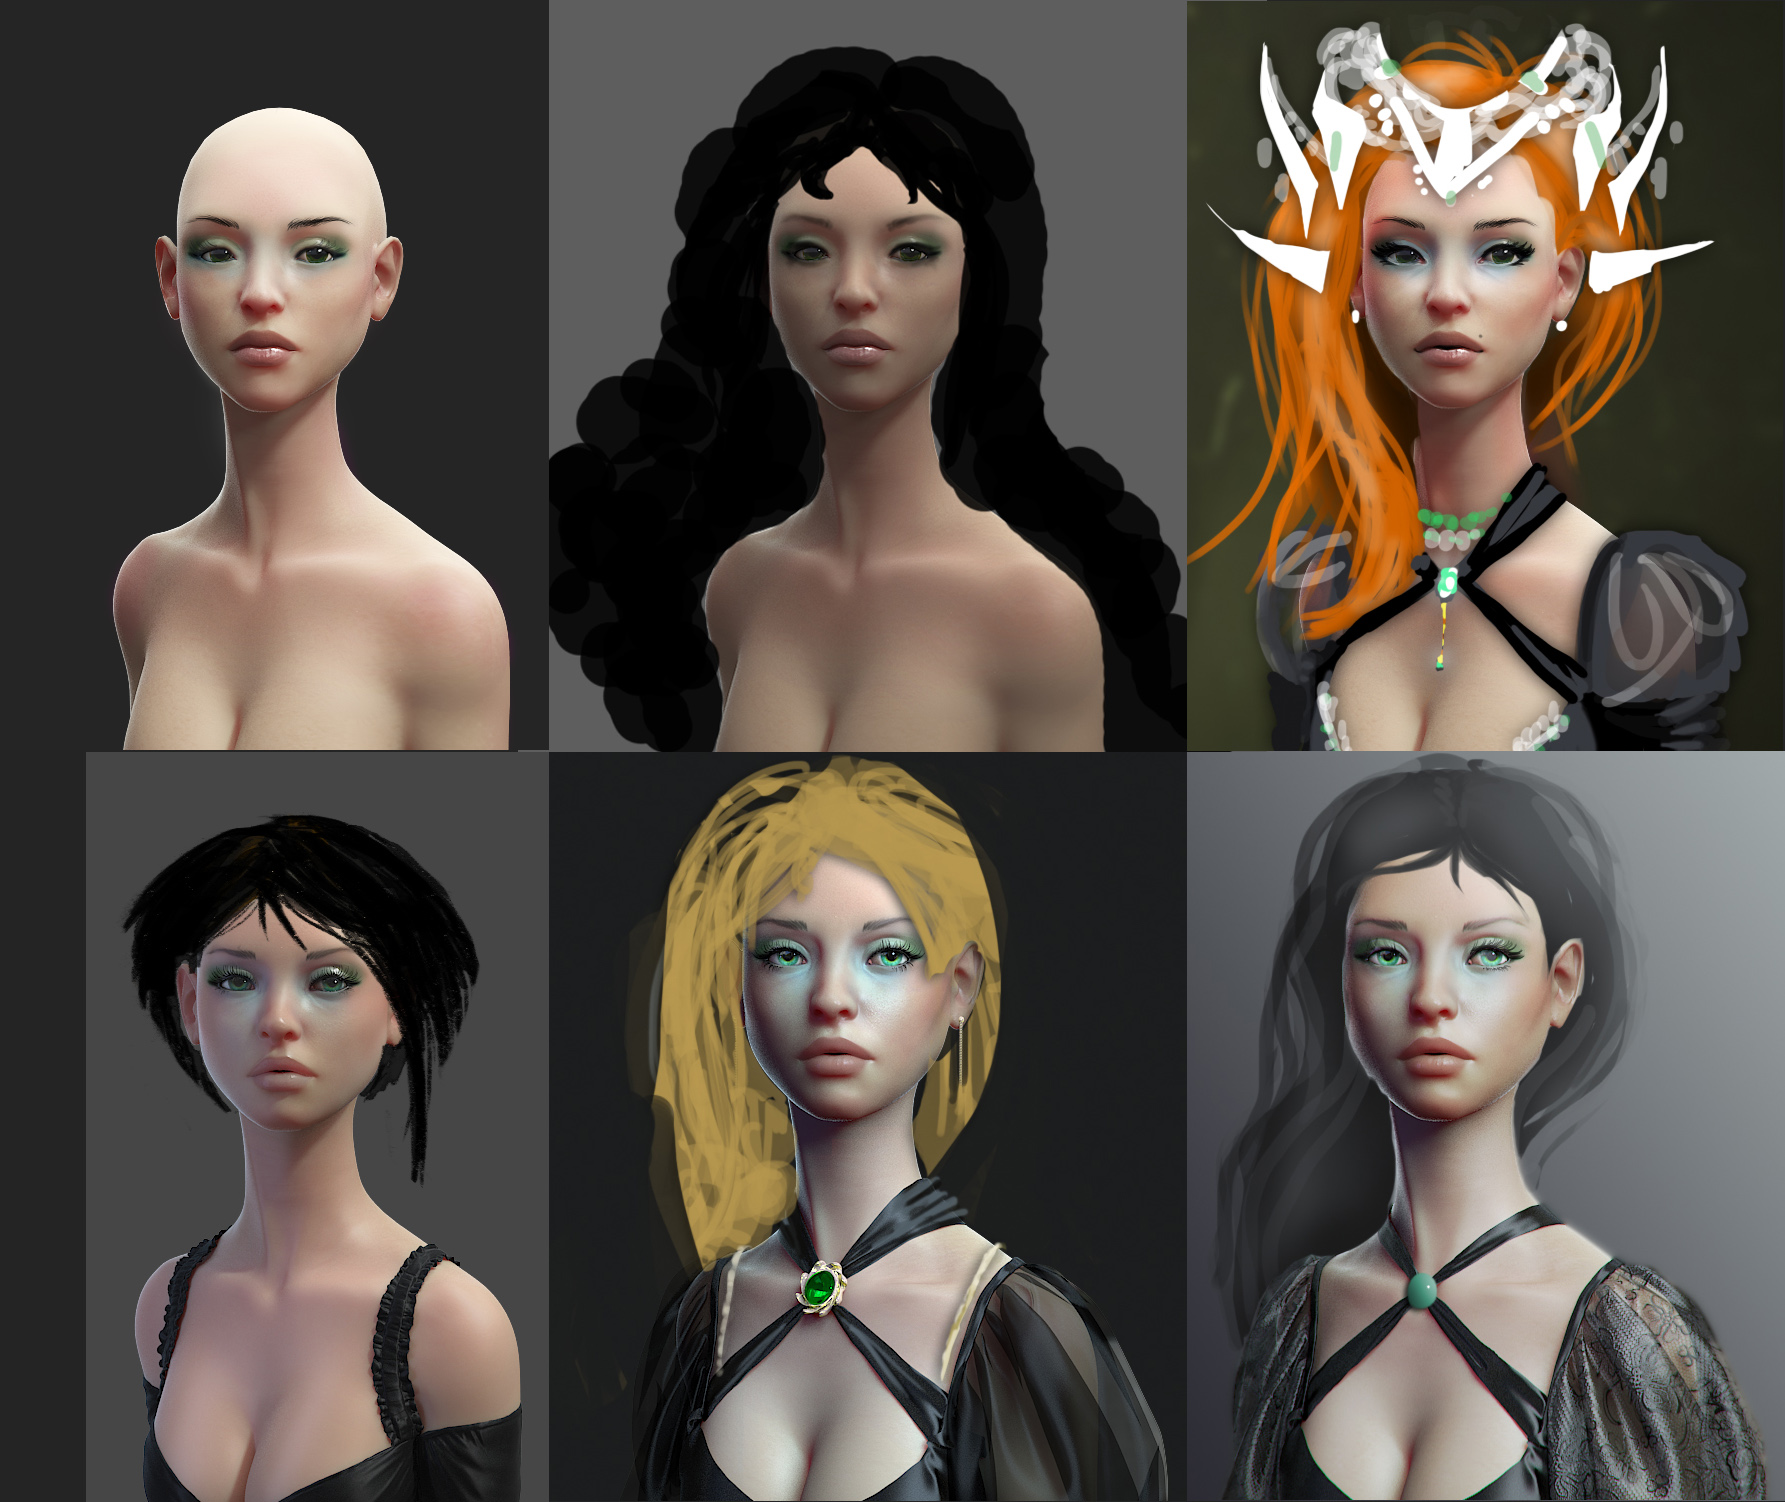
It is logical that you can reproach me with I haven’t clear purpose even in the middle of process. But I like this method. You never know what would be at the result. This way is more creative for me. I don’t like boring technicians. I chose the dress (var3), but still didn’t have any idea about hairstyle. Exactly that moment I got the message from familiar 2d artist.
He gave me good advice.
S – “Did you finish that girl?”
I – ”No, I want smth. special for her head, but my imagination is exhausted. Do you have any idea?”
S – “Try something ethnic!”
So I like this idea and found some references.
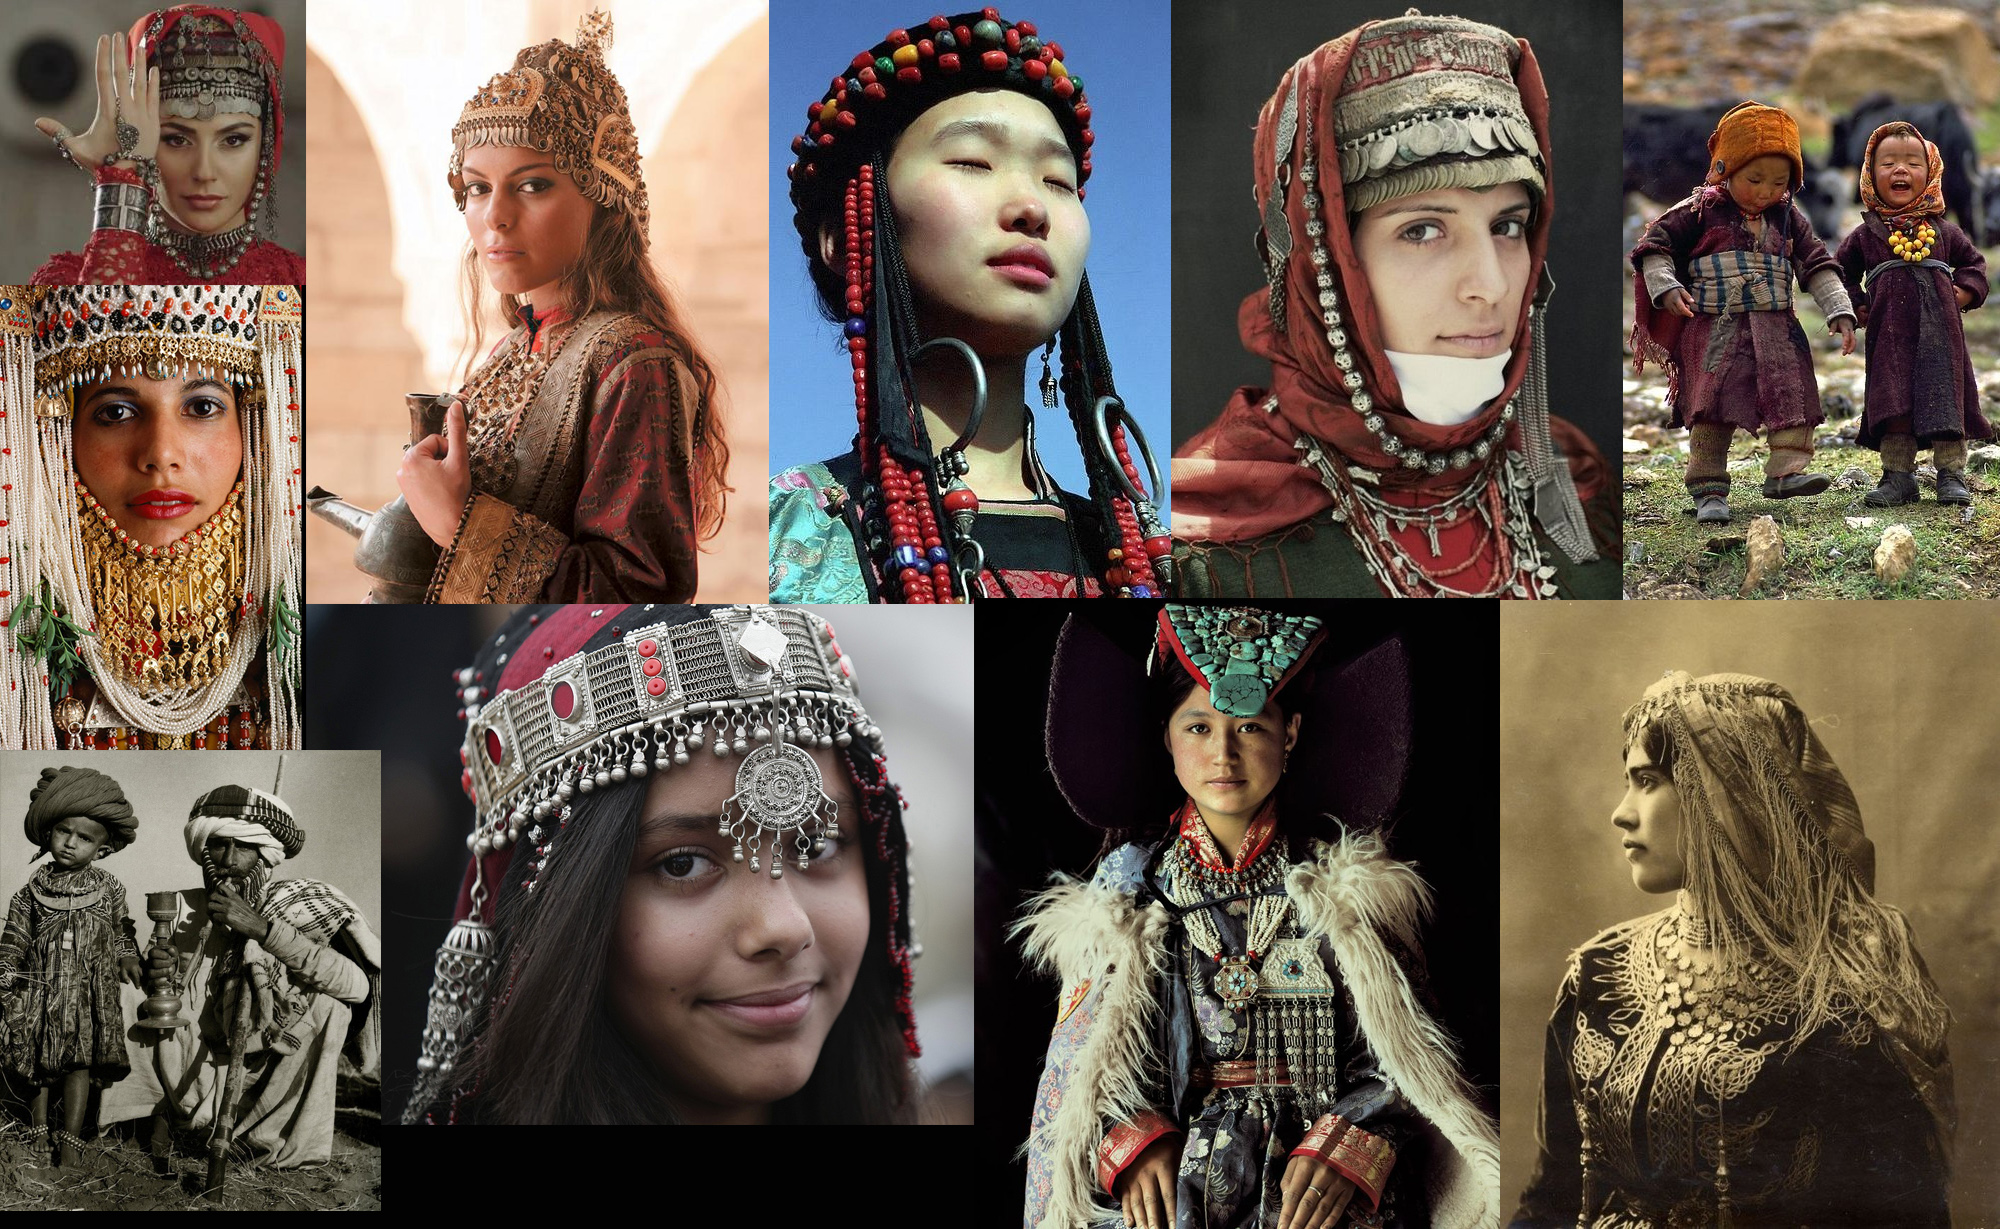
This is it! Exactly what I want!
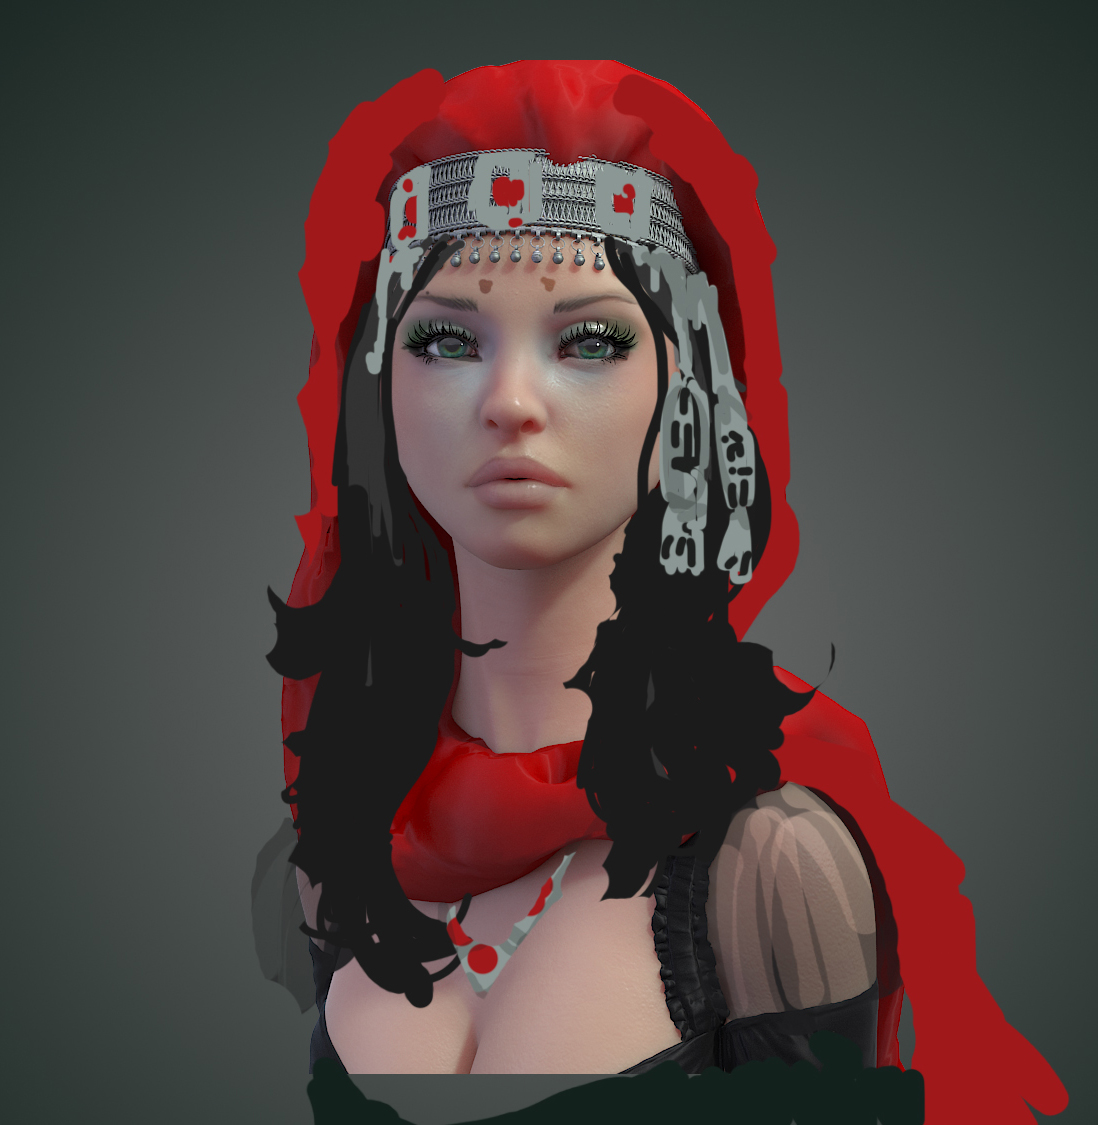
Modeling
Head dress
For basis- I select head, add EditPoly modifc., choose edit edge mode and project where head dress will be using slicePlane. Click slice. Then convert received edges to spline. Delete Edit Poly modif.
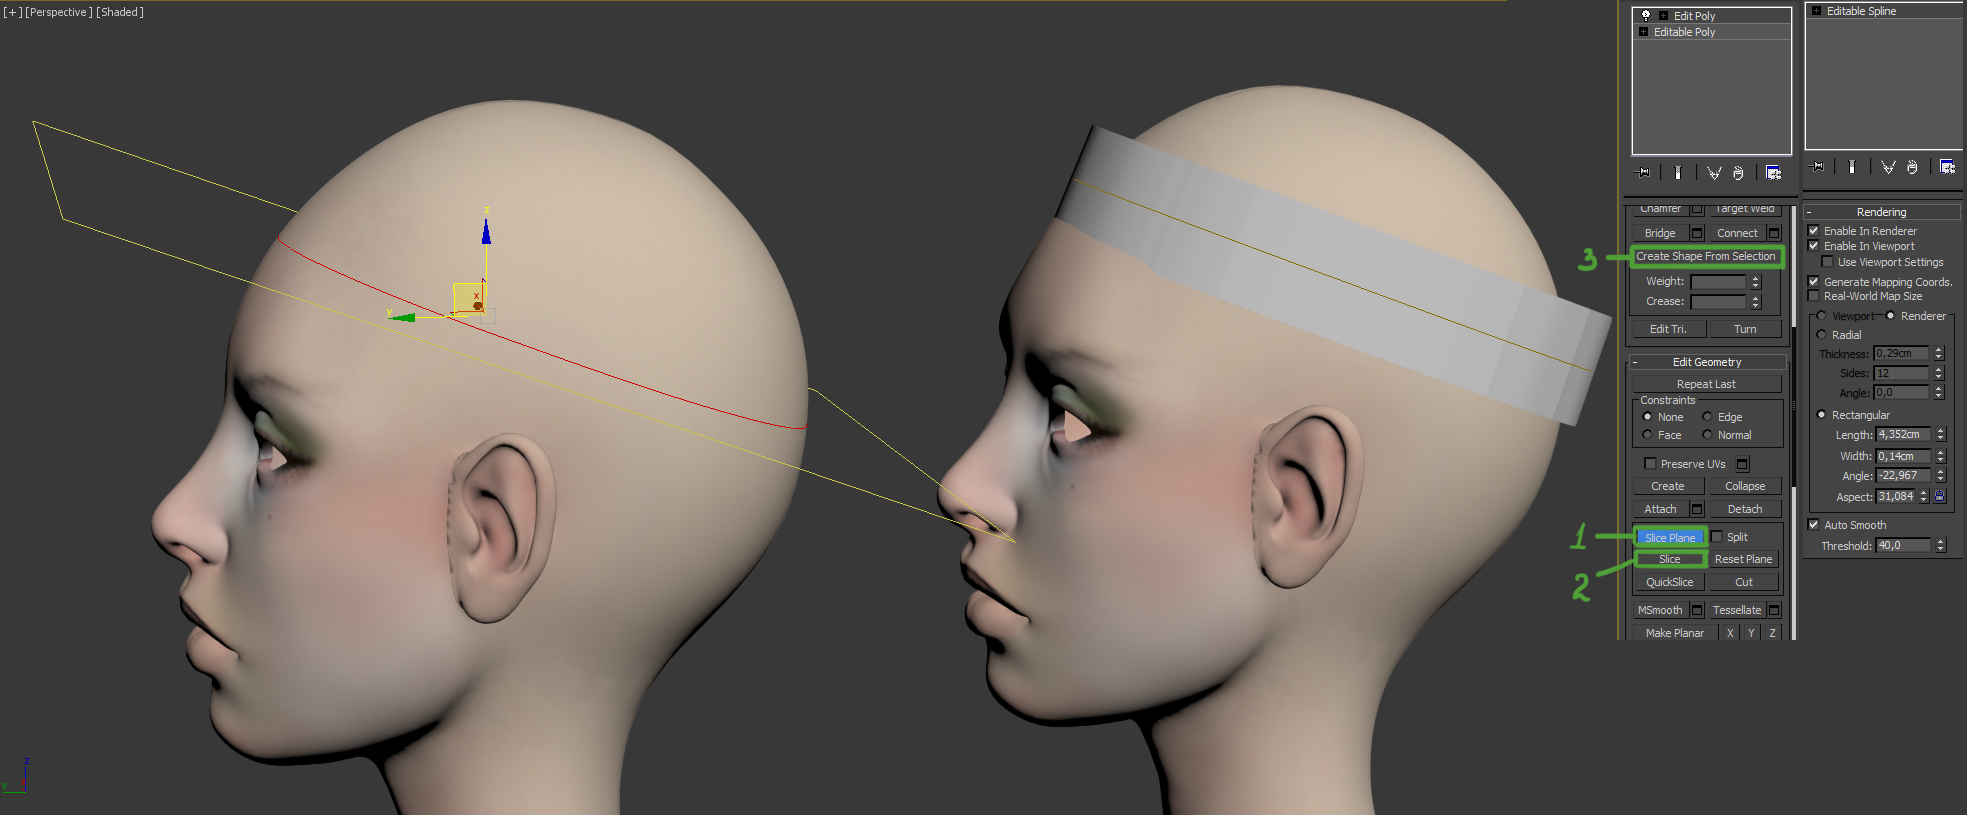
Give some thickness to spline and lift it up a bit.
Time to pattern and detail drawing. As we have spline now, so we can adorn the spline with details. Select spline, click Tools>Align>Spacing tool (Shift+I)
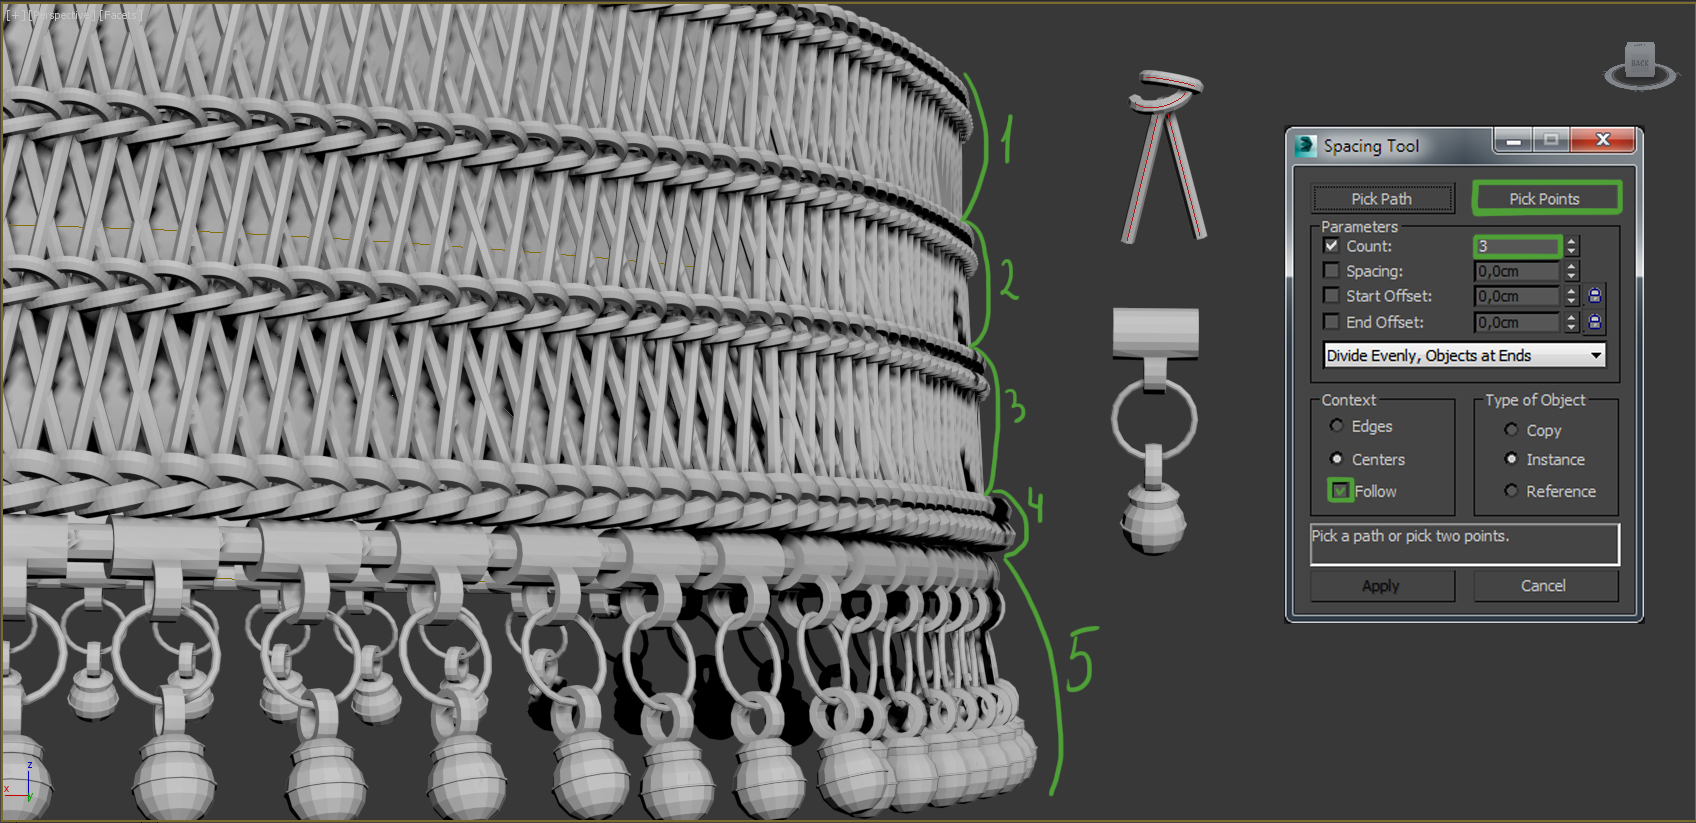
Click Pick points and choose object wish will be “hang” along the spline. Set quantity of object in the same place set tick. Follow and click Apply.
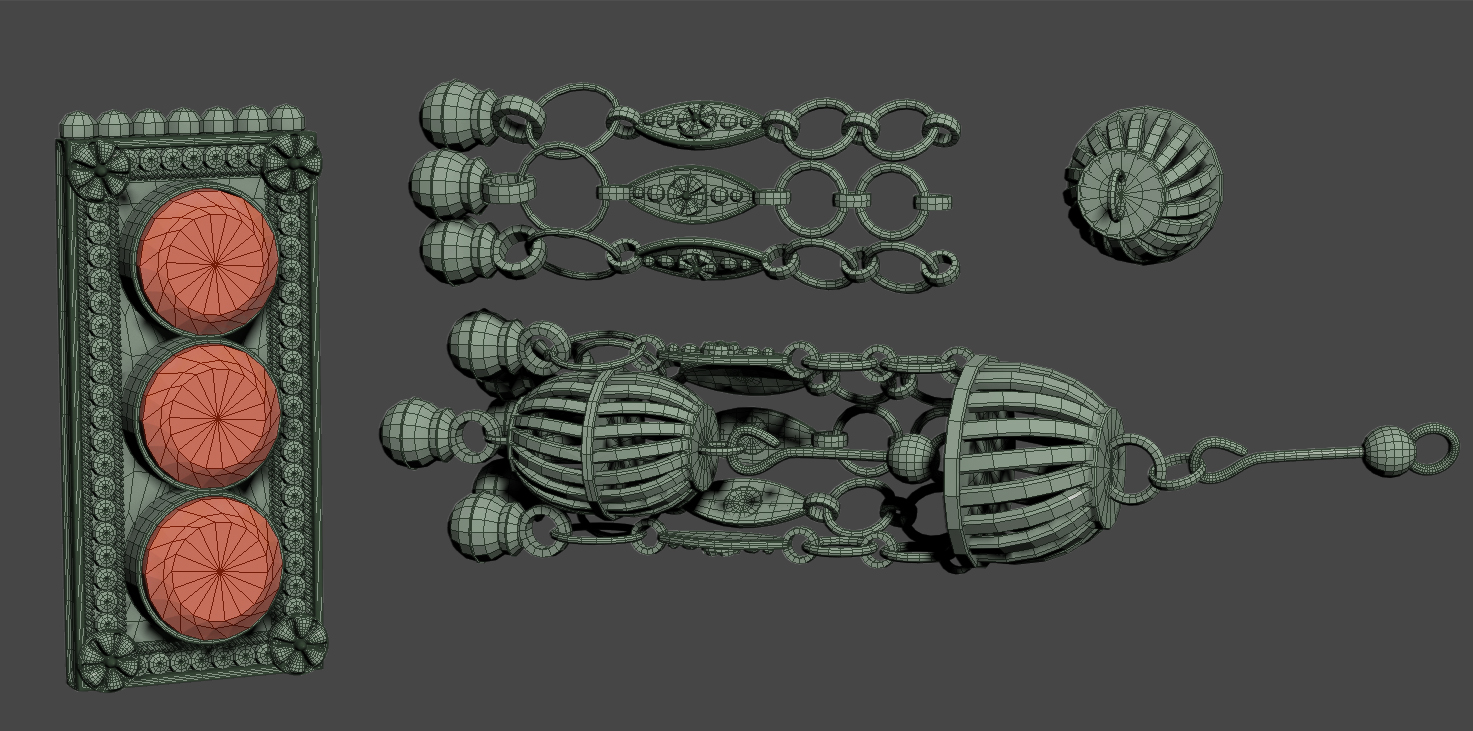
Other details
I use Marvelous Designer for making cloth.
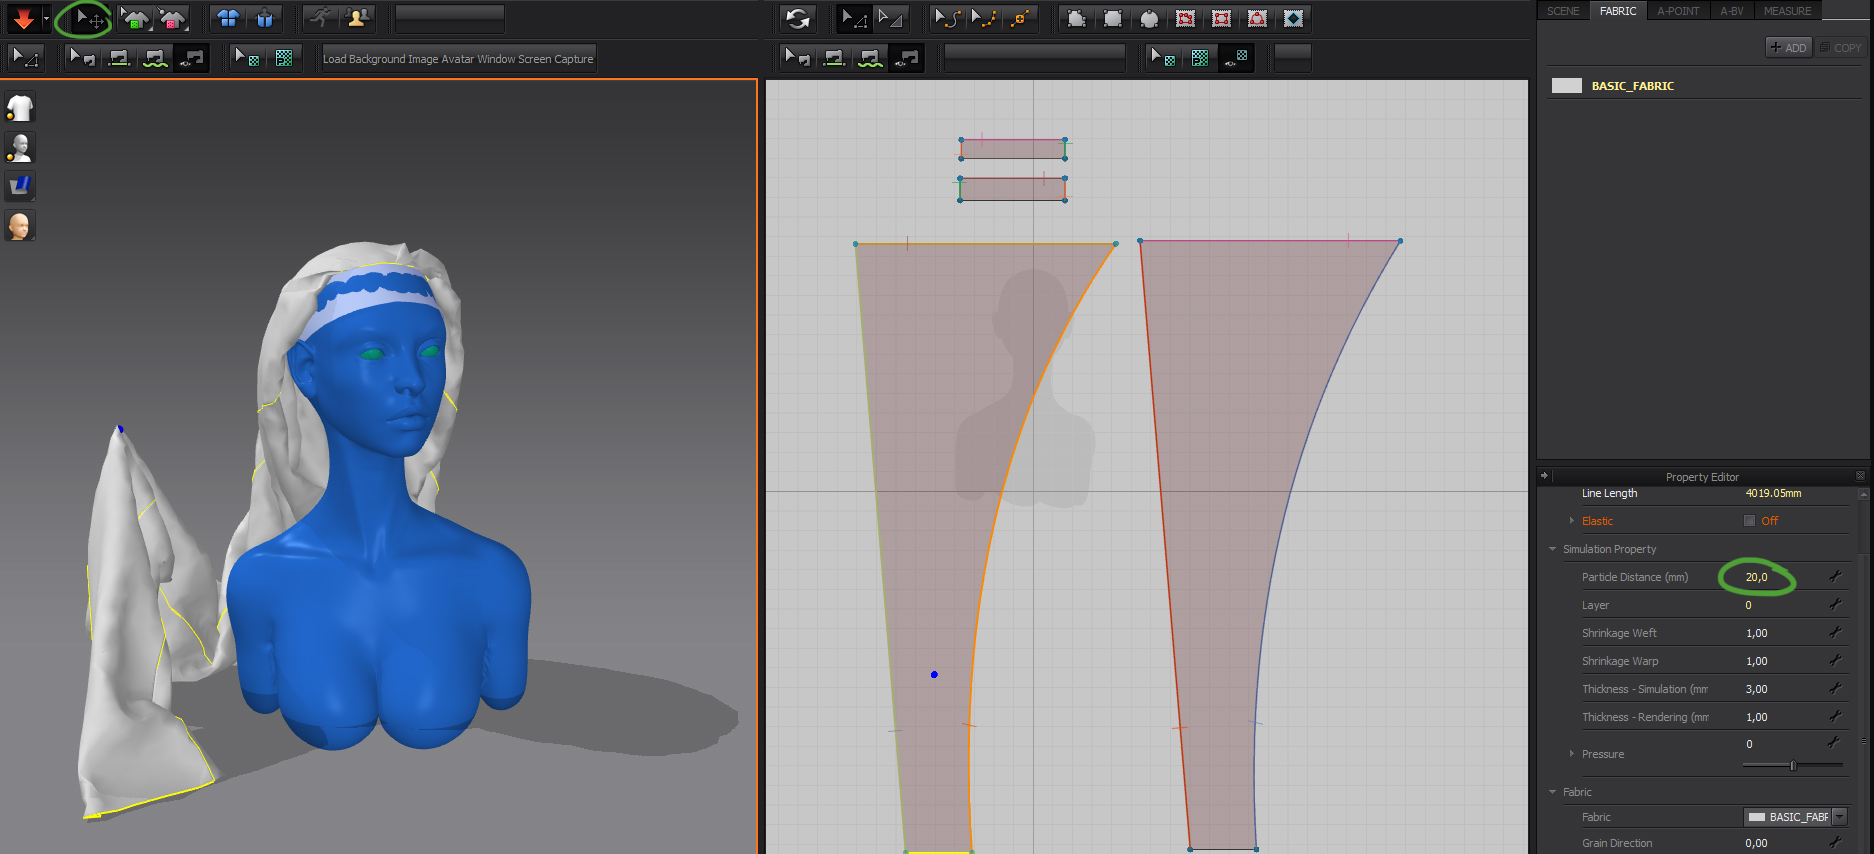
First of all we should import to program head model, so – called avatar. It shouldn’t be too small (there is so strange difference in measures), so I in crease scale factor in 10-100 times when import it. Then I decrease it when export accordingly. Firstly we make base which would be under metal hoop.
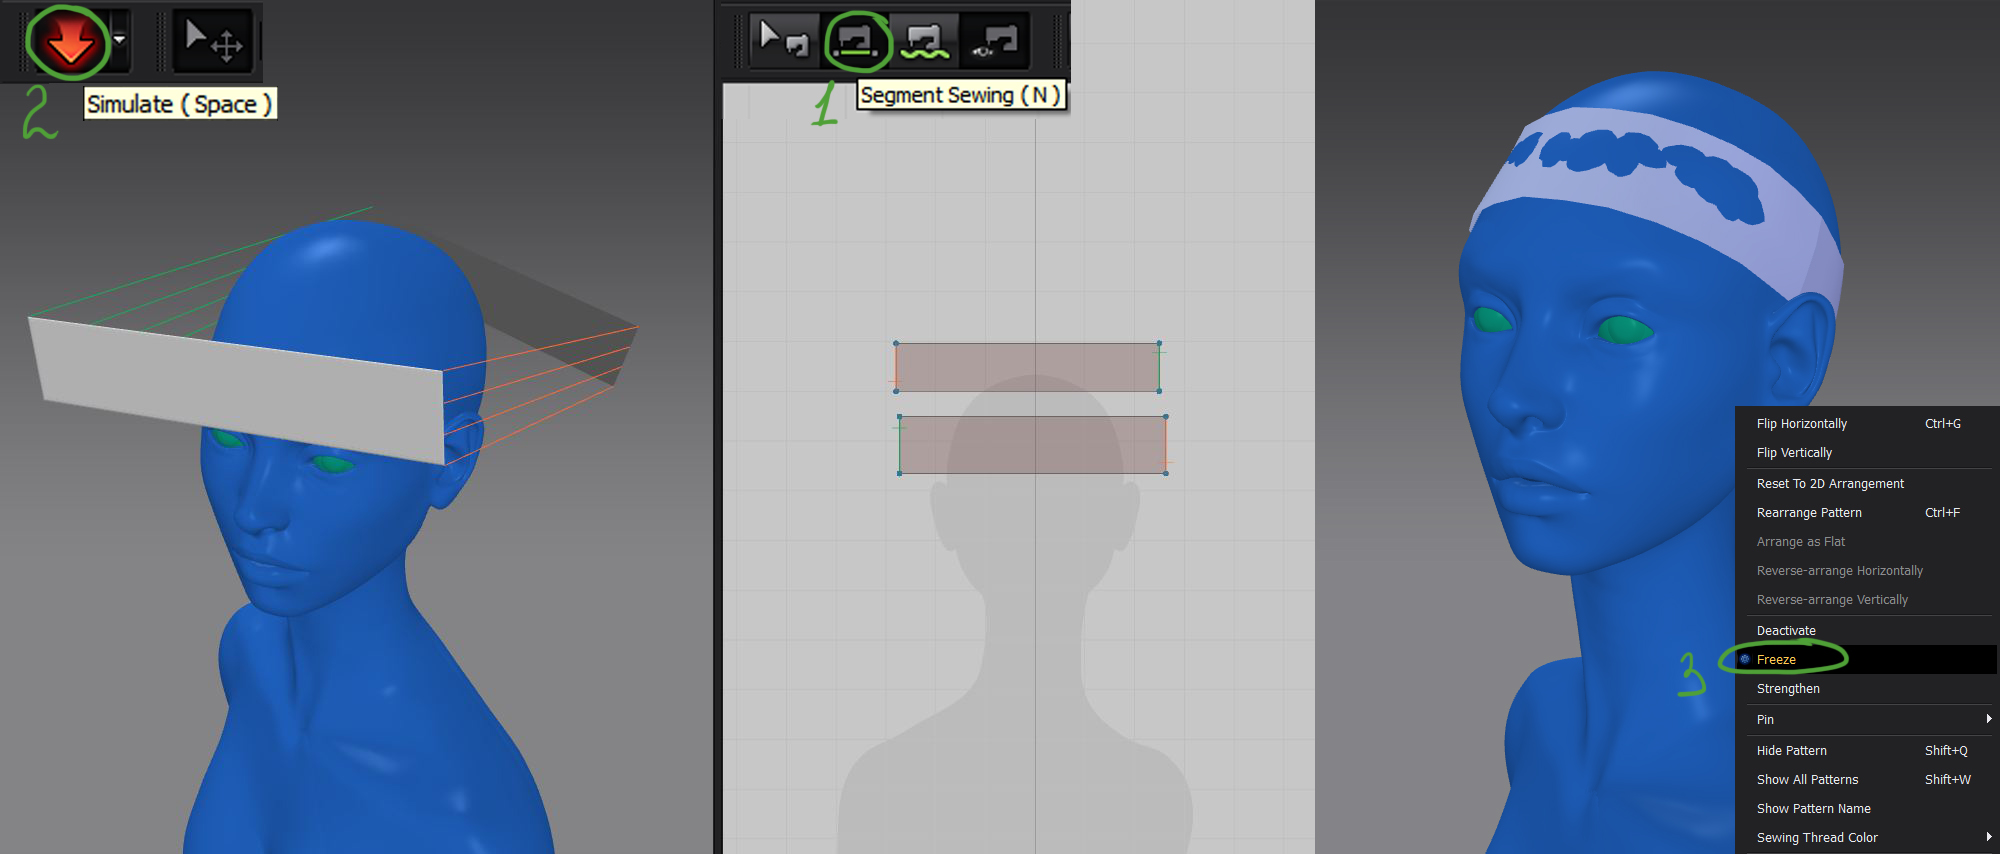
Click freeze. Main visible part of cloth will be “sewed” to this hoop.
Create to more pieces. Then we “sew” them and fasten to our freezed hoop. Then I arrange cloth as I wish in simulation mode. Particle Distance indicator influence on triangles quantify and folds detalization consequently. If it is smaller, we can see small details, but it needs more render time.
So we will decrease this indicator after stowage of basic masses process.
So we get this.
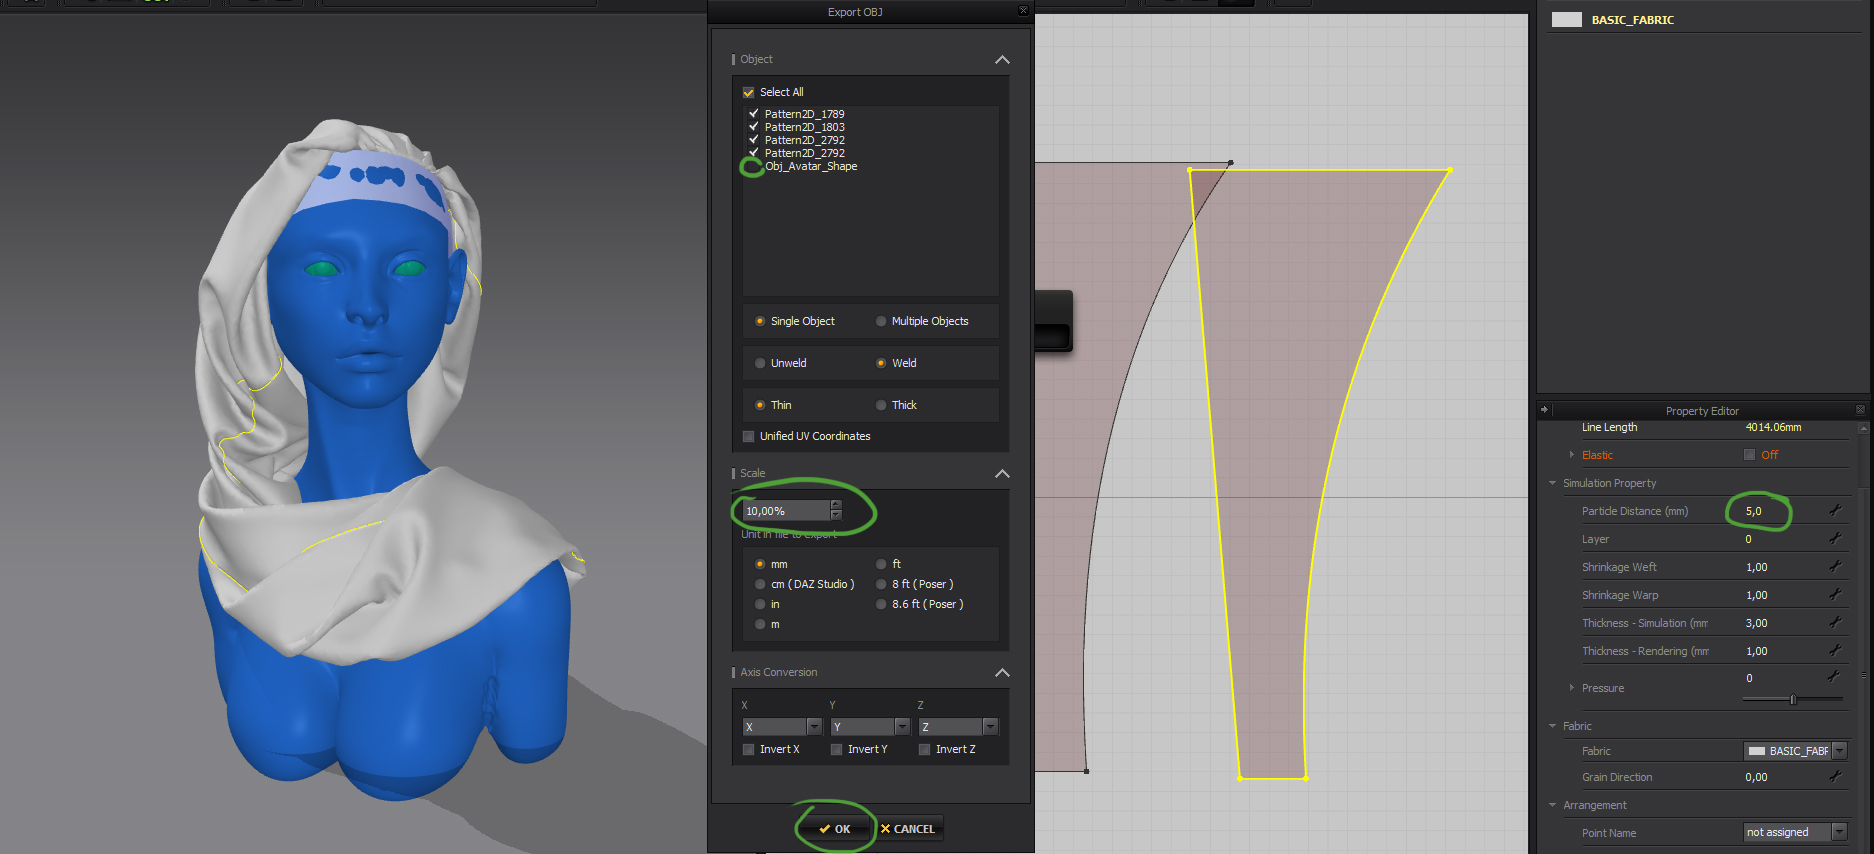
Click File > Export > obj. We don’t need avatar anymore. I increased scale factor so times, that’s why it should be decrease accordingly.
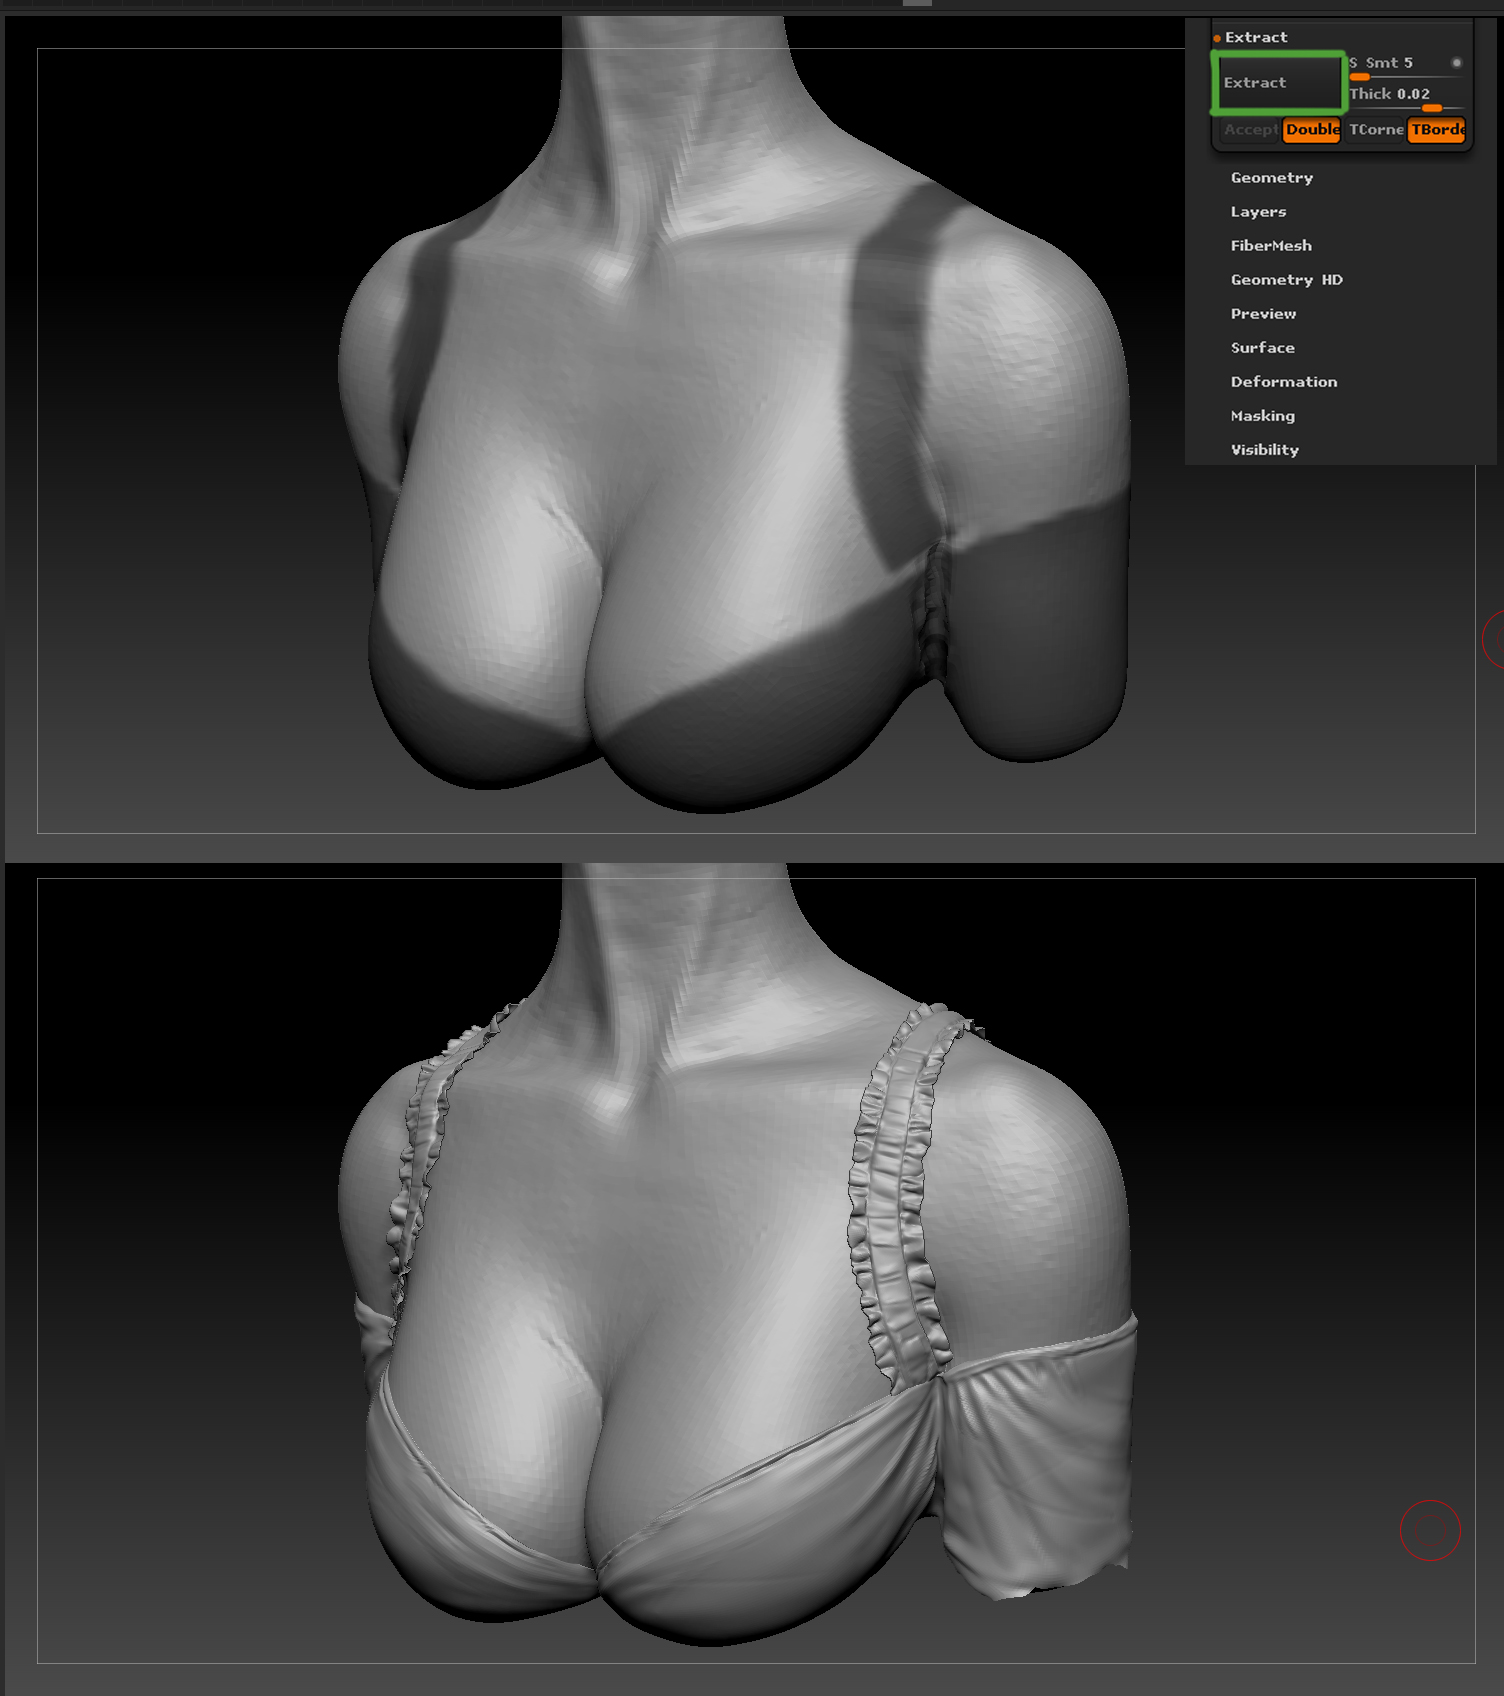
Dress
Dress is drawn in Zbrush as mask. Everything under mask is cut by Extract tool (as new subtool). I detalized it and get what I want.
Face details
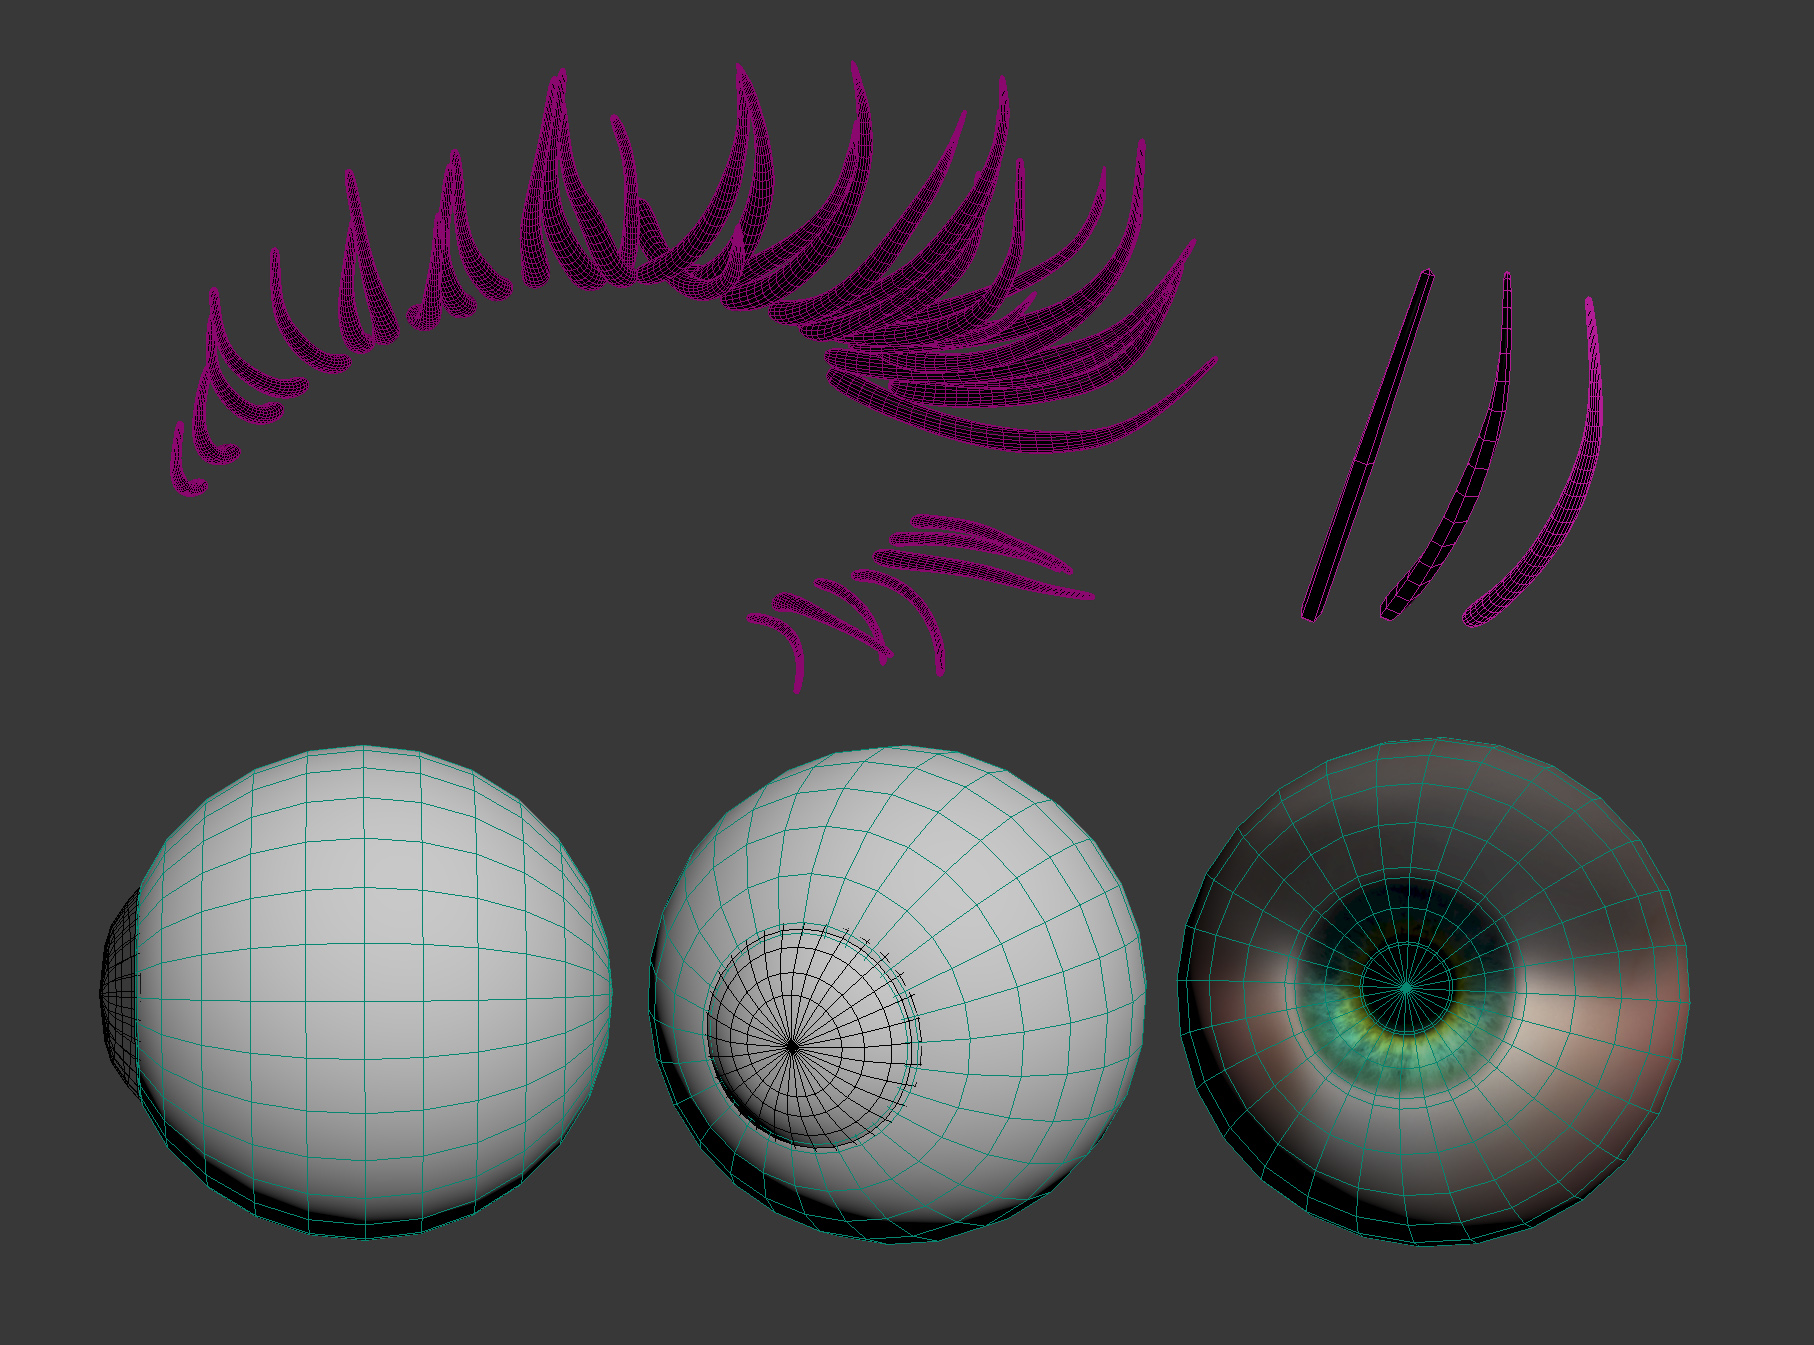
Eyes and lashes.
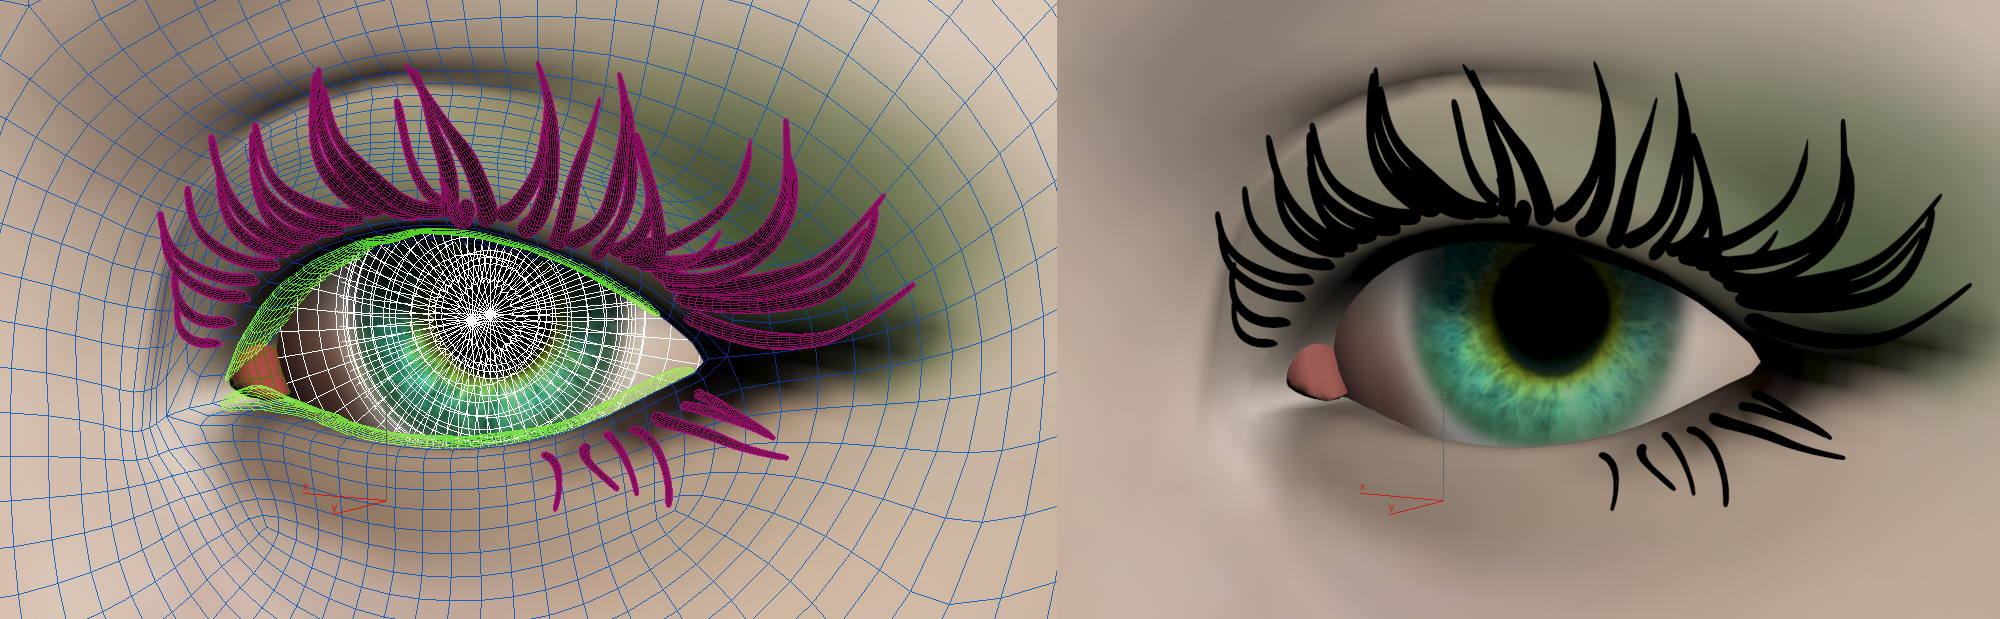
Lashes were “seat” one handly. Eyes consists of two spheres – main sphere and transparent additional sphere for specks.
Hair and materials
I made hair by standard max’s Hair&Fur. Guidings were laid handly selecting then one or two at a time.
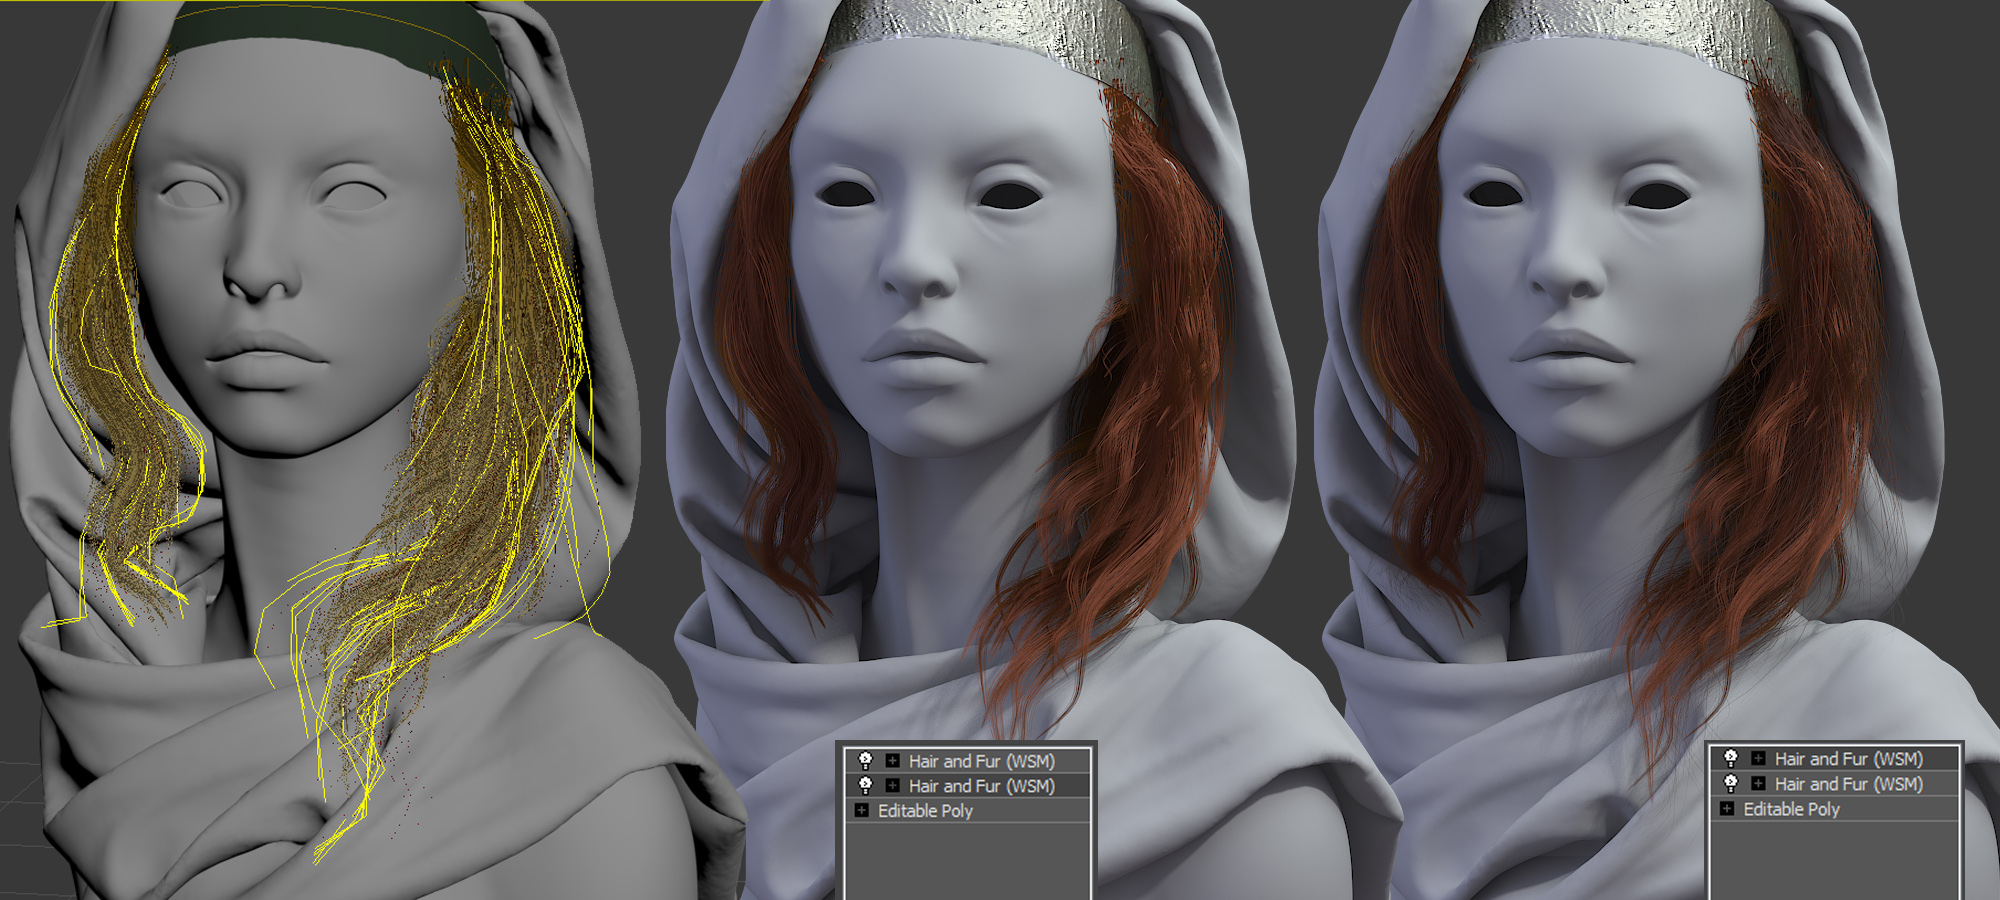
First one hair for basic volume, second one is for small hair. Materials have a bit different color.
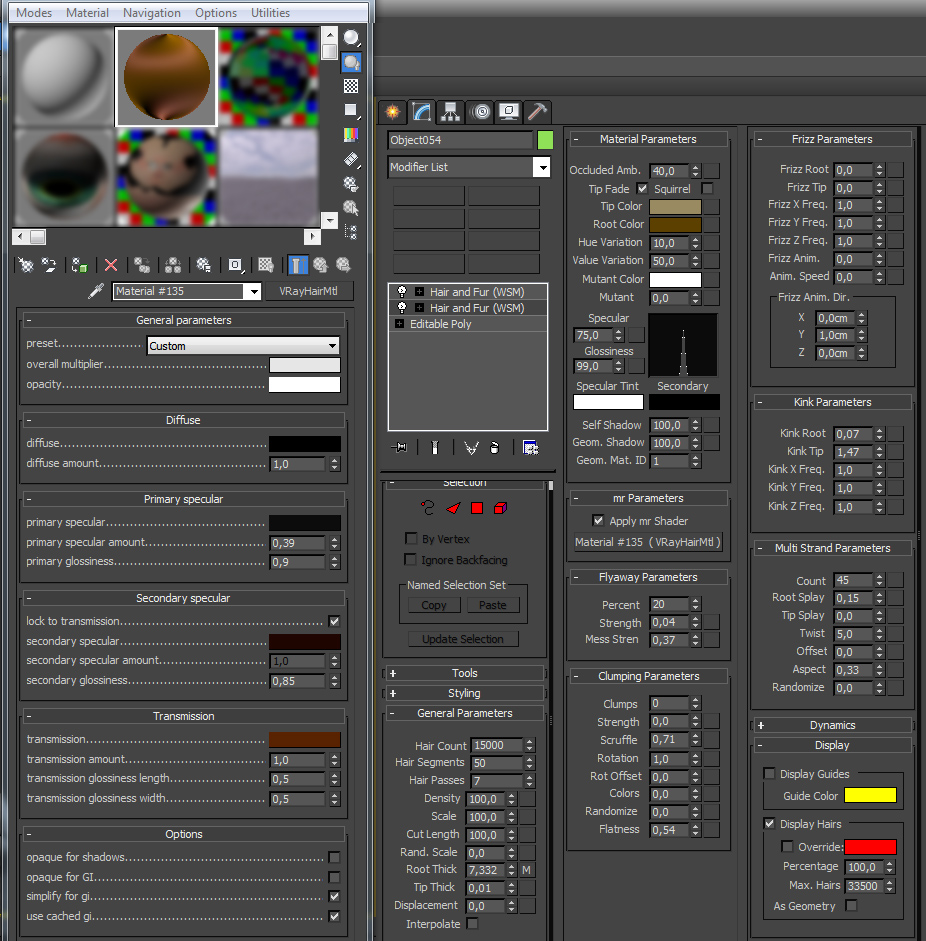
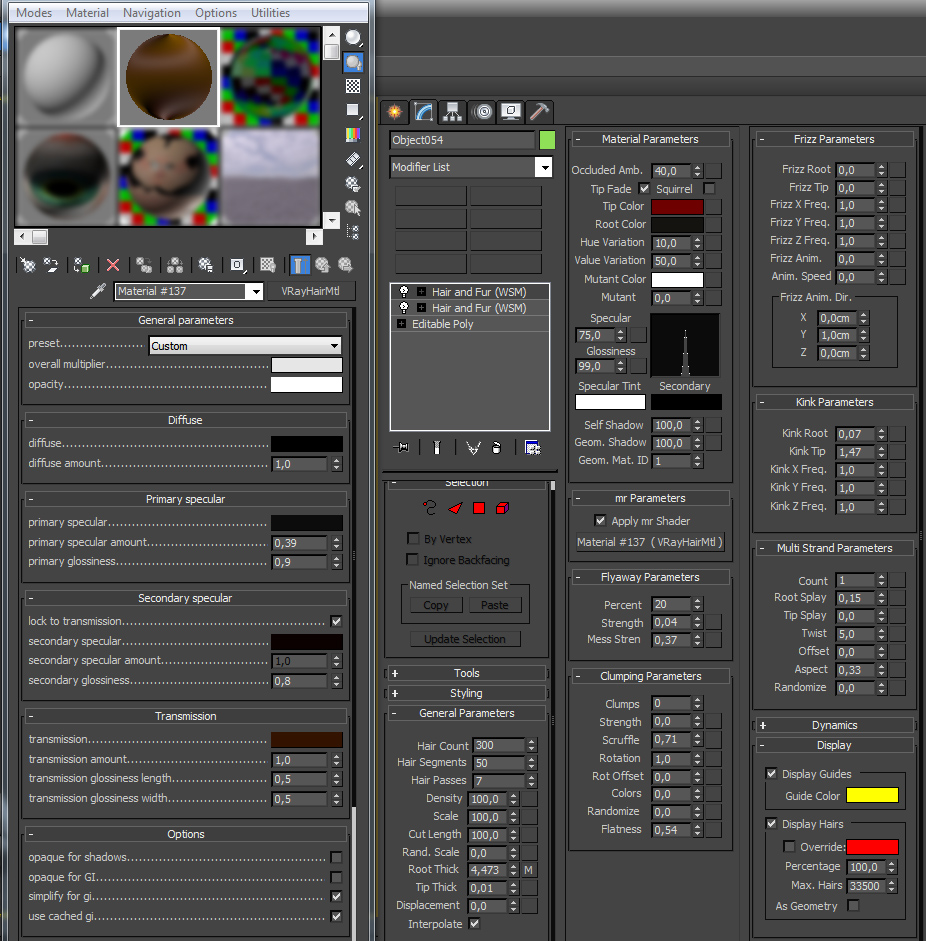
Customization of materials is the most fascinating stage for me. You change one number, click render and wait. And again, and again… It woul be nicer to store cookies, make a big cup of tea and browse some video.
Material of head
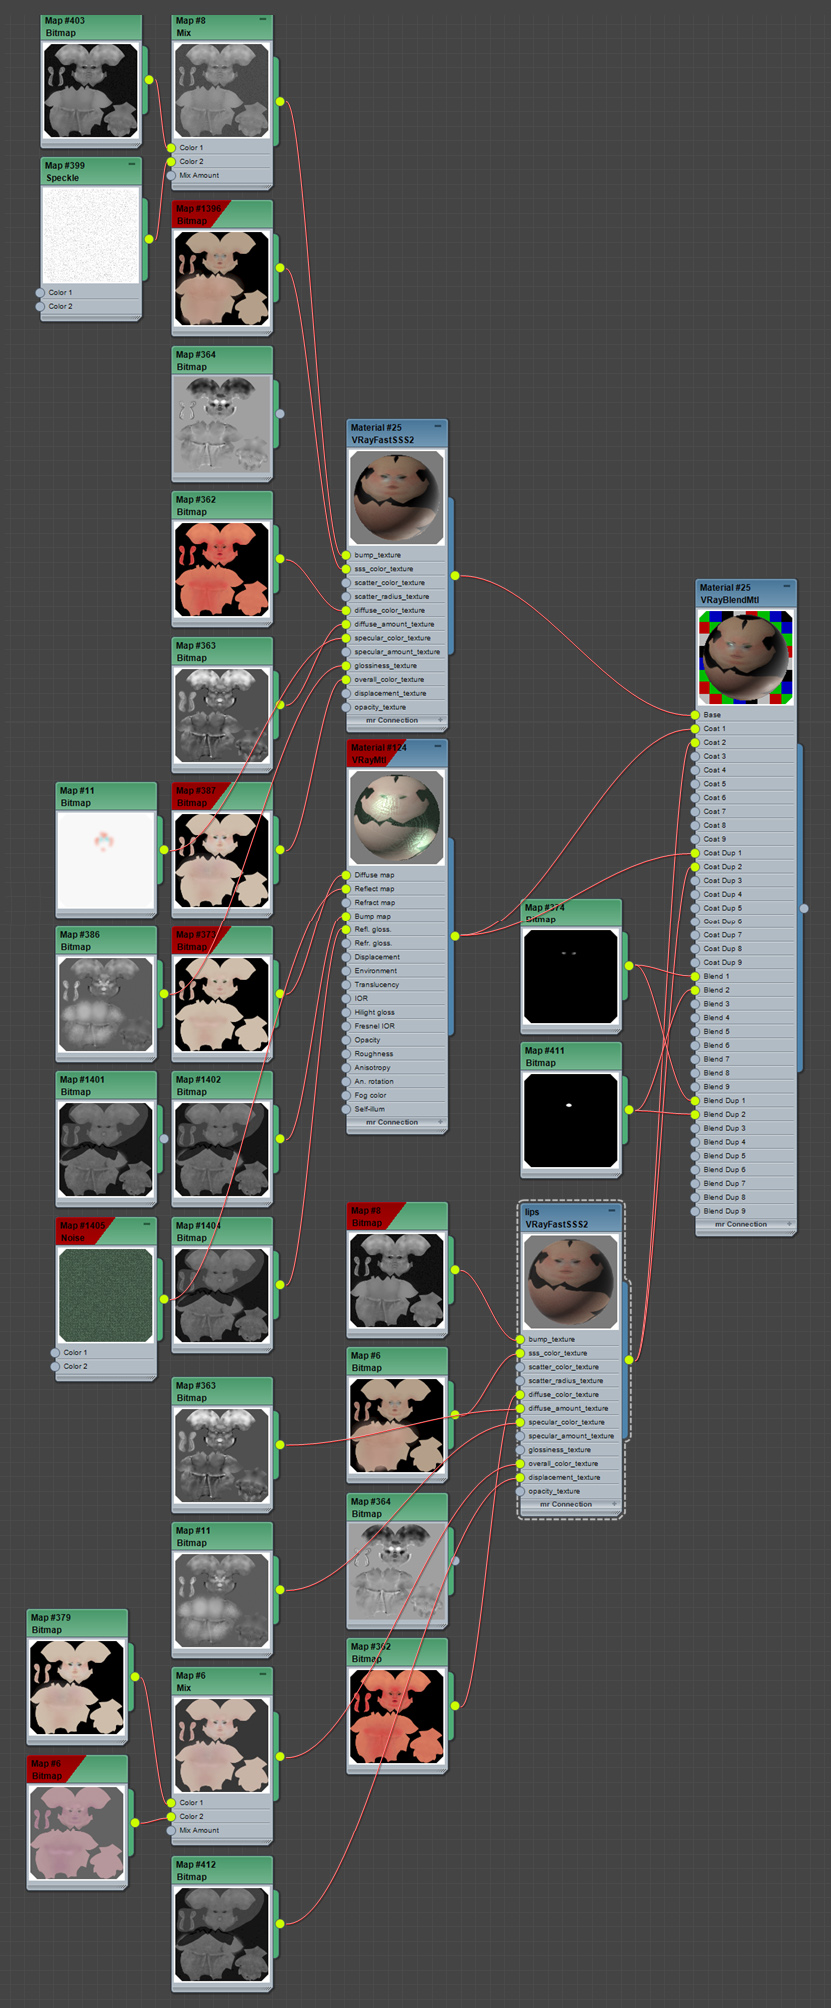
Eyes and drops around them.
Light, render an final
There are 5 sources of light.
One of them is standart (5) – direct light. It makes left shadow and specs on face. Others are VrayLights. Main light (3) is directed from above. Additional light is from one side(4). Filling light is from left(1), it makes shadows softer by dark blue color. Back light isn’t bright (2), has some blue tint too.

So preparations are finished. It’s time to render!
So this is final:
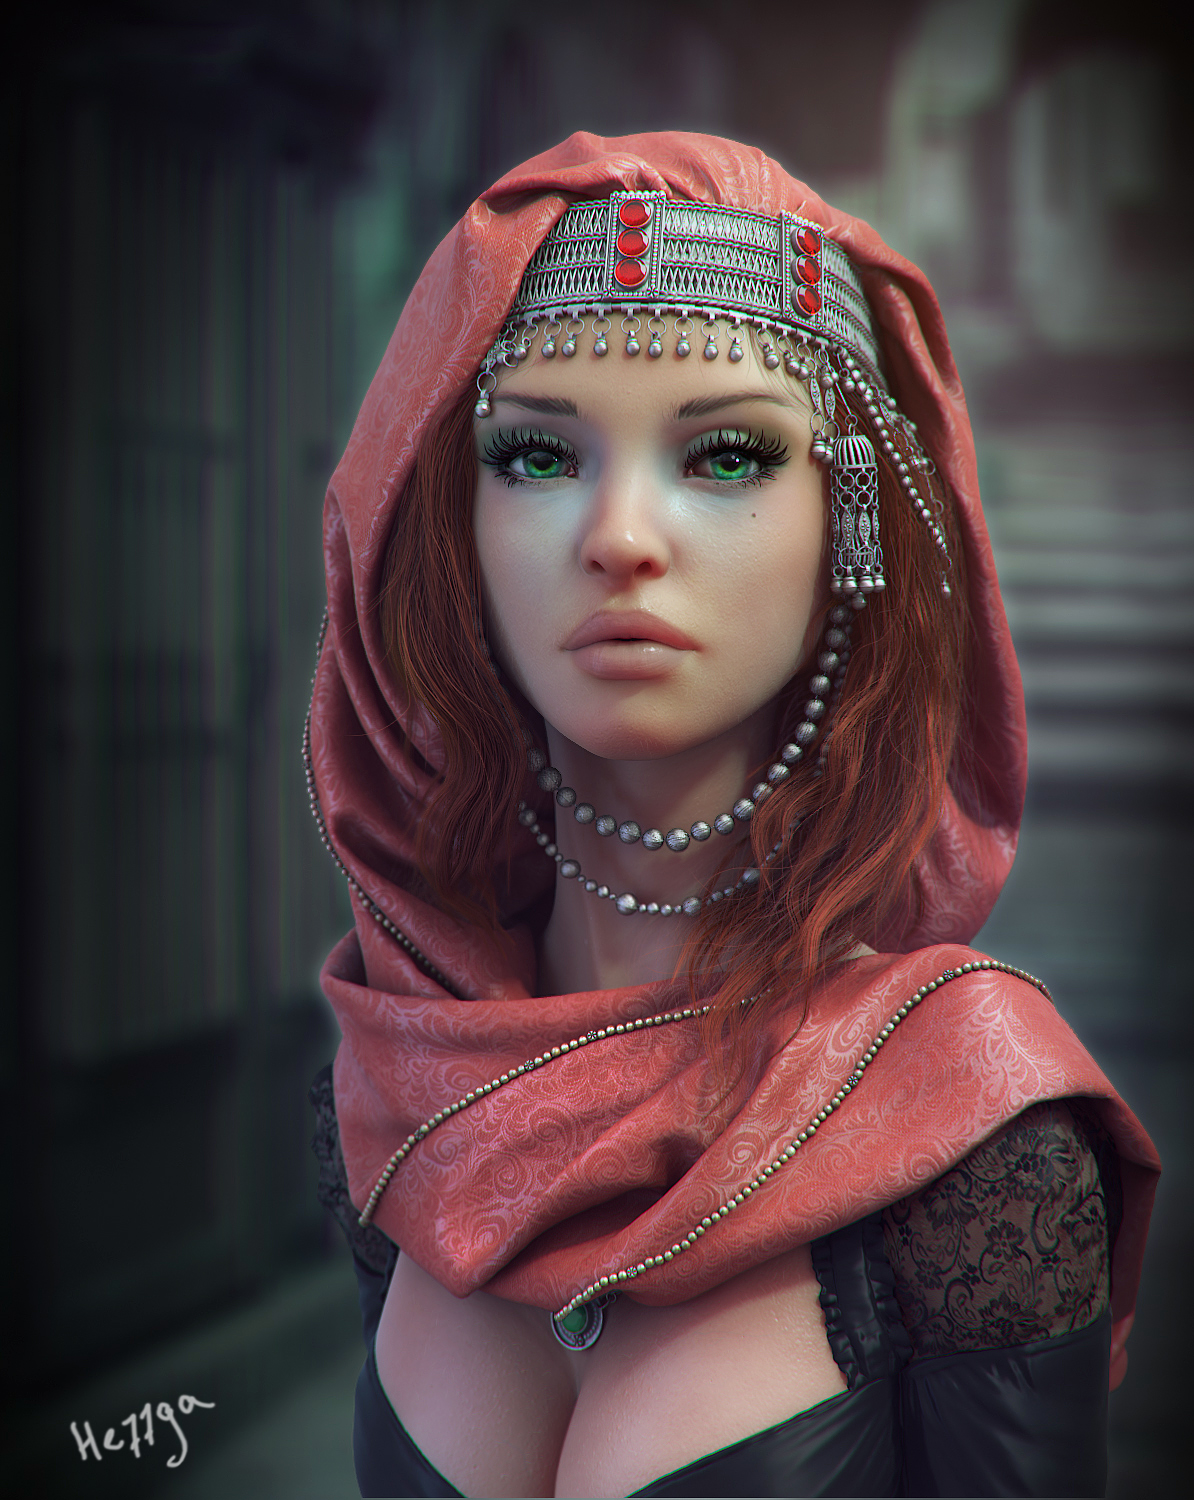
Thank you for attention!
The Author: Olga (He77ga) Anufrieva
Websitee: http://he77ga.ru
Portfolio: https://www.artstation.com/he77ga
YouTube Channel: https://www.youtube.com/user/He77ga