
Brazil2 GI Tutorial
In this tutorial, we will be seeing how to use Global Illumination in "Brazil ‘Rio’ Rendering System v2.0". As well as a small information on the very useful, Brazil2 Advanced Material, which, in my scene is used to create the water in the pool.
In this scene I have tried to create a Villa Hotel, which has a whole villa area for renting. My scene has 2 types of lightings. One is of the daytime, where there is sunshine, and the other is of the night, where stars are seen and no natural light but lots of bulbs and lamps switched on. Also, for the convenience and less confusion in the reference images, I have hidden the trees that I have used in the scene.
Firstly, we will see the daytime lighting.
Place a Target Directional light based on the daytime you want to show. In my case it is high above and diagonally opposite to the main building in the scene.

Stretch its Hotspot beam to the extent that it covers the whole scene of yours, as we have to show sunlight. Given are the settings of the Directional light, which can be made:

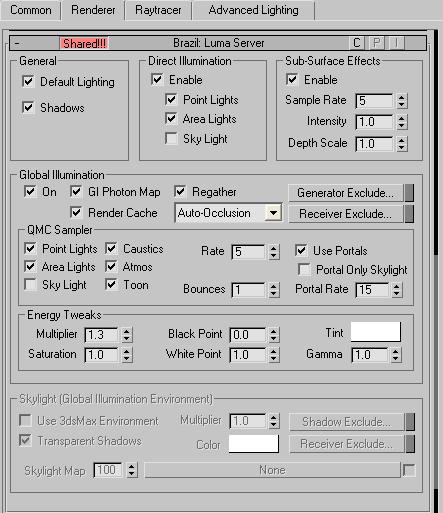
Now press F10 and open the rendering dialogue box. In the “Assign Renderer” section, change your “Production” renderer to “Brazil r/s Rio Learning Edition”. Now switch to the “Renderer” tab. In this tab we have to make some tiny settings in 2 sections, which are the “Brazil: Luma Server” and the “Brazil: Photon Map Settings”. These 2 mainly contain the Global Illumination information for the scene. The changes which can be made in the 2 specified sections are given below:

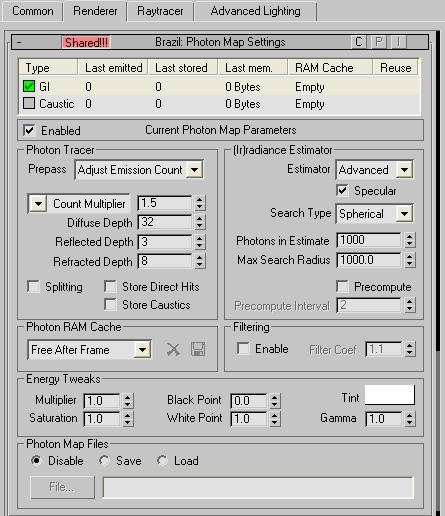
The “Render Cache” option in the Luma Server section helps in comparatively faster rendering.
Now all you have to do is to take a camera view and Render. My final Daytime render looks like this, with the trees unhidden.
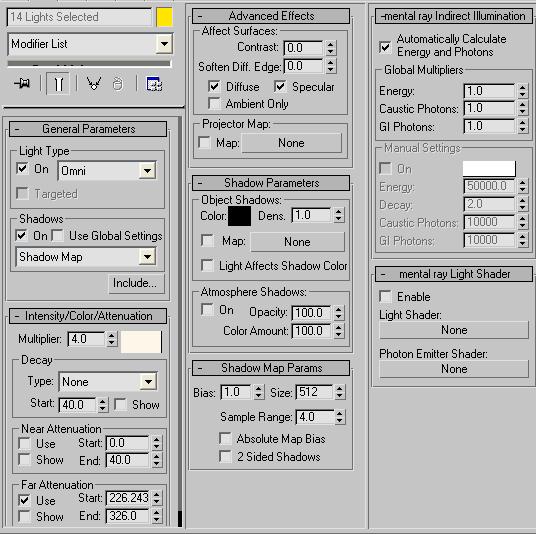
The next step is to create the night scene. Now this scene becomes a bit tricky as, though there is no natural source of light, but many lamps and ceiling bulbs switched on. You have to place a series of Omni lights and Spot Lights at each ceiling, including a few ambience Omni Lights. In my scene, I have numbered the areas where these lights are to be placed, for reference.
1) Poolside Lamp Omnis & spots

2) Main House Ceiling Omnis & spots and Main House Ambience Omnis.
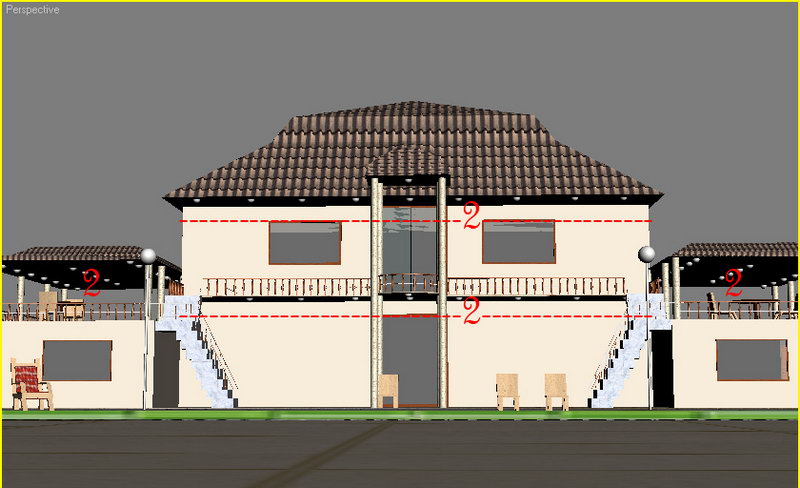
3) Far House Omnis.

4) Under water lamp Omnis.

The Lamp Spots and Omnis should be placed where the white colored Ceiling Lamp Models are seen, whereas the ambience lights can come a bit below the lamps.
While placing or after it, name the series in each area appropriately, for convenience. The settings for each light series are given below:
- Poolside Lamps Omnis and Far House Omnis:

- Poolside Lamps Spots):
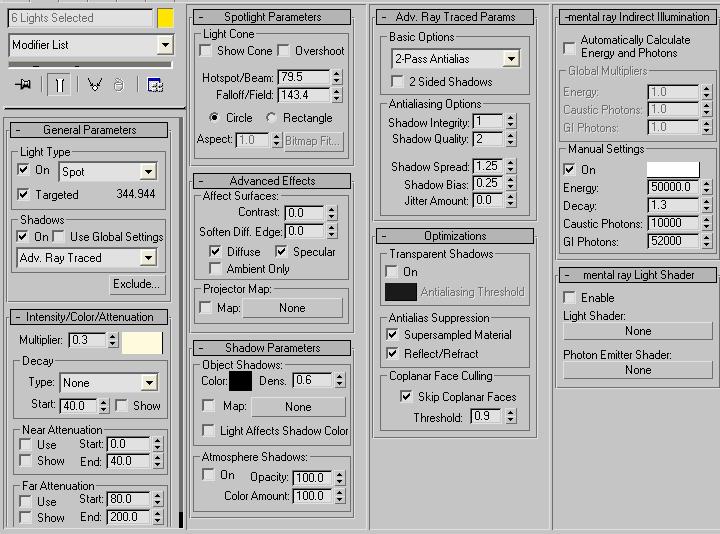
- Main House Ceiling Omnis and spots:
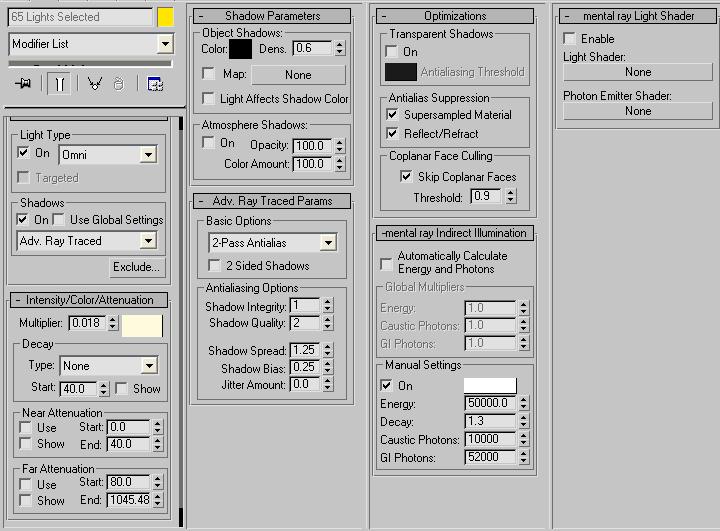

- Main House Ambience Omnis:

Under Water Lamps Omnis:
Now again, press F10 to open the Render settings dialogue box and go to the Renderer Tab. Again we have to make some small changes in the “Luma Server” and “Photon Map Settings” sections. These changes can be done as given below:

That’s it, now again put it to render. It might take a bit of time depending on the machine speed as there are many lights which get rendered. My final night scene looks like this:

Now, we will check out, how “Brazil2 Advanced” material can be used to create Water. For this, just take a plane for the water with large number of segments and put a Noise Modifier to it, with the Fractal switched on.
Now put a material to it and choose “Brazil2 Advanced Material” in place of “Standard”. This material has a long list of options, so I have given only the sections I made changes in:
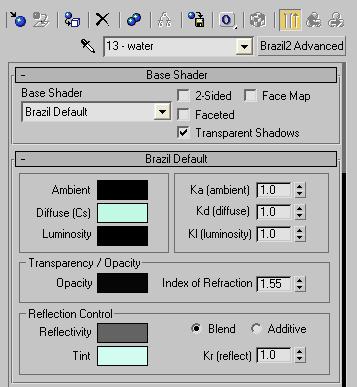
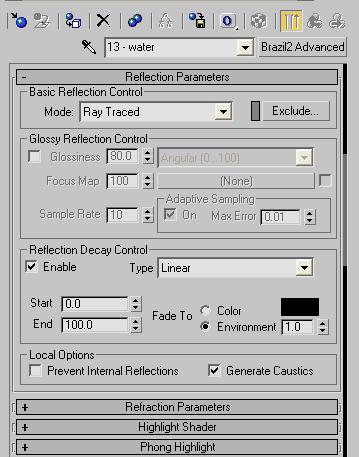
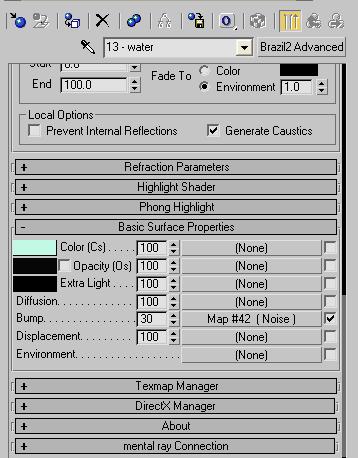
And that’s it. You can get water effect from this.

As for the night starry sky, you can put an image if you have one, or, start a new file and take a large plane, give it a material and give Splat in Diffuse map, with one color Black, and one White. Copy paste the same material as an instance in the Self-Illumination map and just play around with the Size, Iterations and Threshold to get small star-like dots. Now jus render this plane with Top View and save the image.


Well this is how I achieved the final scene in Day and Night light settings. You can of course play around with your own settings.
Thank You for taking time to read this tutorial. Enjoy, Cheers!!!
-Shashank Sharma


