Breaking Up NURBS Surfaces
It may seem that NURBS surfaces are inappropriate for complex models. Although NURBS are difficult to master when it comes to organic modeling, they are actually well suited for anything that is mechanical or man-made. The trick is to think in parts.
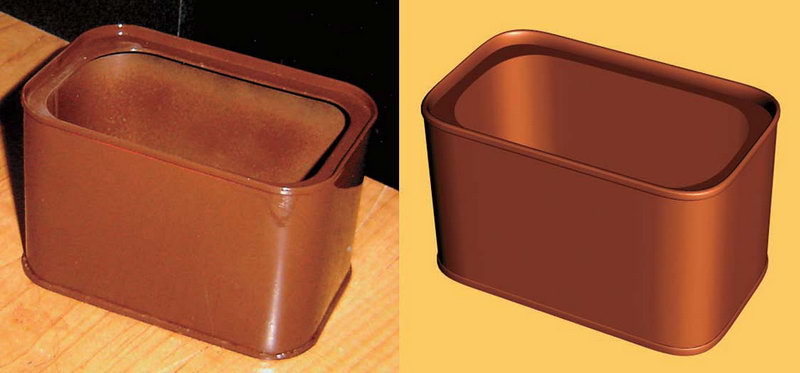
As an example, here is an instant coffee tin created with NURBS surfaces.
To replicate this model:
1. Choose Create -> CV Curve Tool and draw a curve in the top workspace view that establishes the upper-right corner of the can. To ensure that the curve is truly square, temporarily click the Snap To Grids button on the Status line.
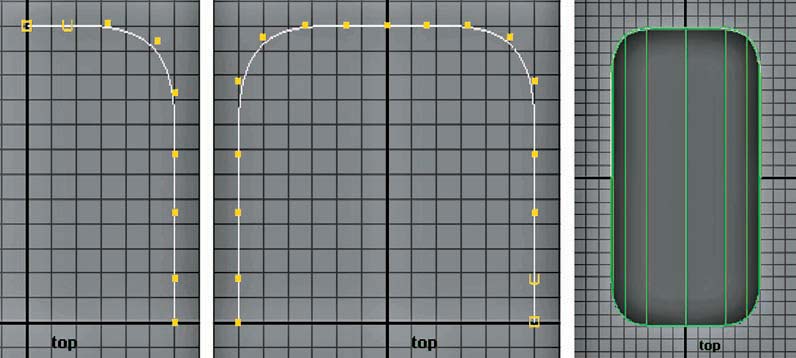
(Left to Right) The corner curve; the curve duplicated with Scale X set to –1; the attached curve
duplicated with Scale Z set to –1 and the resulting curves lofted
2. Switch to the Surfaces menu set. With the curve selected, choose Edit ➔ Duplicate Special ➔ ❒, set Scale X to –1, and click the Duplicate Special button. With the old and new curve selected, choose Edit Curves ➔ Attach Curves ➔ ❒, set Attach Method to Connect, uncheck Keep Originals, and click the Attach button.
3. With the resulting curve selected, choose Edit ➔ Duplicate Special ➔ ❒, set Scale X back to 1, set Scale Z to –1, and click the Duplicate Special button. With the old and new curve selected, choose Surfaces ➔ Loft. The resulting surface forms the tin bottom.
Select and delete the curves.
4. Shift+select the top and bottom edge isoparms of the surface (that is, choose the edges at the narrow ends). You can select edge isoparms by RMB clicking over the surface, choosing
Isoparm from the marking menu, and clicking on an edge. Choose Edit Curves -> Duplicate Surface Curves. Hide the bottom surface to make the new curves easier to see. With the new curves selected, choose Edit -> Delete By Type -> History. Select the new top curve, by itself, and choose Edit Curves -> Reverse Curve Direction. Select both curves and choose Edit Curves -> Attach Curves. If the Reverse Curve Direction tool is not applied, the attached curve will be twisted at the center. This is due to the duplicated curves possessing U directions running in opposite directions. In addition, the History delete tool is needed to prevent a gap from opening up in the curve when the Reverse Curve Direction tool is applied. If a small gap remains on one side of the curve, choose Edit Curves ->Open Open/Close Curves.
5. With the curve selected, choose Edit -> Duplicate. Scale the duplicated curve so that it no longer overlaps the originalcurve. Select the original curve again and make several more duplicates. Each time a duplicate is made,scale and transform the duplicate so that it doesn’t overlap any other curve. Scale and transform all the duplicate curves so that they form the side of the can, the top and bottom metal lips, and the flat opening at the tin’s top.
6. Select the curves in a logical order starting with the original bottom curve. Choose Surfaces -> Loft. At this point, the loft is quite ugly. The sides bow and the surface shoots too high through the top lip.
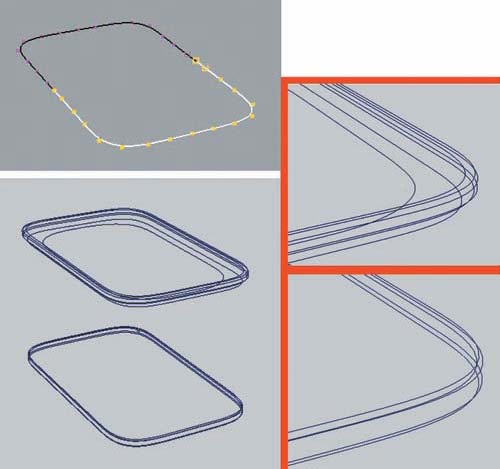
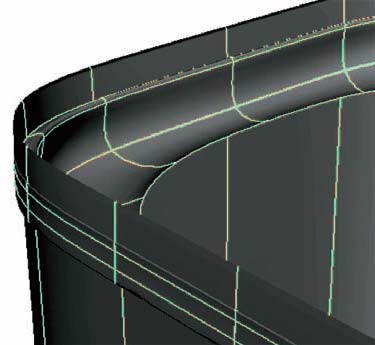
(Top left) Two curves duplicated off the bottom surface isoparms. (Bottom left) Duplicated curves transformed and scaled into position. (Right) Details of curves arranged to create top and bottom lips.
A bad loft
7. The NURBS model must be broken into smaller parts. Undo the loft. This time, select those curves that make up the bottom lip in logical order. Choose Surfaces -> Loft. The lip forms cleanly. Choose all the curves that make up the top lip. Choose Surfaces ➔ Loft. Once again, the surface is clean. Choose the two curves that establish the top of the bottom lip and the bottom of the top lip. Choose Surfaces -> Loft. This creates the sides. As a last step, choose the two curves that form that flat opening at the top of the tin and choose Surfaces -> Loft.
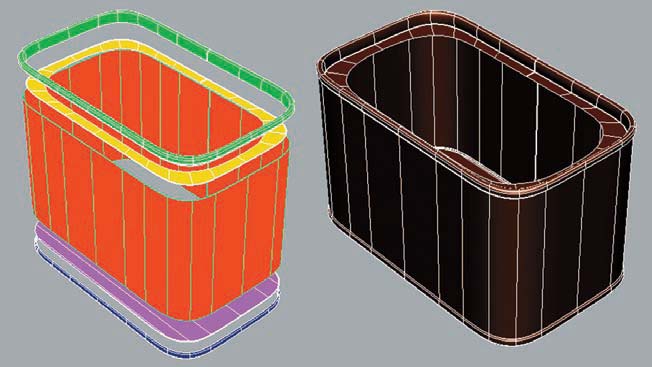
(Left) The five lofts that form the bottom lip, bottom, sides, flat opening, and top
lip. (Right) A wireframe of the final model.
8. Unhide the bottom surface. Delete all the unneeded curves, name the surfaces appropriately, and group them together.