
Quad Sphere Tutorial
Introduction
Hi everyboby, this is my first tutorial so don’t expect too much.During my modeling sessions with Max I’ve seen that there are two kinds of spheres: normal (made with triangles and quads) and geosphere (made only with triangles). So I’ve started wondering how to make a sphere made just with quads.
This is the process I’ve developed.
Note1: You can get a much faster result spheryfing a hedra with a slightly different mesh.
Note2: This tut can be however a good way to learn some basics of modeling for newbies (I’m still learning them too;-))
Modeling
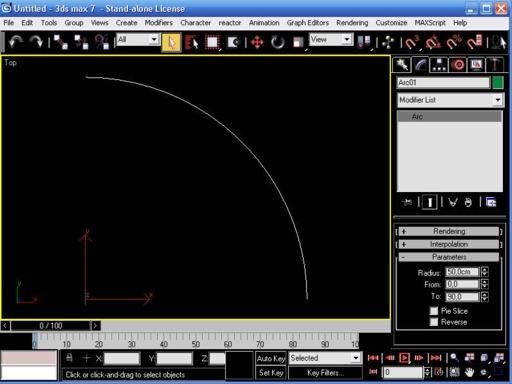
Make an arc of 90 deg., and radius 50 in top viewport and move it to 0,0,0.
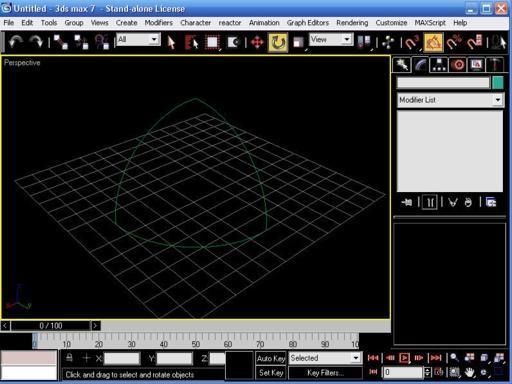
Go in perspective mode, clone the arc 2 times and rotate the clones as in figure (use snap angle).
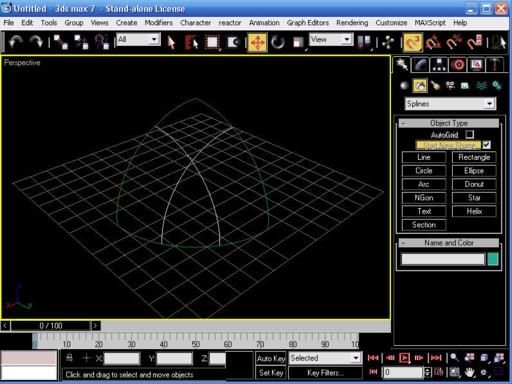
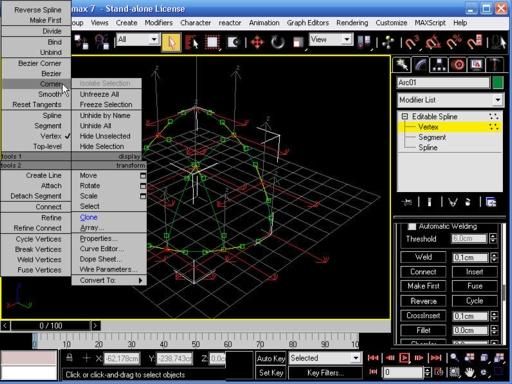
Select one of them and transform it in a spline, attach the other two.
So you have a single spline made of the 3 arcs.
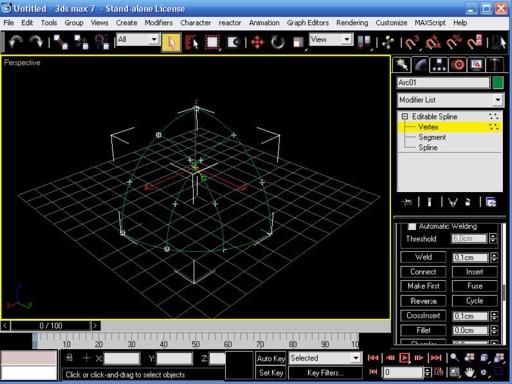
Make another arc of 90 deg. radius 43,301 and clone it.

If you go in vertex sub-mode you can see that the radius correspond to the z value of the up-middle vertex of the vertical arcs, so if you want to use different measures use that instead.
Rotate and move the arcs as in figure (use snap vertex).
Select the spline and attach the 2 arcs.
Go in vertex sub-mode activate crossinsert and put a vertex as in figure
Delete all the vertices not in crossing position.

Transform all the vertices to corner and transform the spline in a ed-poly (the figure seems disappear because it has no polygons), call it Quadsphere.
Go in vertex sub-mode (the figure re-appeares), select all the vertices and hit Weld (you should have a total of 10 vertices).
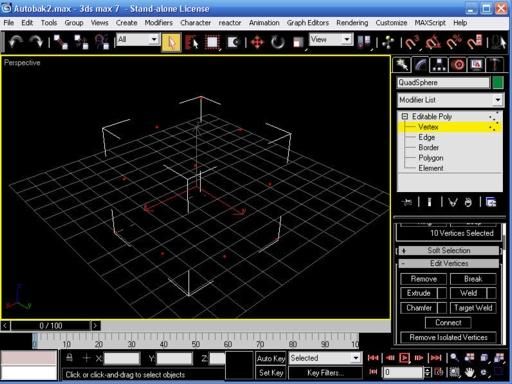
Go in polygon sub-mode, hit Create and start to make polygons using vertices.
Select vertices counter-clockwise to make them appear in the viewport and double-click on the 4th to create the polygon.
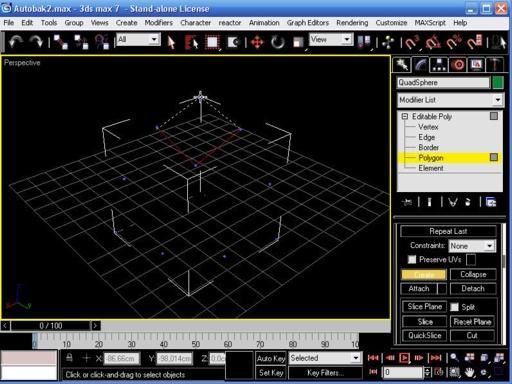
Delete the 2 external vertices and you should end with a figure of three polygons and 8 vertices.
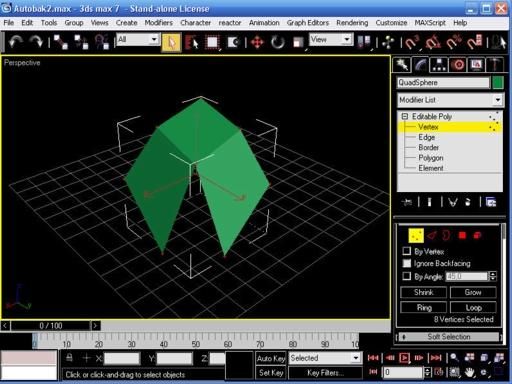
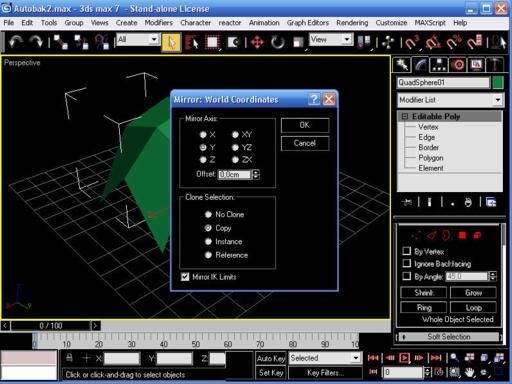
Mirror it on the y-axis (select copy) and attach to the other.
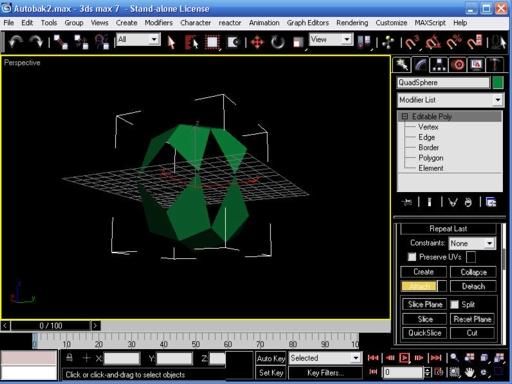
Mirror the new figure on x-axis and again attach it and finally mirror this figure on the z-axis and attach it. You should have something like this.
Go in vertex sub-mode, select all the vertices and hit Weld again (you should have a total of 34 vertices now).
In polygon sub-mode hit Create again and make the 8 other polygons to complete the sphere.
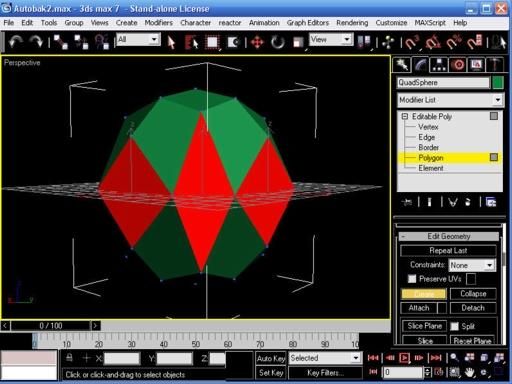
Apply a turbo-smooth (iteration 2) and a spherify modifier and collapse the stack.

The problem now is that the sphere has no exact size (this is due to the creation process).
To resize the sphere to an exact size (100 units) I used polyboost (the transform-size section) but there’s probably a solution inside 3dsmax.

Here we have the final result compared to the normal sphere and the geo-sphere.I think it’s nice and in some ways elegant.
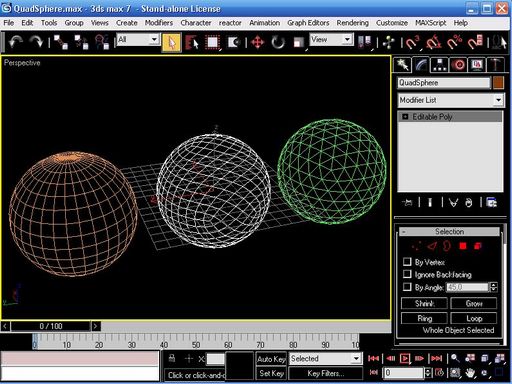
How to use it? I don’t know, maybe it could be useful in reactor or cloth deformation.
That’s all.
Best Regards