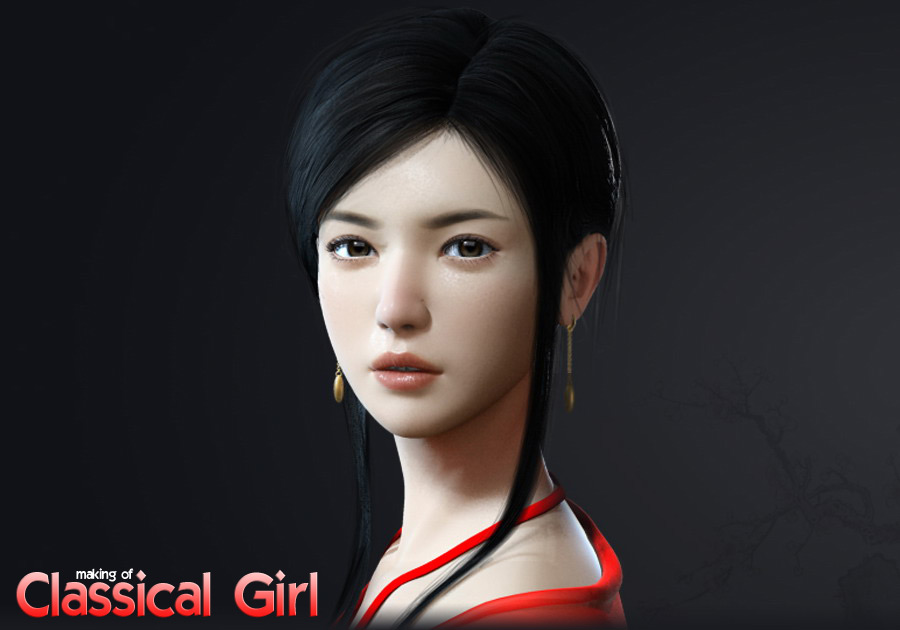
Making of Classical Girl
This article has primarily been focussed on the modelling stage, as many people before me have gone into detail about mapping and texturing, especially using the SSS material adjustment method.
IntroductionI spent a lot of time on this model; I tried my very best to make it as perfectly as I could, so for example sometimes I changed the prominent arches above the eyes; sometimes I chose to have the eyelids slant inwards or outwards; sometimes I checked the cheek bones to make them look more lifelike; sometimes I had to improve the shape of the orbicularis oculi muscle (the muscle that closes the eyelids), and the shape of the nose, and so on – all of these subtle changes helped to make all the difference in the end! I have always done my best to make the structure of my artworks clear, and with this piece I put my limits to the test in order to create this oriental beauty, aiming for a good balance between the structure and the appearance of the character. With all the processing work that went on, I found that many things had to be discarded. I had to question whether this character that I wanted to be beautiful was actually so beautiful … Perhaps the beauty I was capturing was not quite the unpretentious oriental beauty that I originally wanted to express? I had to ask myself these questions whilst I worked to keep myself focussed at all times on my original intentions. I have created models for years, and I have spent much time drawing as well. I therefore had the most confidence on the structure part of this artwork. I realised that to make a muscled man or woman is not too difficult, but if you want to express a kind of feeling – rather than to show a kind of skill – you have to consider so much more! I now know that, in this respect, I still have so much to improve on, but I will try my best to keep improving! |
Step 1: ModellingWhen I was still new to 3D modelling things took me much longer than they do now; now I can do things according to clear steps, and figure out some of the key points and tips during these steps! The first step in the creation of this piece was the outline. My best advice to you is to not consider the detailing of the five specific organs at this stage; the most important part here is grasping the main features, such as the shape of the face and the five organs
|
|
Tip: When we see a painting by a great Master from a distance, we can be attracted even though we can’t see the details. The closer we get to it, the more detail we can see, and the more attractive the painting becomes. The same applies to model-making; the model should be thought to be good, even if seen from a distance. Do not pay much attention to the details at first; the most important thing is to consider it as a whole, and then you can add the details during the process of creation. What the outline is and how to grasp the outline can be seen as two key points. Think about how you can recognise your friends from a distance the moment you see them – even far away – despite being able to see their appearances clearly. In a similar way, you can also think about your model being covered by a cloth … This is my way of looking at my work at this stage. If you do think in this way you could possibly save around two-thirds of your time! Most people think more about the details first, without considering the outline of the model – they then get lost in the following process as the numbers of lines increase and it becomes harder for them to improve! Tip: We can’t ignore the wiring when it comes to making a model. In the beginning, we will spend a lot of time on the wireframe. In order to reserve more time for the modelling we should find our own way in which can finish the wireframe more quickly. My way is to write down the time I spend on each individual technique; the tools I use and the order in which I use them. |
Step 2: WireframeThe focus here was to create the wireframe reasonably
Tip: Try putting your design aside, or try scanning it onto your computer and open it when you want to use it as a reference. We should not import pictures into our software to "describe" a model, unless we have to create an exact replica, otherwise such a description is of little benefit to us when trying to adopt the ability to grasp form. When you’re ready, you can then import your reference picture into Maya – I found no errors when I did so with this piece. This fact built firm confidence in me and helped me to carry on with the following stages of creation. |
Step 3: DetailsAt this stage I started to go deeper into the details
Tip: The way that we can understand objects in the form of converting them into blocks can be used to help us survey the model’s form with our eyes – to check whether it meets the standard or not. As long as there are methods like this, we can all create good models! For example, as we all know, we can imagine the nose as a trapezoid; cheekbones and the jaw can also form a trapezoid, the first of the two sides of an egg shape. We should try to sum up such laws during the process as we create a model by ourselves to help us achieve the correct forms |
[pagebreak]
Step 4: More DetailsAt this stage I started going into more detail, moving into the process of describing the five sensory organs |
|
 |
 |
|
1. The Eyes: It is especially important at this stage to mention that the upper eyelids (under the eyebrow) “contain” the lower eyelids (directly above the eye). Many people do not consider this relationship, which can lead to the eyes not looking convincing enough! 2. The Nose: When modelling, many people do not pay attention to the nose, but in fact there is a lot of structure to the nose! 3. The Mouth: The relationship between the upper and lower lips is “containing” and “being contained”; the upper and lower lips rotate when they enter the mouth. |
|
Step 5: The EyeballHere I moved onto adding eyeballs to the eyes
|
|
Step 6: Adding eyelashesThis step is very important! Here we add the eye lashes and the tear ducts. We often witness CG masters who can make their characters look vivid – it’s all in the eyes! The key is to produce a single model of the tear duct alone, and then adjust tears in the material. If you are not already aware of this issue, I hope that this tip has given you some food for thought!
|
|
Step 7: Making AdjustmentsTogether with the eyes, eyelashes, tear ducts, teeth and earrings, take a look at the results and make the appropriate adjustments
|
|
Step 8: HairAt this stage I created the hair. I was once asked how to create hair. I basically use NURBS, mainly on two loft curves of a surface. Do not delete the history records – this way you can make amendments simply by controlling the curve directly. If you want to make the effect of the wind, or want to control it as a whole, add a fine mesh to control the curve. Using this method is a very easy way to make adjustments!
|
|
[pagebreak]
Step 9: Hair&ClothesHere I added the hair and then moved on to make the clothes and the fan object |
|
 |
 |
Step 10: LightingFinally, I added the lighting. Lighting can be in used in accordance with our interests, and then we can use the FG option of MR to render. Here is the effect of rendering (note that I changed her clothes and removed the fan) |
|
 |
 |
 |
|
FinalThis article has primarily been focussed on the modelling stage, as many people before me have gone into detail about mapping and texturing, especially using the SSS material adjustment method. Her skin was an SSS skin texture, and in the future I hope to have the opportunity to talk to you more about the material, lighting, rendering and post production. For the time being, I hope this has been useful to some of you! Thanks to all! Featured linksSite: http://www.wangshiyong.com |
|


