Creating a “Velvet/Suede” finish with V-Ray or mental ray
After few requests to post a tutorial about creating a velvet/suede fabric finish, I have managed to put something together.
The following tutorial works for both V-Ray and mental ray.
One of the most distinctive characteristics of the velvet/suede finish is its soft textured effect with two contrasts that transcend across the entire surface. This effect is more noticeable on the edges/rim of the surface.
To emulate this material, simply do the following:
Step 1
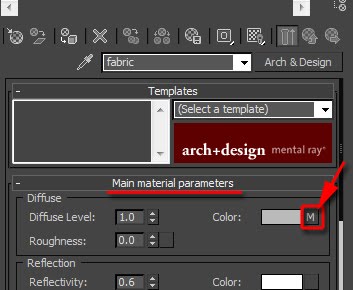
Go into your existing “Diffuse” map toggle first.

Or
Step 2
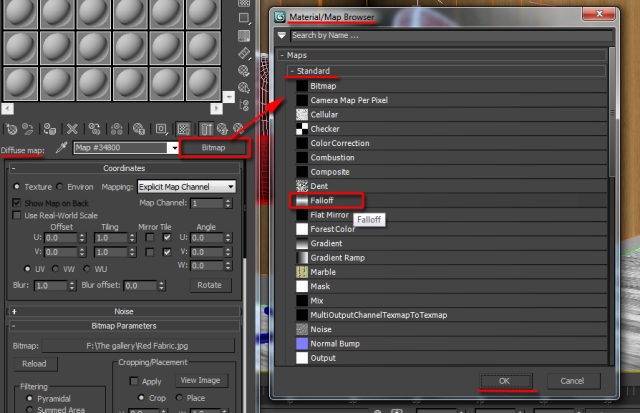
In the “Diffuse map” parameters, click on its “Bitmap” toggle to access the “Falloff” procedural map from the “Material/Map Browser” dialog. Double click to select it.
Step 3
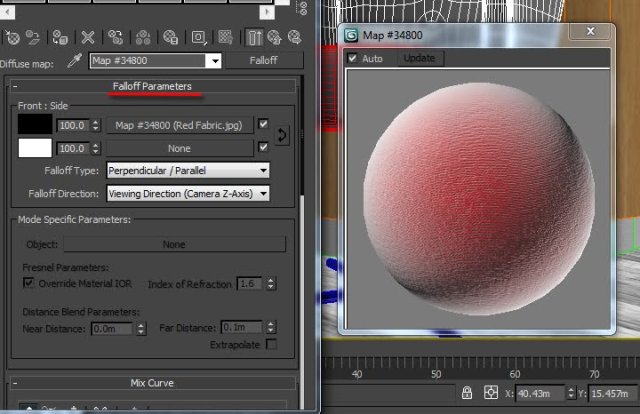
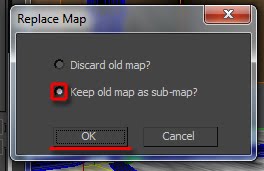
The “Replace Map” dialog should be prompted. Choose to “Keep old map as sub-map” and “OK” to close the dialog. The “Falloff parameters” should be loaded.

Step 4
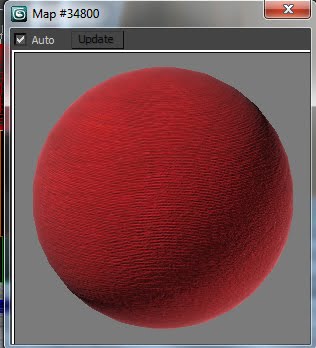
With the “Falloff parameters” loaded, one can clearly see its exquisite effects from the material slot thumbnail.
The next phase is to create two variations of the same material in order to emulate the previously described “finish”.
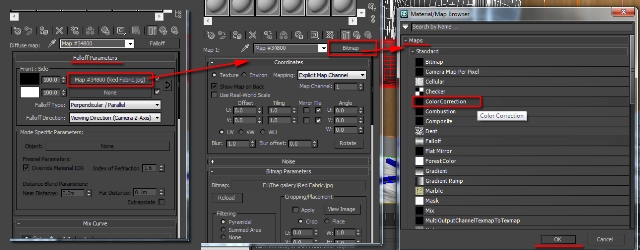
The “Color Correction” procedural map is one of many tools that can help achieve that:
In the “Front: Side” group, click on the “Front” toggle to access its “Bitmap” parameters; followed by clicking on its “Bitmap” toggle to choose the “Color Correction” map from the “Material/Map Browser” dialog. Also, choose to “Keep old map as sub-map” option when the “Replace Map” dialog is prompted.
Step 5
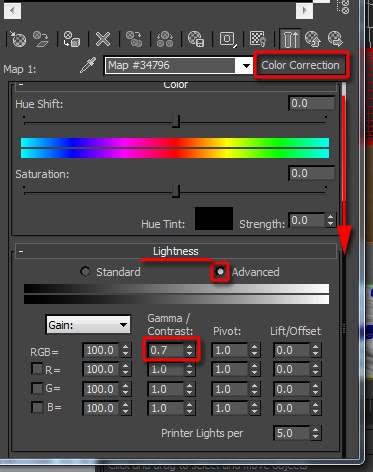
This procedural map offers a number of ways to control the texture. One of the most popular methods used by numerous companies is to scroll down to the “Lightness” rollout and enable the “Advanced” function.
Its parameters should come to life. Reduce its “Gamma/Contrast” “RGB” value to about 0.7 to darken its texture.
It’s worth noting that, this value worked well for the desired effect. However, one can try different values, if desired.
Step 6
The next step is to use the same procedural map for the “Side” toggle, with reversed effects (i.e. brighter texture).
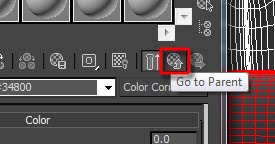
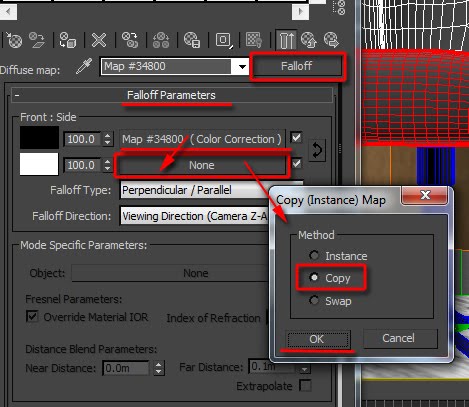
To do so, simple go back to the “Falloff Parameters” by clicking on the “Go to Parent” button first. In the “Falloff Parameters”, drag the “Front” toggle contents and drop it onto the “Side” toggle.
The “Copy (instance) Map” dialog should be prompted; choose the “Copy” option and “OK” to close the dialog.
The “Copy” option was chosen because its parameters will be later changed.
Step 7
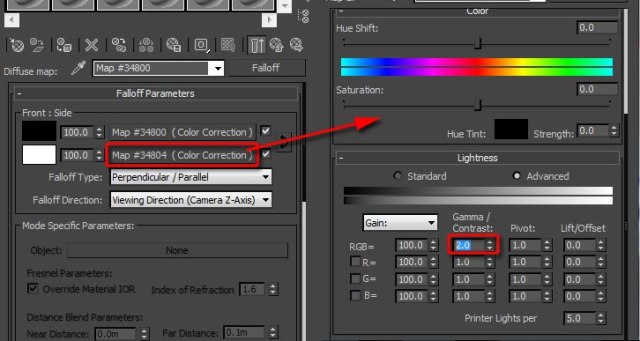
Next, go inside the “Side” toggle and increase its “Gamma/ Contrast” value to about 2.0.
Please note that this value worked well for the intended results. However, feel free to try different values, if desired.
Step 8
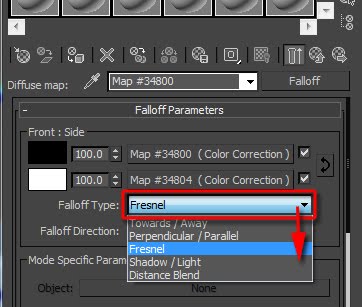
Finally, to ensure that the falloff is visible on the edges /rim of the surface, simply change its “Falloff Type” to “Fresnel” and render the results.
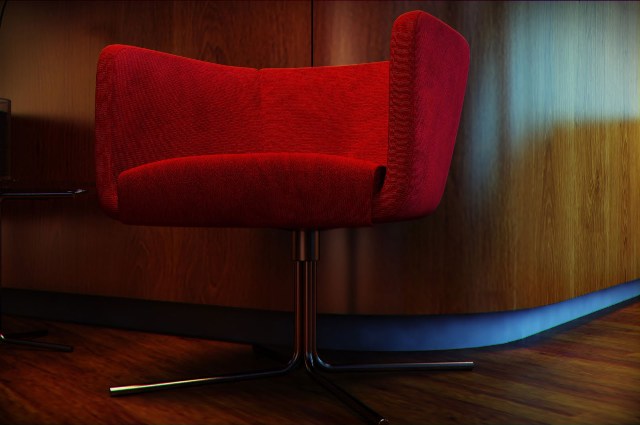
The two 3D renders below depict the “Before” and “After” effects using the “Falloff” procedural map on the diffuse toggle.
I hope you have found this tutorial helpful!
NO “Falloff” procedural map being used

With “Falloff” procedural map being used


About The Author
You might be interested in