How to create a swimming pool model with 3ds max
Welcome to my new tutorial. I will show you how to design a swimming pool using splines within 3ds max, but the methods used in this tutorial can be applied to any 3d modeling package that features spline and poly modeling tools. This tutorial is pretty straight forward and is designed for beginners and experienced users alike.
Section 1 – Modeling:
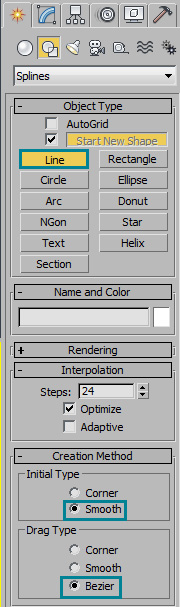
First, start off by creating a new line object under the spline tab. I went with smooth for the initial type and bezier for the drag.
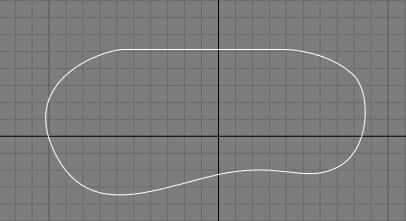
Create your desired shape and tweak as necessary. This tutorial will follow a simple curved design that is common with many residential swimming pools. Here’s my result:
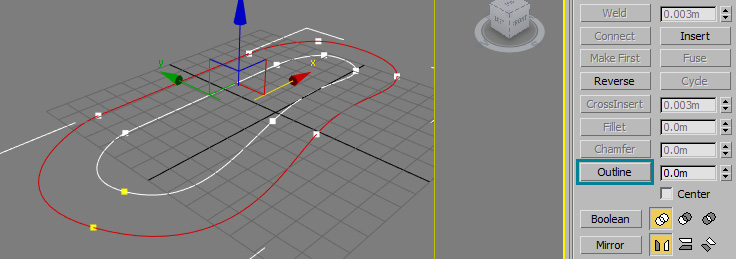
Now go into editable spline mode and select the shape you just created as followed:

Now select the outline function and make a positive value for it (I used 0.5):
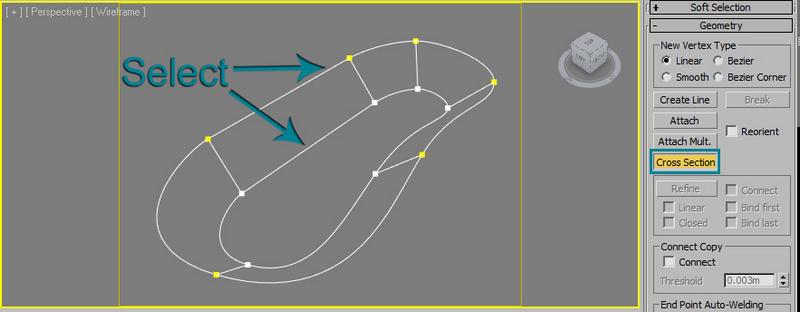
Select the newly created line in the center and move it below the exterior line. I used a value of -0.5 for the Z position. We will be using this new line to create the pool plaster:

Now apply the cross section function in the geometry stack and select a spot anywhere on both splines. It will automatically create new lines from every point in between the shapes:
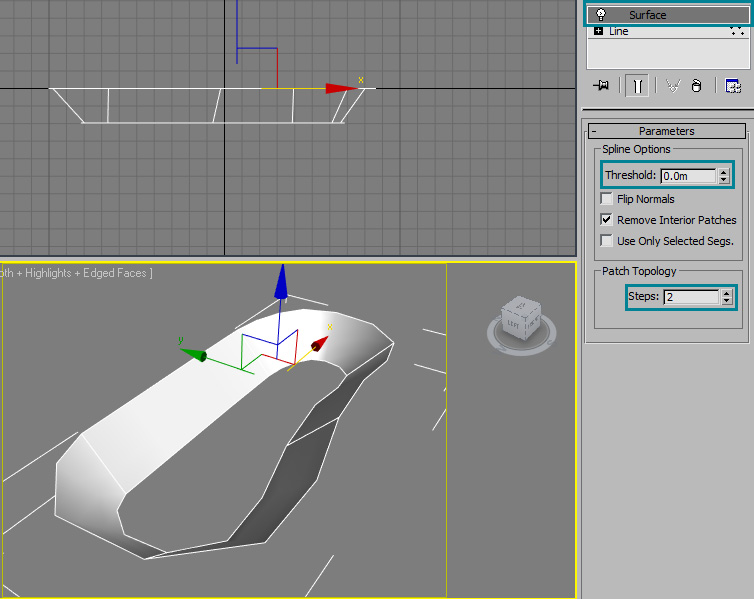
Add a surface modifyer to the spline with a threshold level of 0. I used 2 steps for my patch topology. Values may be changed depending on the individual shape, but in this case I kept the step rate low so modifying the geometry would be easier later on:
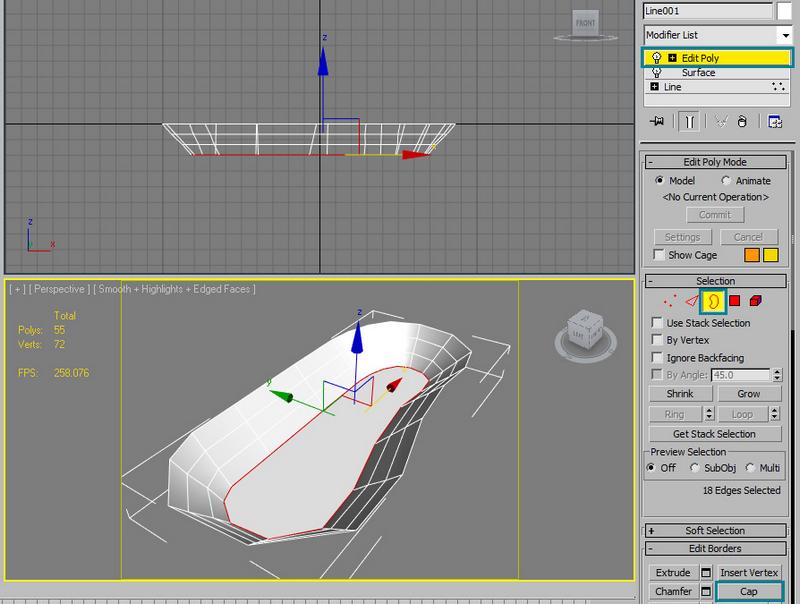
Now we need to add an edit poly modifyer to fix the surface. Select the border at the bottom of the shape and cap it:
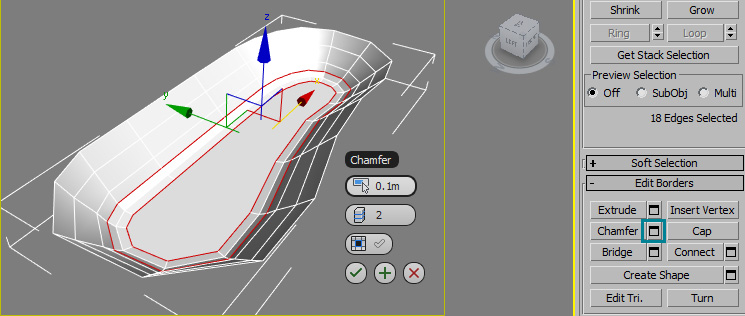
Now we have a surface for the plaster, but it needs some refining. Keep the border/edges selected and apply a chamfer effect to smooth out the bottom surface. I used a value of 0.1 with 2 segments:
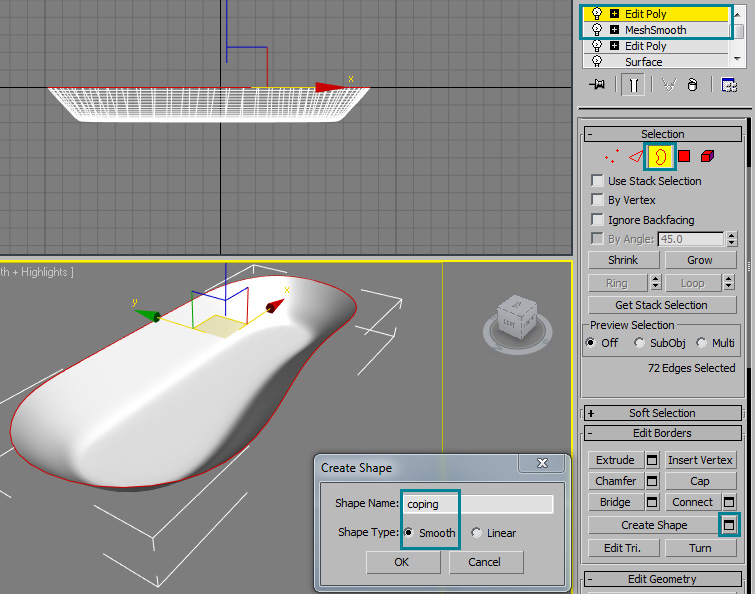
Now add a meshsmooth modifyer with a value of 2 iterations to give it a more natural and realistic look. Then add another edit poly modifyer and select the border at the top of the mesh. Create a shape from the selection and name it "coping." Use the "smooth" selection for the shape type:
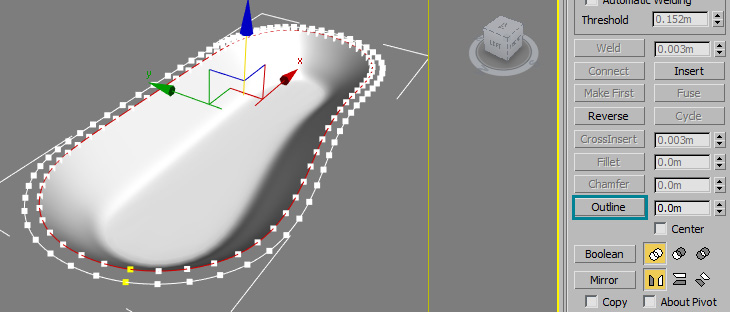
Now select the newly created shape, and add an outline with a negative value. I used -0.12 for my outline value:
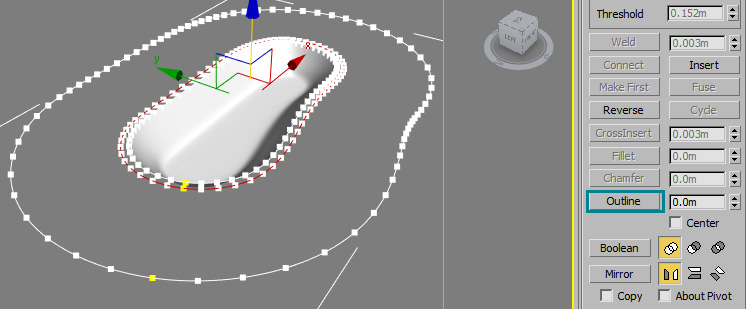
Clone the selected shape (as a copy), name it "decking" and add another outline effect with a negative value. I used -1.5 as my value:
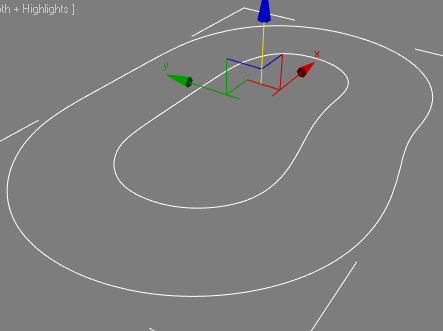
Select the "decking" object and delete the interior ring. This should be all that’s left of the decking shape:
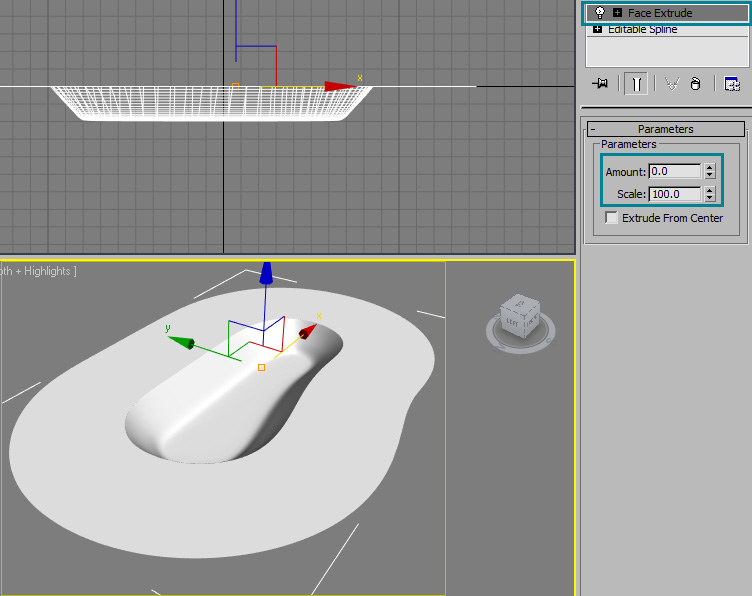
Now add a "face extrude" modifyer to both shapes (coping & decking). Set the value to 0 on the amount. You should get a result similar to this:
Now to make things easier, let’s turn the decking area into a rectangle instead of keeping it the same shape as the pool. Add an edit poly modifyer to decking, go to "edge" selection, and use the quick slice tool to cut some edges into a shape of a rectangle:
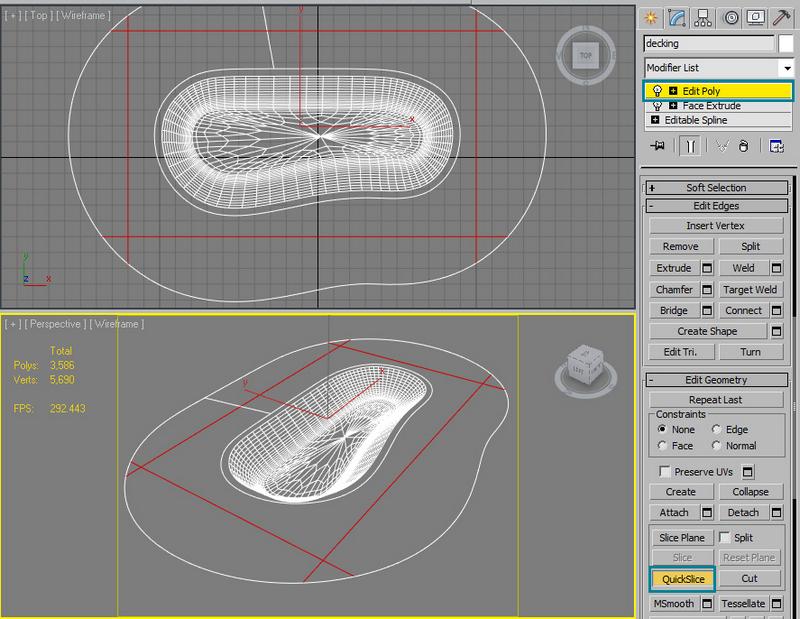
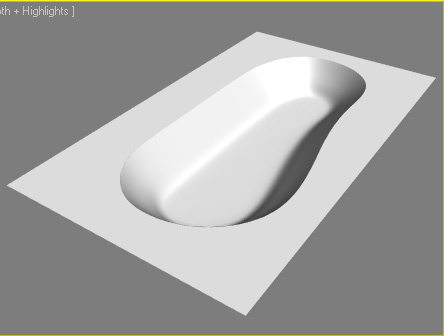
Select and delete all of the polygons outside of the rectangular shape. You should have a result similar to this:
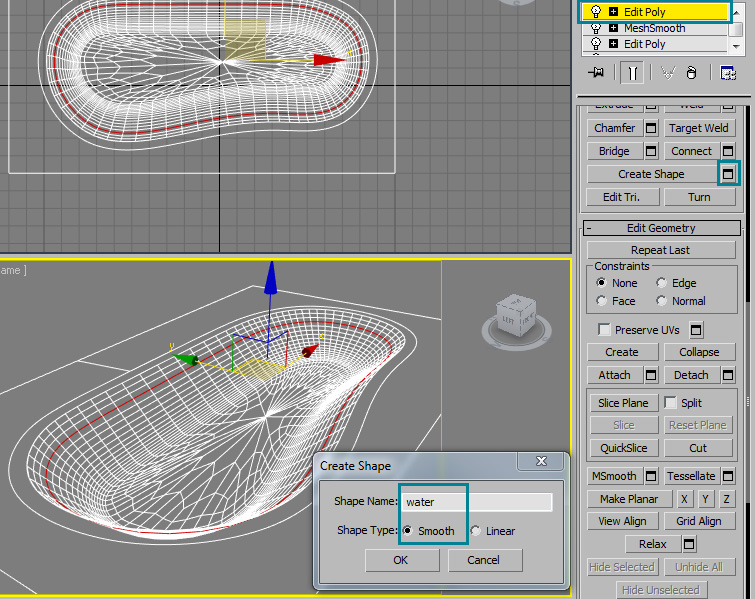
Now let’s add some water to the pool. Go back to the pool object and select an edge that’s at a level that you want your water to be at. In my case, it’s the fourth row from the top. Select any edge and press loop to select all the edges on that row. Create a shape from the selection and name it "water":
Add a face extrude modifyer to the water with a value of 0, you should get a similar result as below:
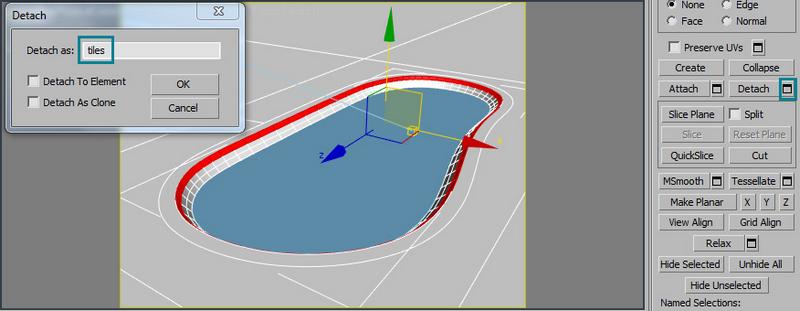
Now let’s take the top row of polygons of the pool interior and detach it from the mesh. We’ll use this set of polygons as our tiles:
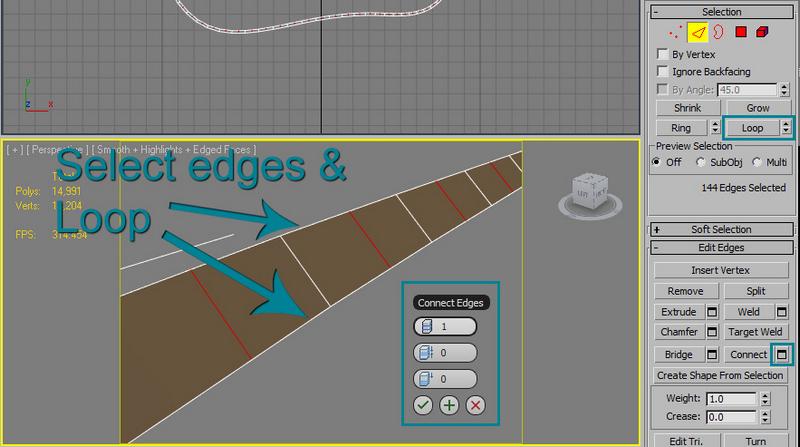
The next step is to refine our tile mesh by multiplying the amount of horizontal polygons by 2. We’ll do this to make texturing the tile much easier and better looking (results may vary of course):
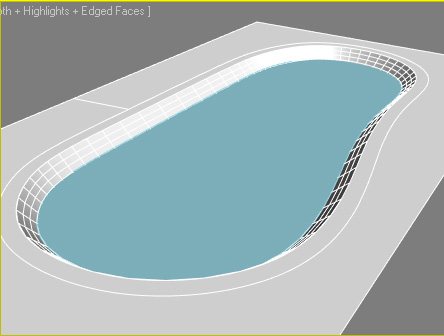
Now we’ve gone through the steps to create a basic interior shape for a pool and its surrounding surface. You can alter the geometry to add detail, such as extruding and chamfering the coping to make it look more realistic. Let’s move onto the texturing aspect of our model:
Section 2 – Texturing:
Select a tile material and apply it to the tiles. I used a free tile texture from the internet for my example:
http://telias.free.fr/textures_tex/floor/stone_vratza.JPG
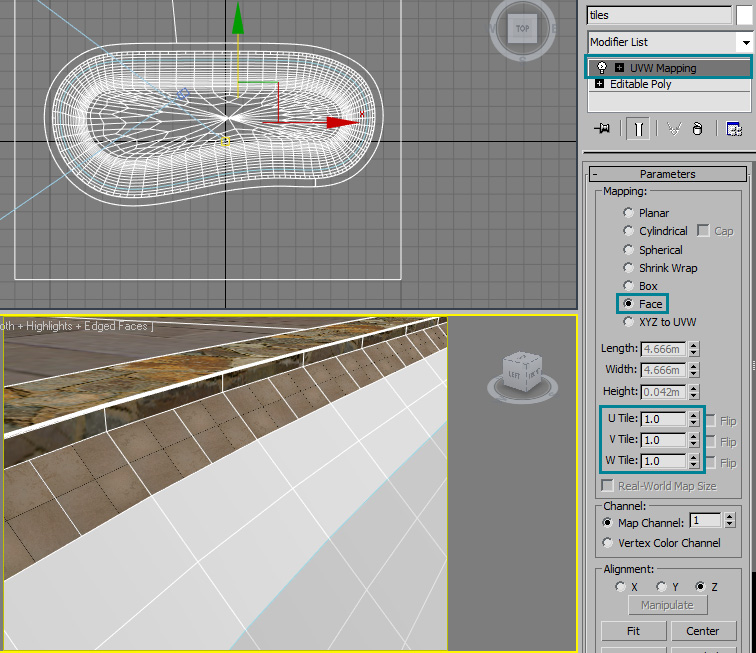
Add a uvw mapping modifyer and choose "face" mapping. Depending on the individual texture, you may need to adjust the uvw mapping properties. Mine was a basic texture featuring 4 tiles on the square, so I kept my mapping properties default:
For the coping and decking I just used some stone textures and experimented with some material settings to get a nice looking area around the pool. I applied uvw mapping modifyers to both objects and just refined the texture maps until I got something desirable. Both the coping and decking are simple VRay materials with rgb 20, 20, 20 on the reflection with 0.7 reflection glossiness and stone textures for the diffuse and bump maps. I added a VRay displacement map for the decking to give it some depth and detail. For the water, I used a free material online and modified the bump settings:
http://www.vray-materials.de/all_materials.php?mat=1090
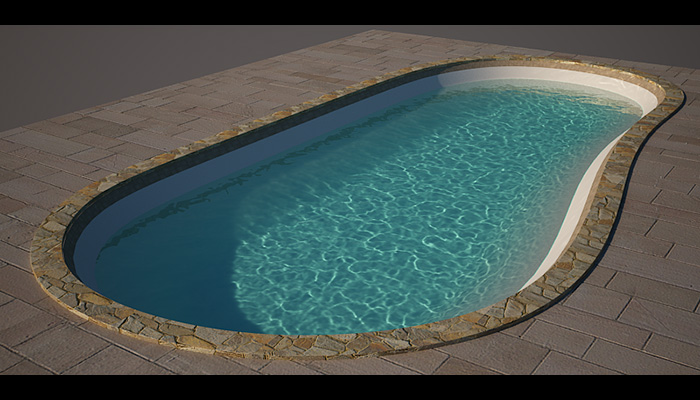
Here’s my result following the texture phase. The plaster on the interior of the pool is just a standard VRay material with a white diffuse map and a noise map for the bump effects (fractal, size 0.01), so its effect is only slightly noticable:

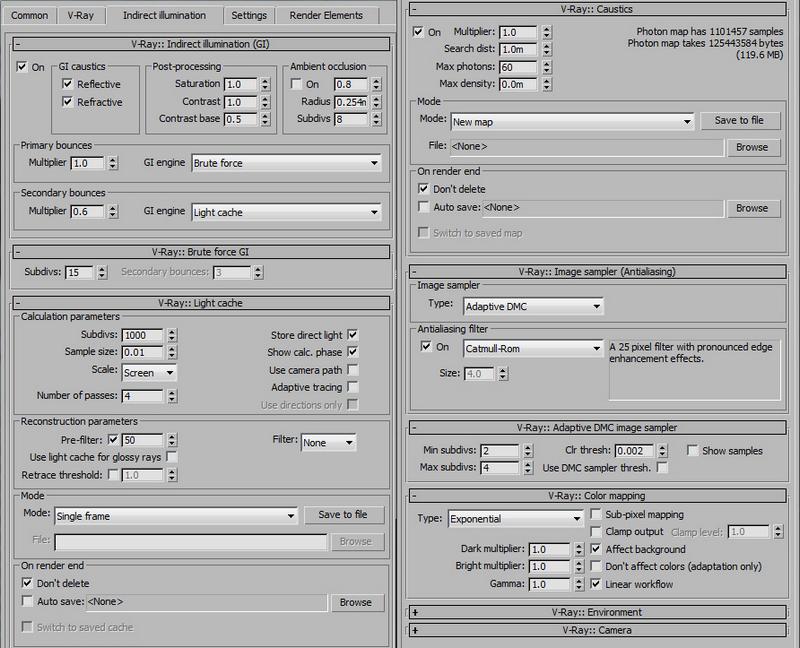
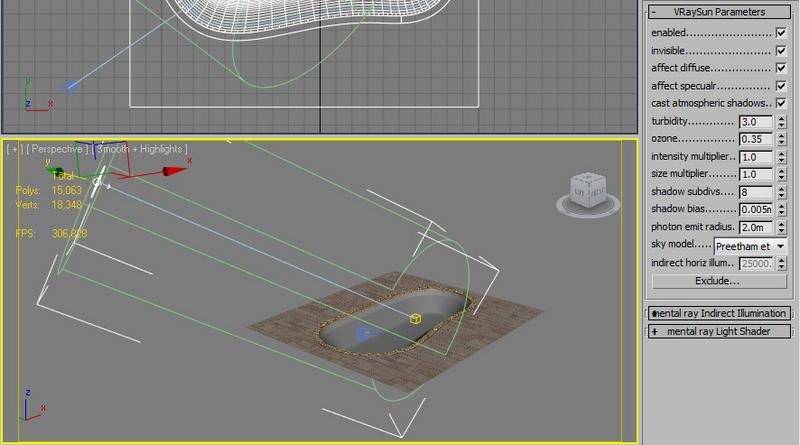
Here are my lighting and rendering settings. I used a VRay Sun + Sky with a VRay Physical camera:
This concludes my tutorial and I hope this lesson has been valuable to you. If you have any questions or need assistance with anything from this tutorial feel free to email me, my contact information is below. If this tutorial has helped you in designing new pools for your architectural visualization scenes, I would definitely enjoy seeing your work! Thank you for taking my tutorial and be on the look out for some new material soon :)


About The Author
You might be interested in