Neoclassic Livingroom Lightning and rendering Maxwell
Hi.
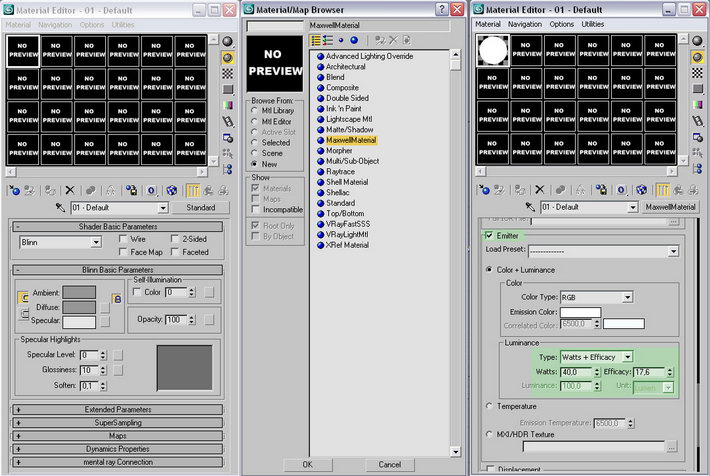
In this tutorial we’ll investigate the render and lightning adjustment for neo-classical room design. At first place, activate the maxwell render and then set the materials in the material editor as maxwell materials.
LIGHTNING
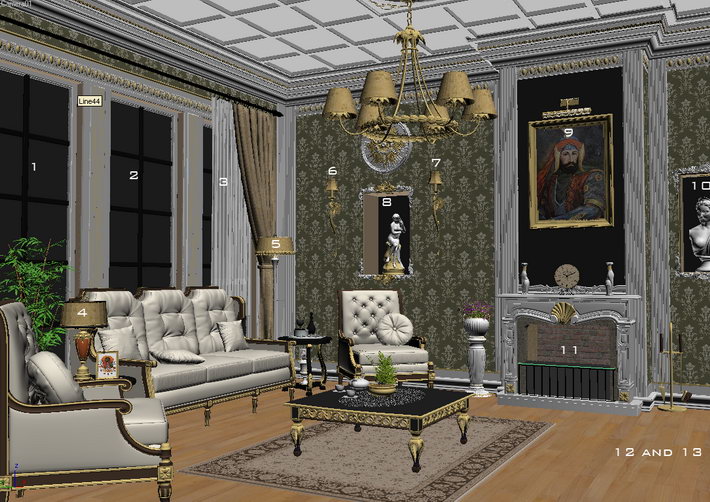
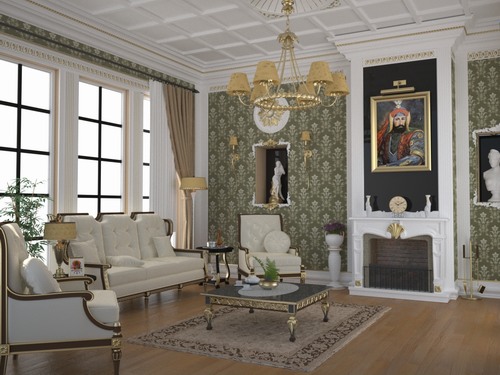
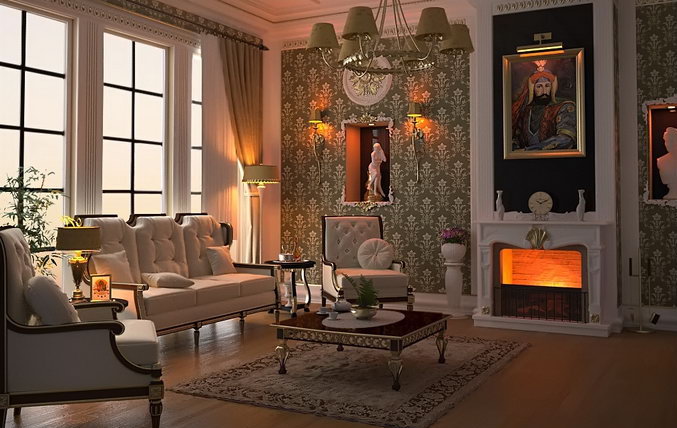
Numbers seen in the above figure indicate the light locations in the scene.We’ll consider the scene is in real world and locate the light sources depending on where the light will spread from.In this Scene Select the light sources as boxes.Of course fort his objects to spread light,they need to be emitters.To get this done ,open material editor apply the emitters to the boxes.
|
EMITTER NO |
RGB |
WATT |
|
1 |
255,255,255 |
2500 W |
|
2 |
255,255,255 |
2500 W |
|
3 |
255,255,255 |
2500 W |
|
4 |
255,114,0 |
60 W |
|
5 |
255,114,0 |
60 W |
|
6 |
255,114,0 |
45 W |
|
7 |
255,114,0 |
45 W |
|
8 |
255,114,0 |
60 W |
|
9 |
255,114,0 |
100 W |
|
10 |
255,114,0 |
60 W |
|
11 |
255,114,0 |
150 W |
|
12 |
255,255,255 |
2500 W |
|
13 |
255,255,255 |
2500 W |
Since we’ll use multilight on this scene the below given WATT values are not that important and not that efective on the overall result on the scene’s lightning.
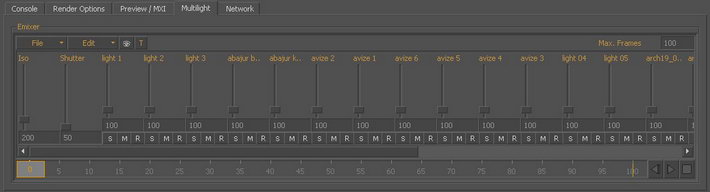
MULTILIGHT
In multilight menu you’ll encounter a control panel looks like an equalizer and here,you can adjust the light strenghts.
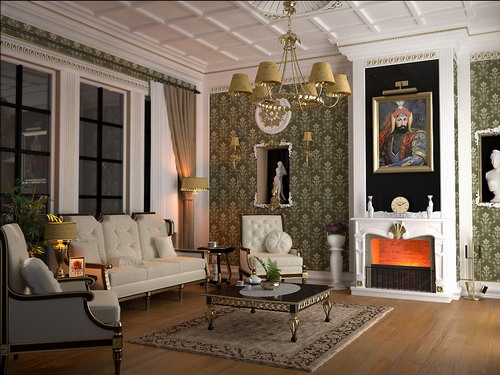
As seen in the above samples it is possible to get effective results by using multilight.
Keep in mind it will be very useful to set the RGB value to 242,242,242 instead of 255,255,255 to have less noise on white walls.
RENDERING
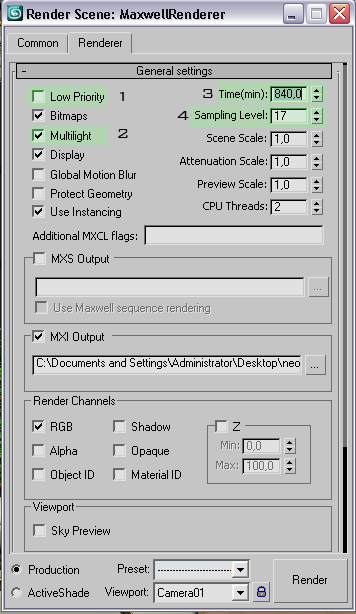
1.Low Priority: If you activate this option the amount of RAM Used for rendering will be less so that you can run other applications easily.if not, RAM usage will be more and that means the other applications will run very slow.but in the same time period quality of the render will be relatively beter.
2.Multilight: As stated above ,its the tool which allows you to adjust the light strenghts after rendering.
3.Time(min): You can enter the time in terms of minutes for rendering to be completed.
4.Sampling level: This parameter is directly affecting the render duration.For example, with a very low sampling level (5) even if your usual render time is 5 hours it will be less than 5 hours with this setting.higher the sample level higer the render quality and better results but with 1 computer it may be really hard to handle the process.Mostly this should be set between 15 and 20.
CAMERA SETTINGS
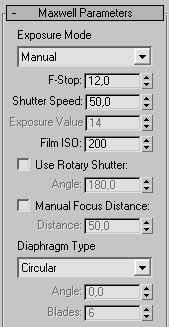
F-Stop: As the F-Stop value increases the diaphragm decreases and if the diaphragm goes narrow the depth of field (DOF) increases.This will help us to get a clear result but since the diaphragm went narrow brightness of the scene decreases.
Shutter Speed: This is a mechanical system that determines the duration of lights reflection over the film.This durations mostly given in terms of division of one second.for instance 1/1, 1/2, 1/4, 1/8, 1/15, 1/30, 1/60, 1/125, 1/250, 1/500, 1/1000.This higher duration means more light will reflect over the film.
ISO: Is the standart measuring system that measures light sensivity.Higher ISO means Higher brightness on scene that brings Higer noise rate along.
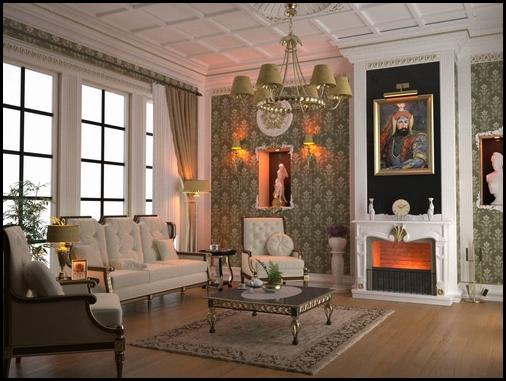
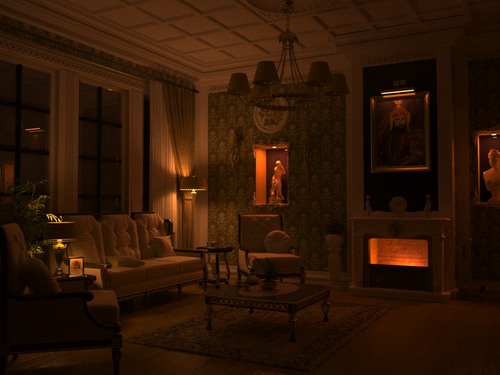
RESULT


About The Author
You might be interested in