Modeling of COCA-COLA
Introduction
This tutorial is intended to show you how to make a Coca-Cola bottle using Maya. Although, you may think making a bottle is trivial, but it is easy to overlook some of the tiny details that make your final image more desirable to watch. I will also try to give you some tips, which can help you with your workflow when you are modeling in Maya.
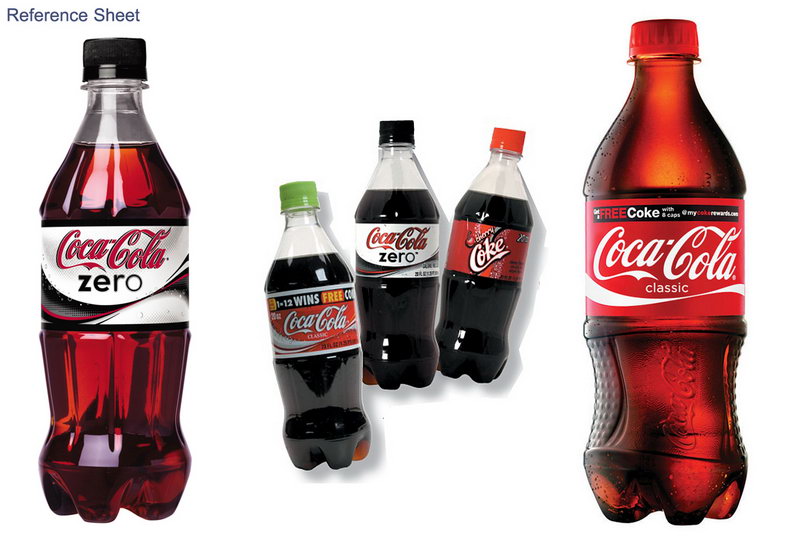
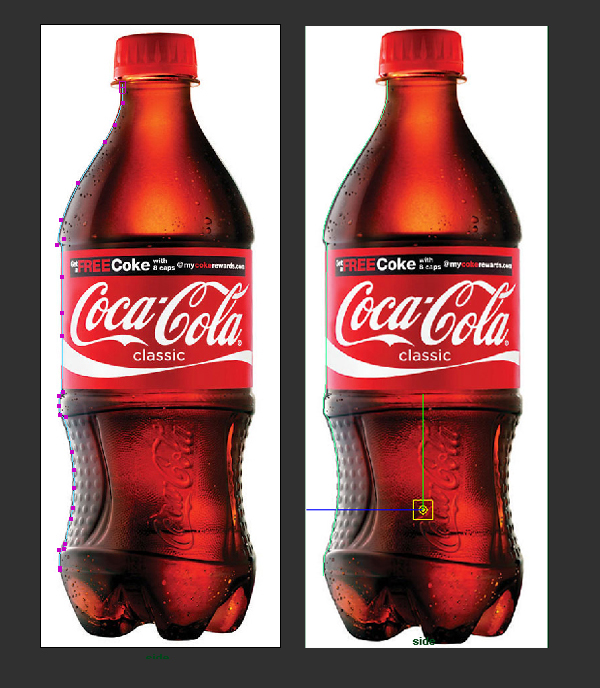
Alright, we start off by doing a fast R&D and try to find as many references as we can to make our life easier during the modeling process. Here are some of the images I found on the internet…. simply search for “Coca-Cola Bottle” in Google and you should find tons of good references.
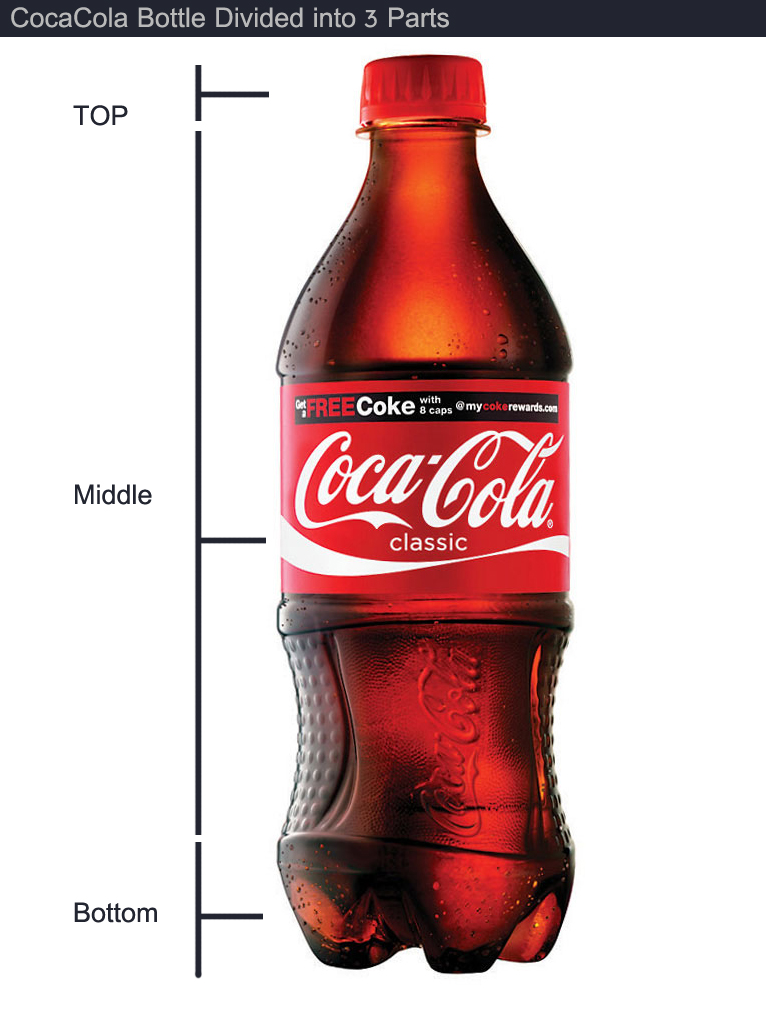
In this tutorial we are going to make the “Coca-Cola Classic” since it has some complex details. We divide the model to three major parts (Top – Middle – Bottom). This way it is easier for you deal with each part and also decide what technique to use next.
Step 1:
First we need to setup up our “Image Plane” for the side view in Maya.
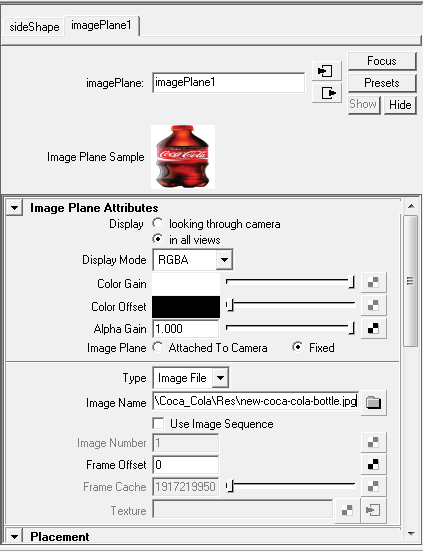
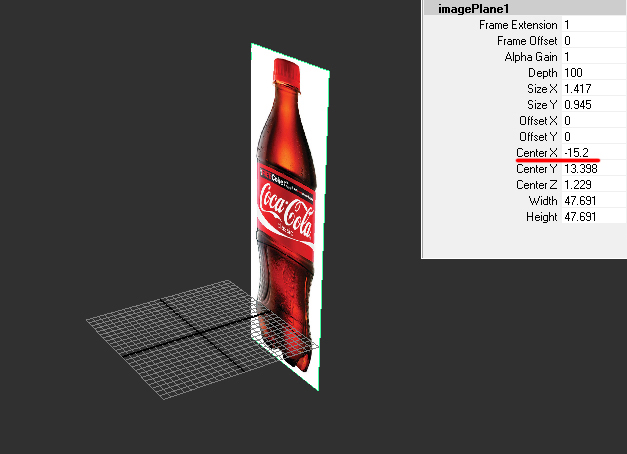
Make sure that Image plane’s Center X is a negative value so it won’t block your model.
Step2:
Modeling the middle part:
To model the middle part we simply start with an “EP curve tool” to create half silhouette of the bottle. While EP Curve is selected hit insert and make sure the pivot is somewhere in center of the bottle.
Next select “Surfacesà Revolve”, leave the default options to what they are. Now, we have a base shape to work with.
Since this shape is a NURBS surface, we need to convert it to a Polygon mesh.
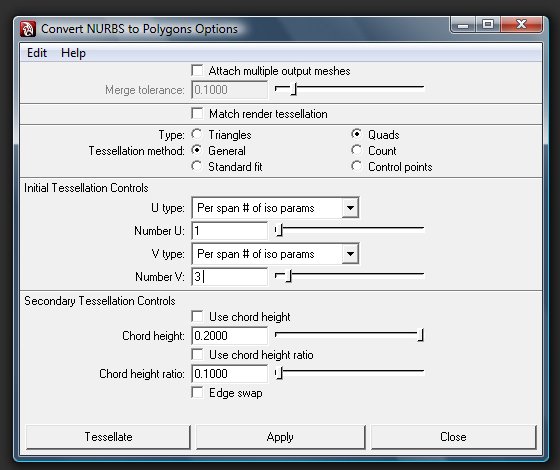
Go to Modify menuà Convertà “NURBS to Polygons Options”.
Set the options as following and then hit Apply:
Type: Quad
Tessellation method: General
U type: Per span # iso params
Number U: 1
V Type: Per span # of iso params
Number V: 3
The reason we want the U, V to be set (1, 3) is because we don’t want our poly shape loses much of its details while still is a Low Poly. If you compare the poly version to the original NURBS surface, you can clearly notice that we have lost some of the curvature but don’t worry since we later apply a mesh smooth on it.
Also, we no longer need the NURBS surface, so simply just delete it.
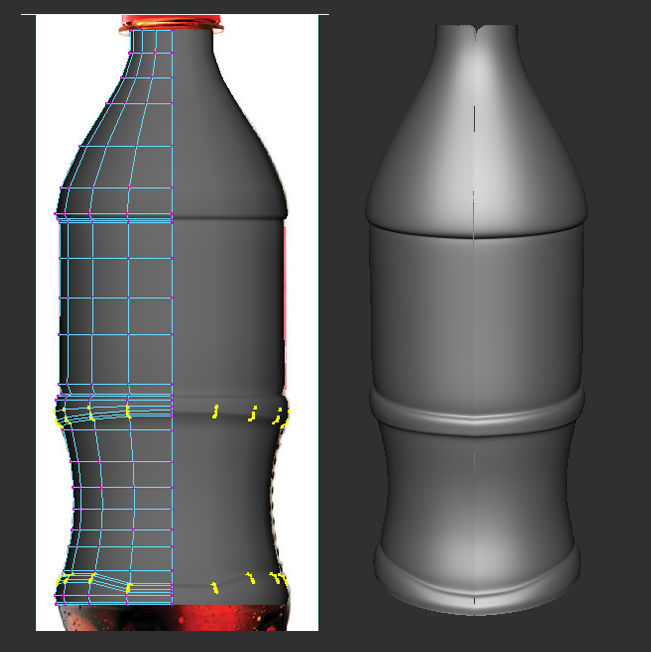
Now under Edit Meshàselect “Insert Edge Loop Tool” and add some new edges around areas as you see in the following image. Then, use “SelectàSelect Edge Loop Tool” to select the new edges we just made, simply hit “R” and scale them towards inside a bit. The reason we added these edges is to give more depth to those areas as you notice in the Reference image.
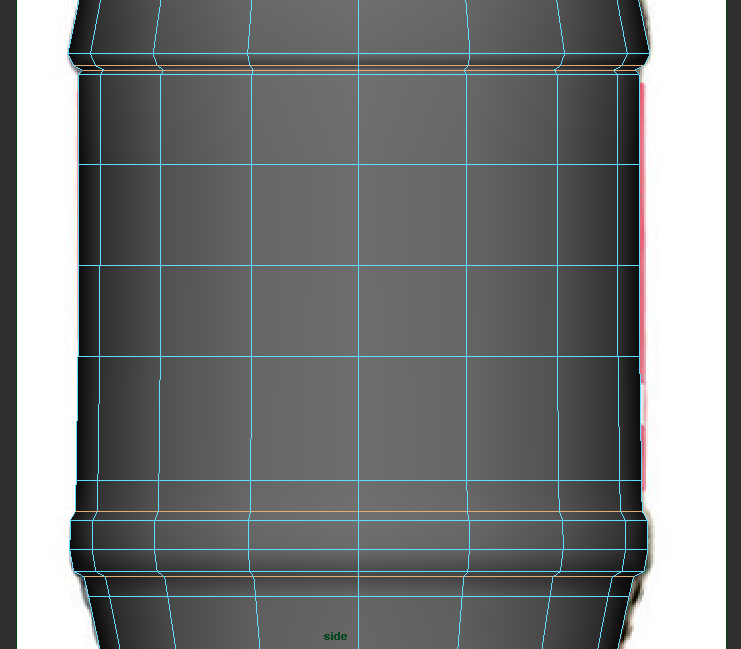
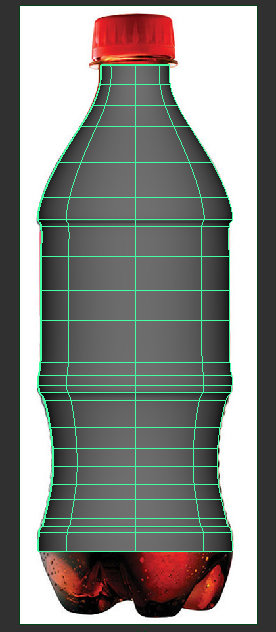
Here is what you should have by now….
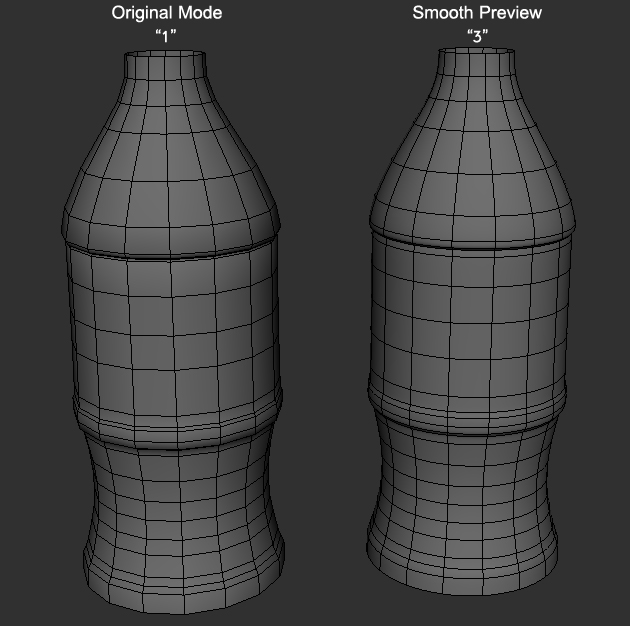
Tip: While middle object is selected press”3″ on your keyboard to see the poly in smooth preview. Press “1” to go back to normal mode. Notice this feature is only available for Maya2008 and higher…..
Select half of the object and delete it, then “Duplicate” the other half as an instance.
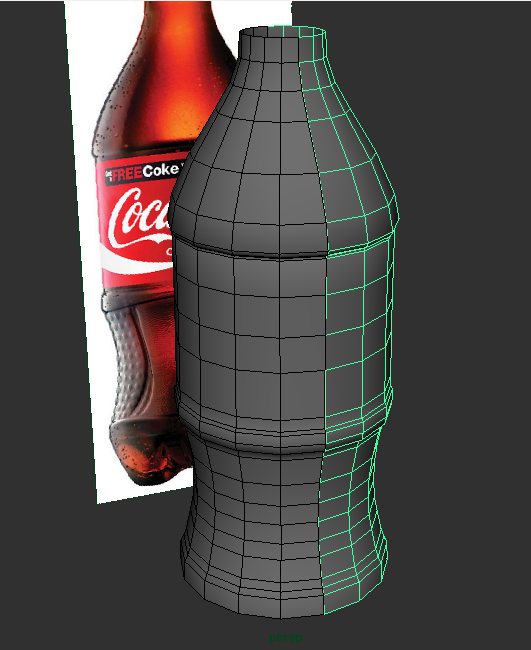
Next, move the vertices according to following image. Try your best to match the vertices as close as possible to the reference image.
Step3:
Modeling the Top part:
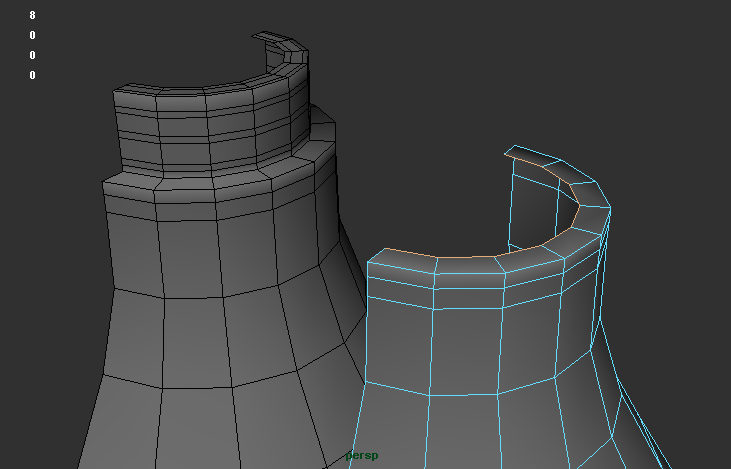
Select the edges of bottle as extrude them similar to the following image:
Modeling the Cap and Treads:
We start off by making a poly cylinder with following parameters:
Radius: 2.72
Height: 2.484
Subdivision Axis: 20
Subdivision Height: 1
Subdivision Caps: 1
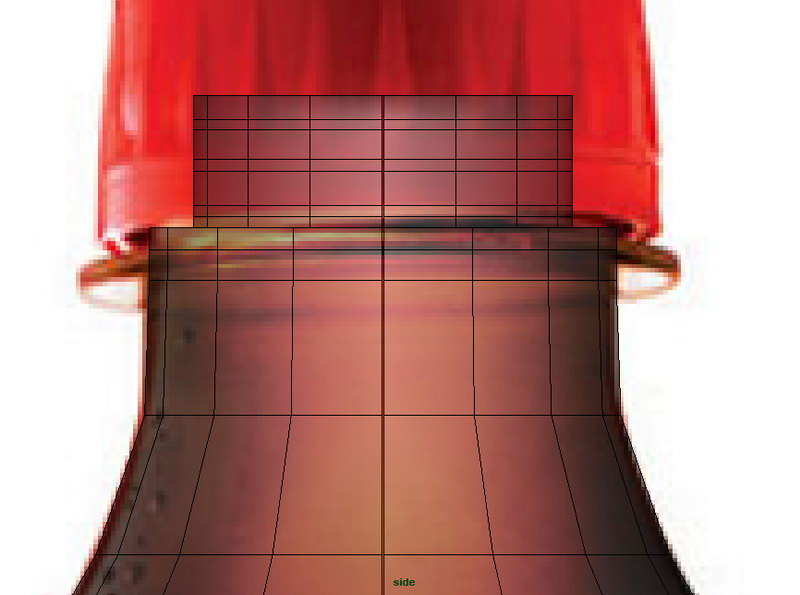
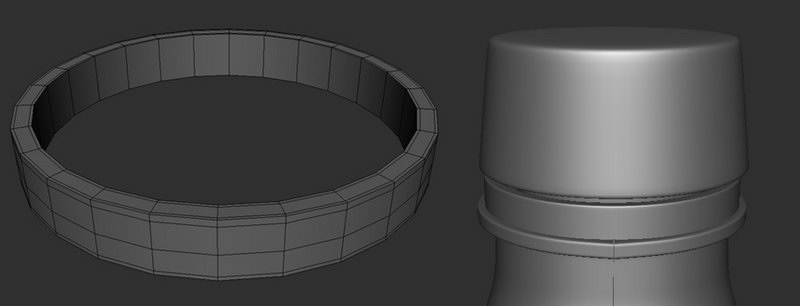
Select the lower vertices and scale them towards outside a bit, then delete the lower cap. Select the lower border and extrude it towards inside. Use the following image as a guide:

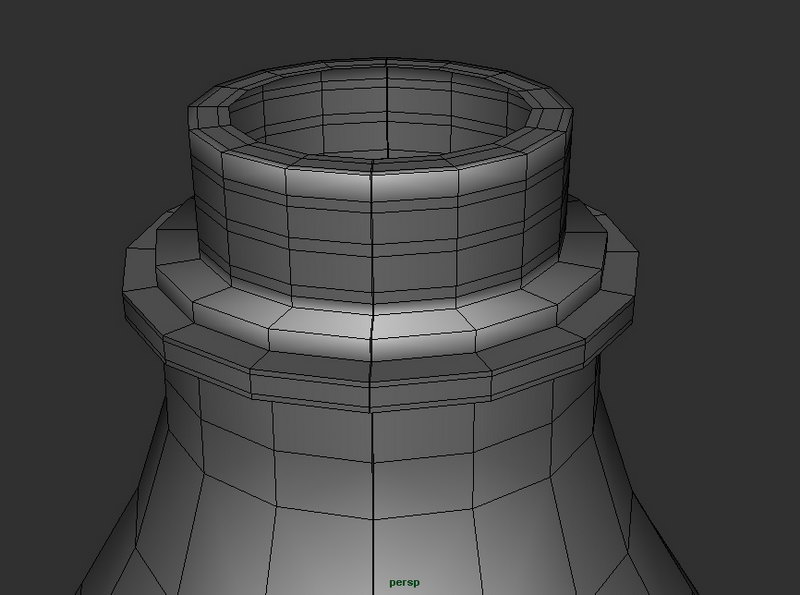
Make a “poly Pipe” and position is under the cap. You are almost done with the Cap.
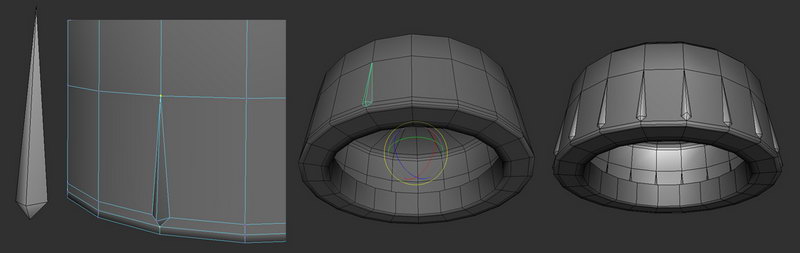
Now, make a triangular tread and align it with a cap door. You can use Vertex snap tools by holding “V” to make sure the tread is aligned properly. Make sure the pivot is exactly in the center of cap. Press “E” to switch to rotate mode then “Duplicate” it to make 20 treads.
Step 4:
Modeling the Bottom Part:
There are many different techniques that can be used to tackle the bottom part. Here is one of them I came up with:
First, make a simple “poly Sphere” and set it’s parameters as following:
Radius: 7.5321
Subdivisions Axis: 20
Subdivision Height: 8
Make sure the sphere radius is close to radius of middle part; don’t worry if they don’t match exactly inch by inch together since we later merge them together. Also, you notice that the number of subdivisions differs for each part. Don’t worry now, later we have to add and delete some edges to middle part to match it with the bottom part.

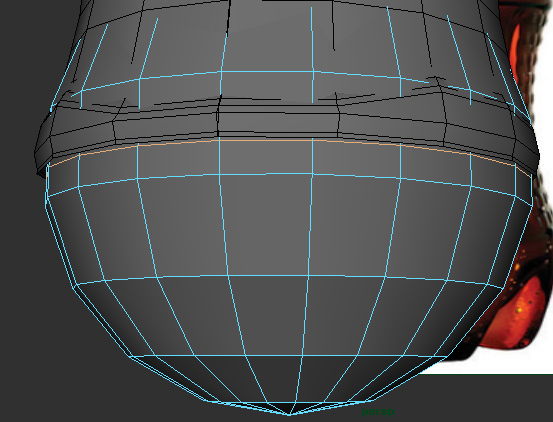
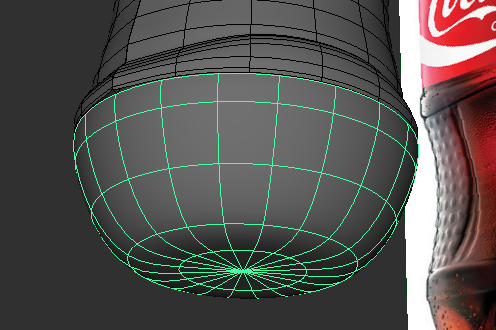
Use “SelectàSelect Edge Loop Tool” to add a new edge to the sphere where middle part ends, so we can delete the upper half of sphere.
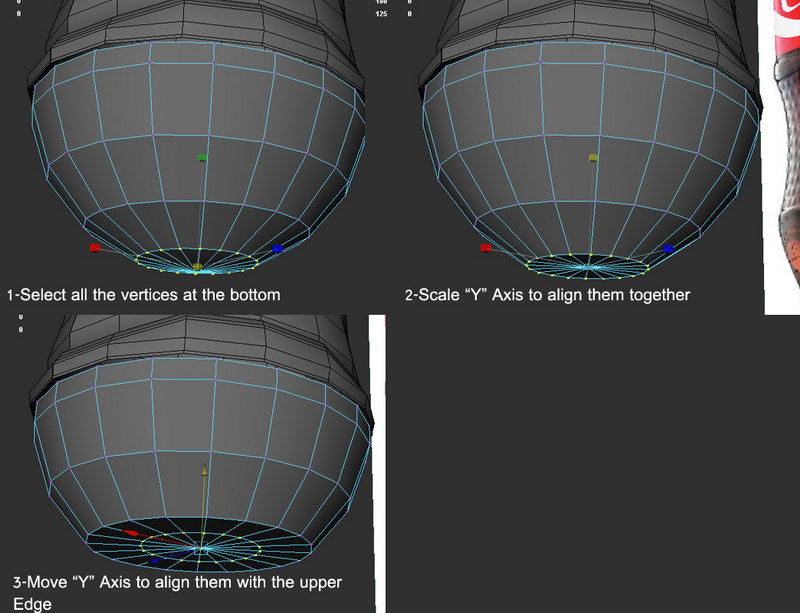
Select all vertices at the bottom of sphere and scale them on “Y” axis until they are lined up. While there are still selected move them up on “Y” axis to line up with its upper edge. See the following image and use it as your guide.
Here is what you should have so far. Press “3” to see the object is smooth preview.
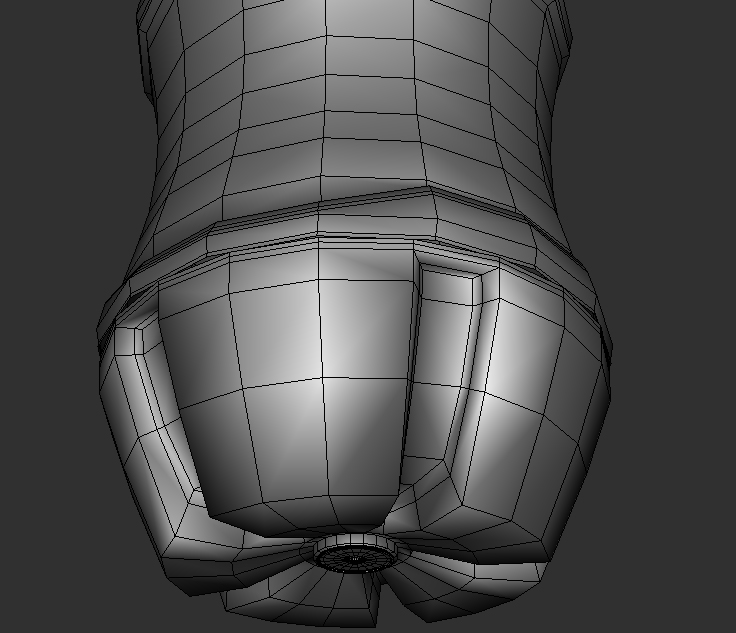
Next, add new edge loops at the end of bottom part. Assign a red color material to those polys that we don’t need to work with. This way, you can focus on other parts and won’t get confused later when we extrude the polys between them.
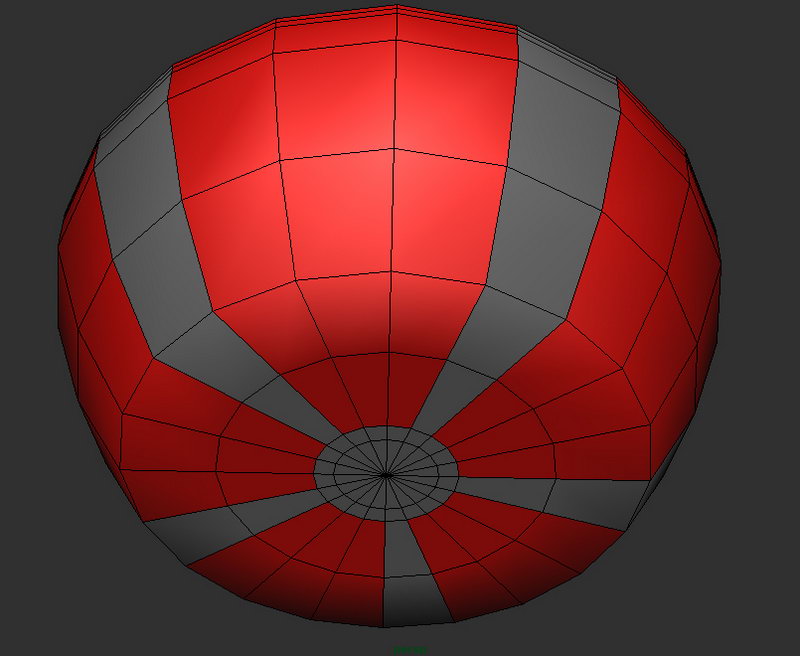
Now, try to extrude the polygons at the center to something similar to following image:
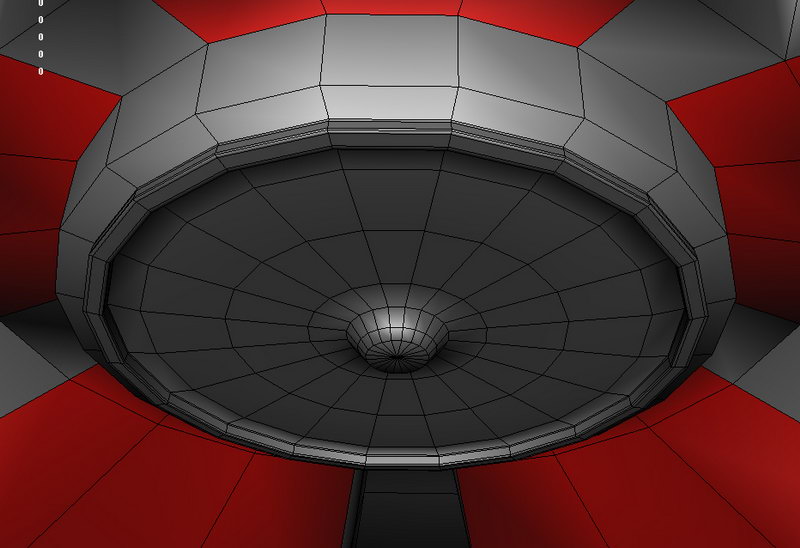
Next, we extrude the polys between those polys we already colored and extrude them two times towards inside. I have selected the edges where the second extrude should occur for your guide.
Here is what we have so far. I also assigned a nice default Blinn shader to it so we no longer see the red areas.

Step 8:
UV Mapping:
To setup the UVs I used “UV Layout 2”. Select “Coca_Bottle” in the scene and export it as obj. Load the obj file in “Uv Layout 2” and layout the UVs as following. I am not going to cover how to use UV layout in this tutorial but if you are not familiar with it you can easily learn it by following the tutorials that’s on their website. Here is the link:
http://www.uvlayout.com/index.php?option=com_wrapper&Itemid=97
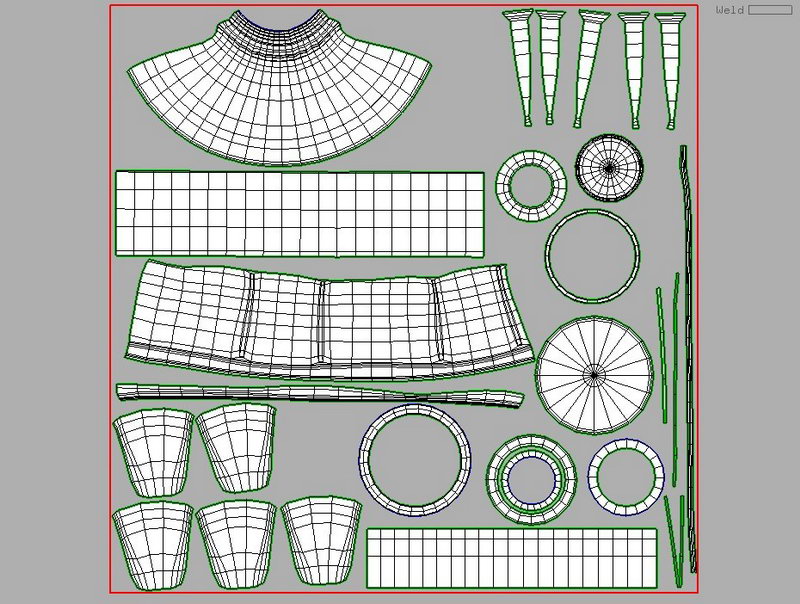
Once, you are done with UV’s Export the model back to Maya.
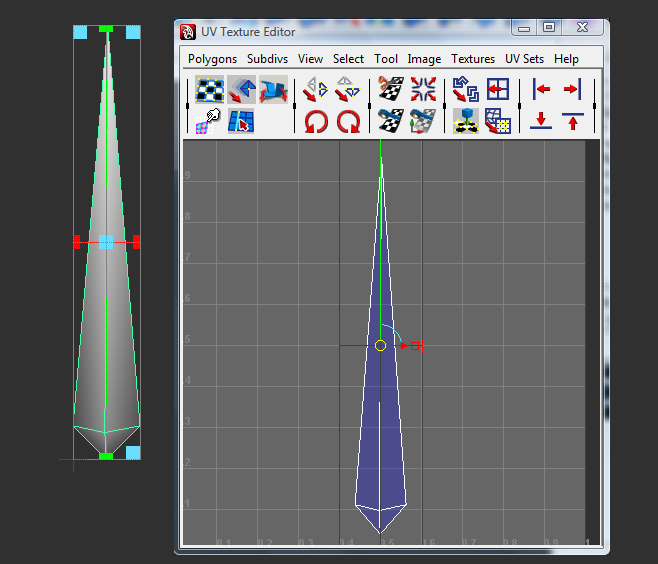
UV mapping the Cap’s treads can be easily done in Maya using simple planar map. We apply a planar map to one tread and then we transfer its UV information to rest of 19 treads. This way all UVs pile up exactly on top of each other.
Transfer UV maps:
to transfer one object’s UV map to another object, first select the object that has proper UV layout and then the second object with no proper UV layout, then go to Mesh “Transfer Attribute Options” and in this case set the options as following:
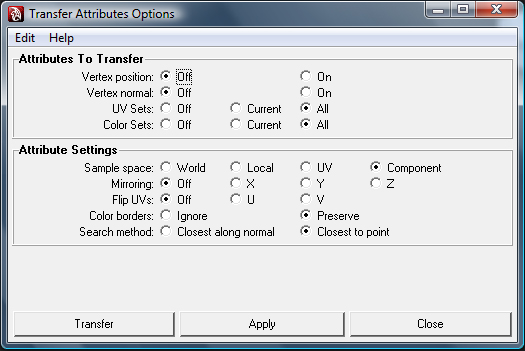
Do this step for the rest of 19 treads. Once you are done, all the UV’s are perfectly piled up on top of each other. Merge all the tread to one object. Call the new object “Cap’s Tread”.
Step 9:
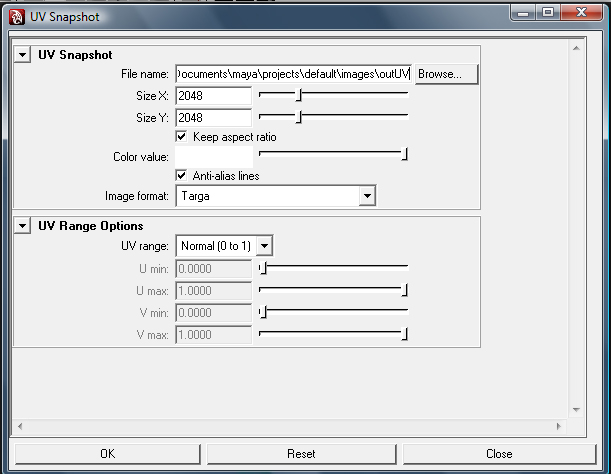
Exporting “Coca_Bottle” UV to Photoshop for bump mapping:
Select “Coca_Bottle”, and then go to “UV Texture Editor”. Once UTE pops up, go to “Polygonsà UV snapshots… set its options as following:
Step 5:
Connecting parts together:
First we merge the two halves of middle part together. Simply combine and merge them together.
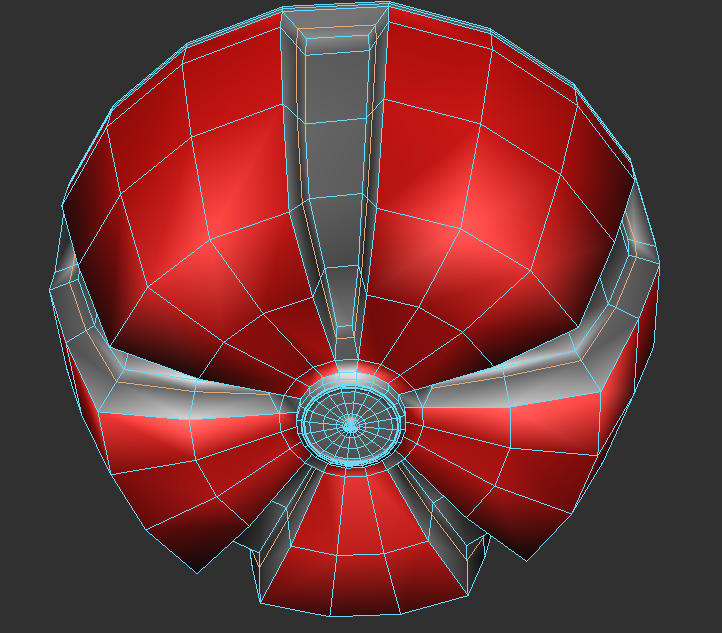
Now it is time to connect the middle part to the bottom and merge them together. As we saw earlier in this tutorial, number of subdivisions differed for both middle and bottom part. To fix this problem, we add some new edge loops to the middle part to match the edges of bottom and then we simply delete all the old edges that don’t match .
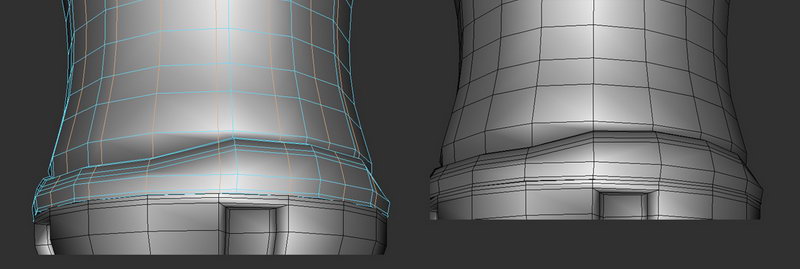
Once you are done, merge all the vertices together and extrude the middle towards inside where middle and bottom part are connected. Call the new object “Bottle”.
Step 6:
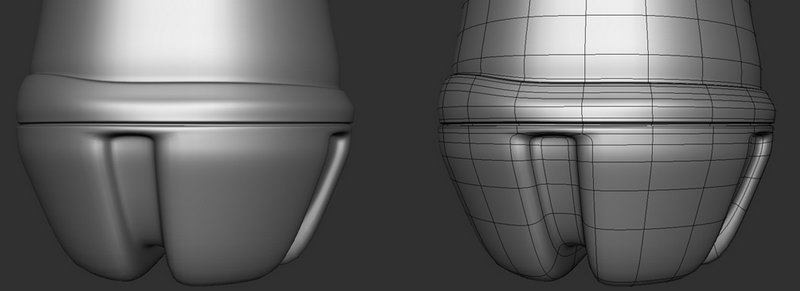
Adding extra details to middle part:
In this step, we are going to add more definition to middle part where you hold the cock.
Simply, move the vertices and extrude their faces to make a basic slot. In this model we need to have four slots.

Step 7:
Combining parts:
This is a simple step. Combine all the objects except the cap’s treads and call it “Coca_Bottle” or whatever you like. The reason we don’t combine the treads with the rest of objects is that once we apply mesh smooth to them they get rounded and it is not something we want. Also, make sure you delete all the history of the objects before combining them.
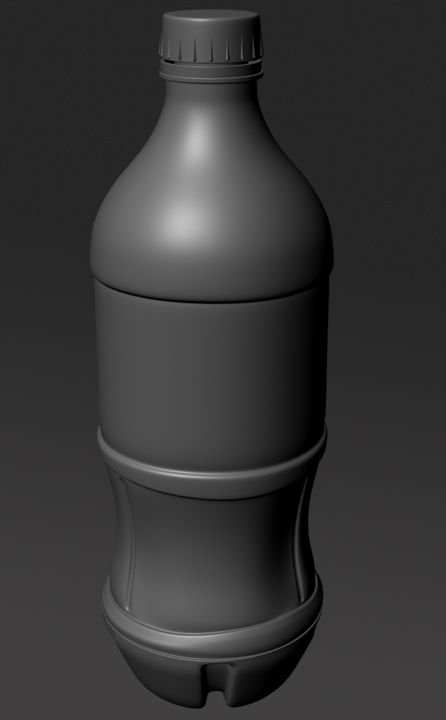
Tip: if you feel the bottle needs to be a bit fatter, make sure you hold “Ctrl” while scaling the object on “Y” axis. This way you are scaling the object on both “X” and “Z” simultaneously.
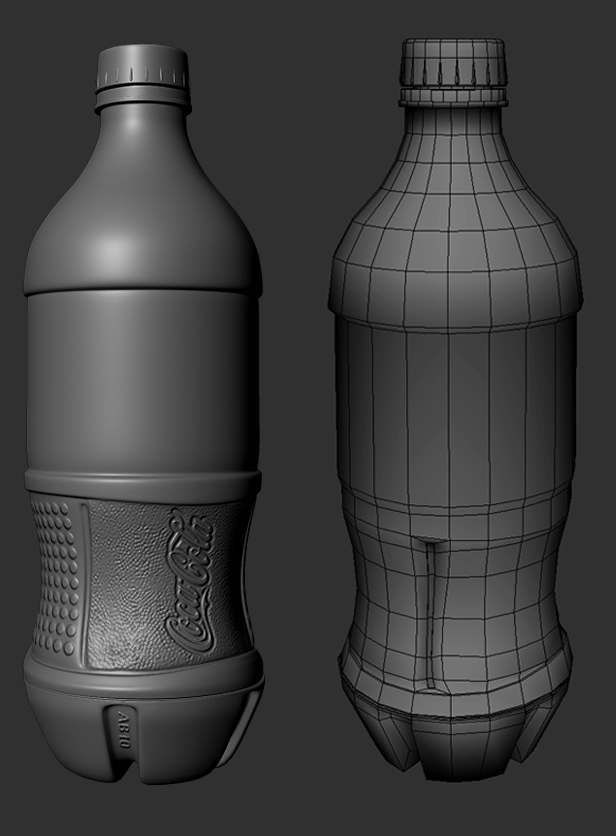
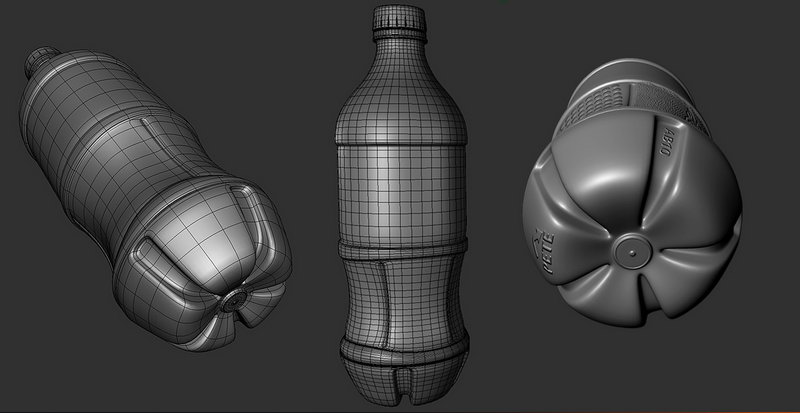
Here is the final model after applying mesh smooth. At this stage we are done with modeling part.
Step 10:
Setting up UV as a guide in Photoshop:
Once UV image is loaded in Photoshop, press “Ctrl+I” to invert the colors. Double click on the lock icon to pop up the new layer window. Call the new layer “UV_reference” and hit ok.
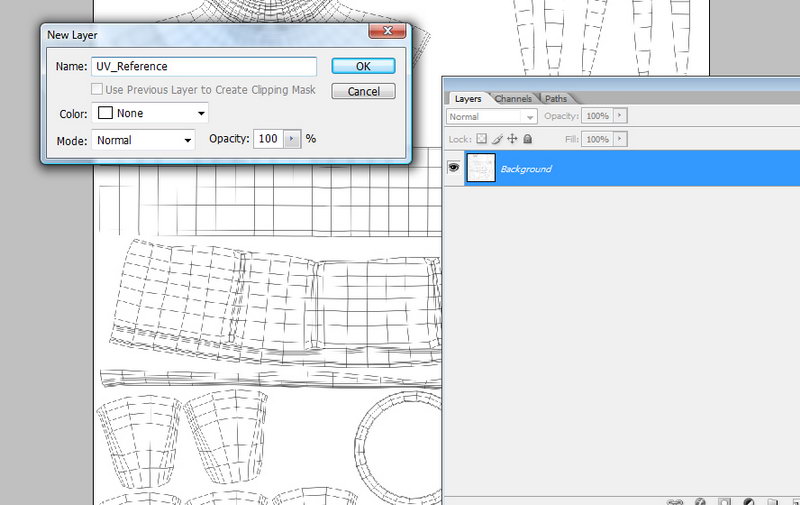
While “UV Reference” layer is selected change it’s style from “Normal” to “Multiply”, so you can see the layers underneath. Make a new layer under the “UV Reference” and call it “Bump”.

Now, we need to gather some images to draw “CocaCola Logo”, and “small dots” on our bottle.
To make the small dots under Logo I used the following texture.
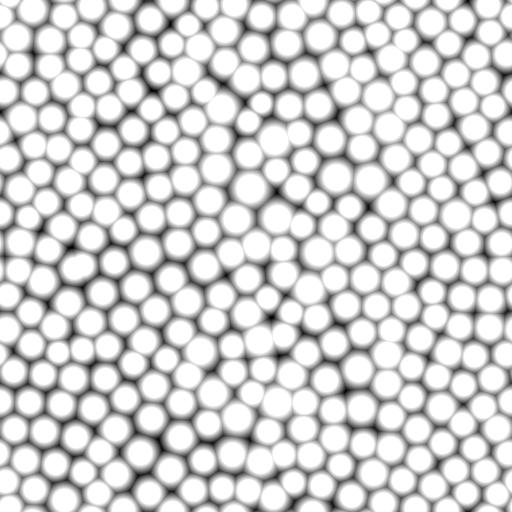
The rest of small dots can be simply made by using “Ellipse Tool” in Photoshop and duplicating them using “Alt+Drag”.
![]()
Here is the “Coca-Cola Logo” I found on Google which is a nice high resolution image with transparency. Simply, convert the color to white with black background.


Now that we have all the images we need, you can start aligning them on our UV we exported from Maya. Here is what I came up with.
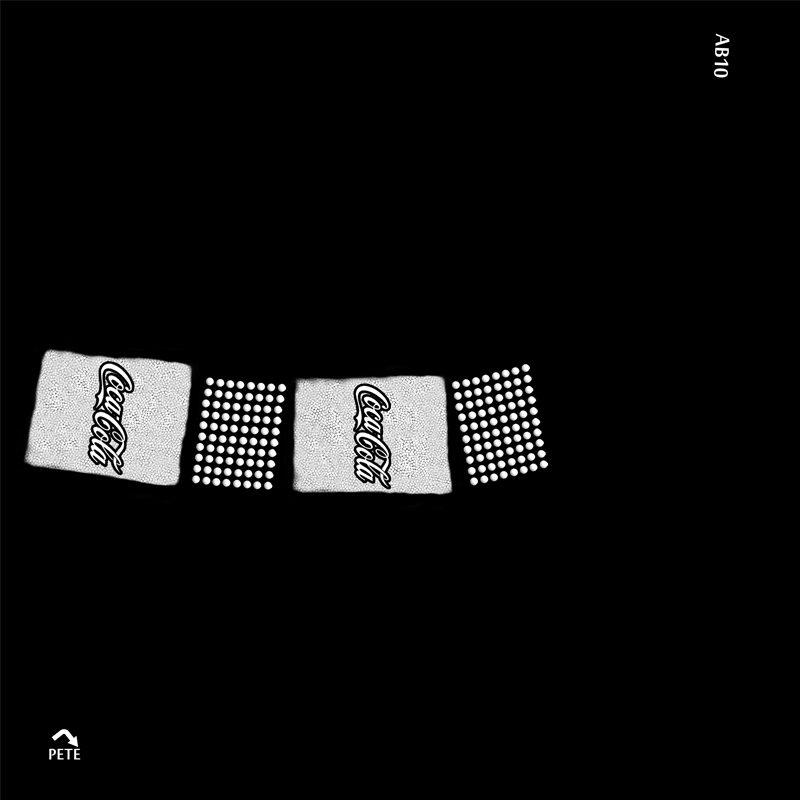
Save the final image as tga format and name it “CocaCola_Bump.tga”.
Step 11:
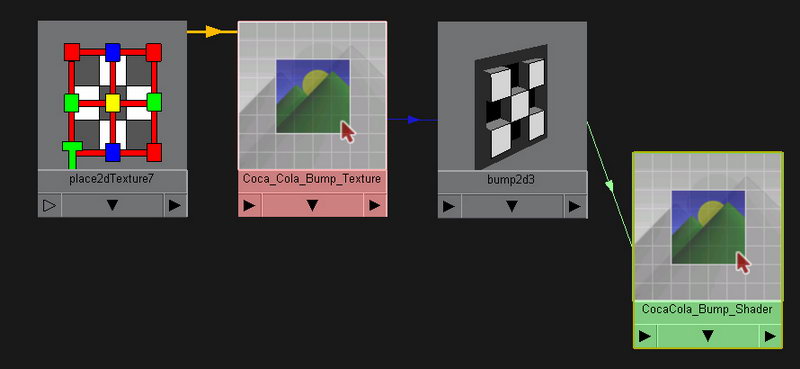
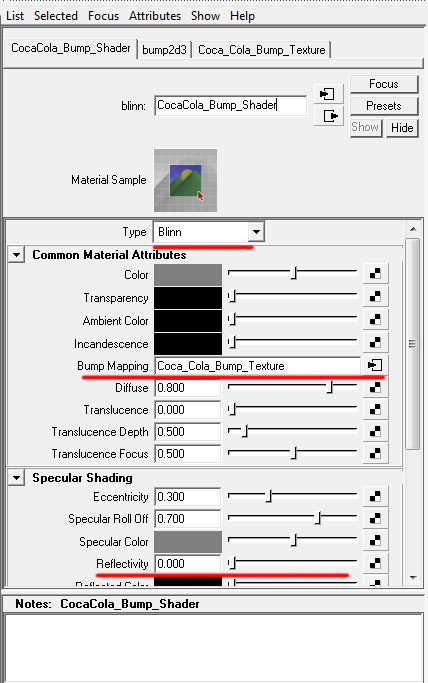
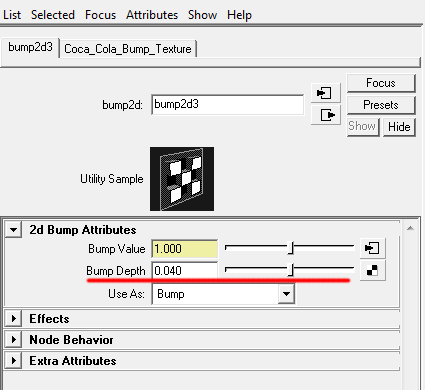
Setup bump map in Maya:
Simply make a blinn shader and apply our texture (“CocaCola_Bump.tga”) to its Bump mapping section. Try to reduce the “Bump depth” to something around 0.040. Also, make sure reflection is set to zero.
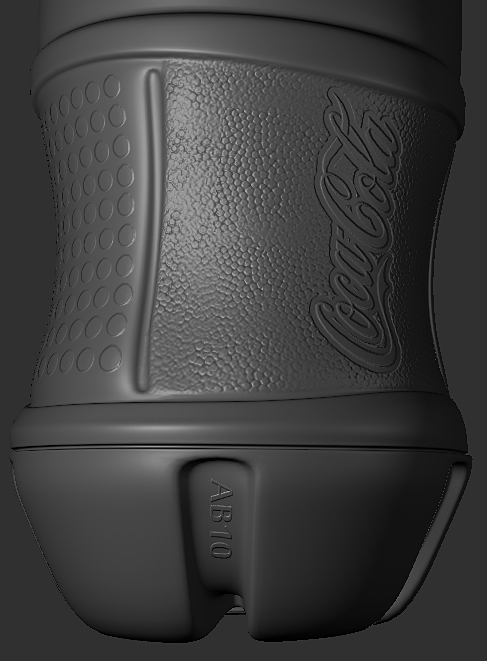
Apply the Blinn shader to our CocaCola bottle. Make sure “Smooth shade all”, “Textured”, “High quality” is check on, so we can see how our bump map looks like in the viewport. You should get something similar to this:
Conclusion:
I hope you have enjoyed this tutorial so far and information in it was useful for you. Also keep in mind that similar technique I describe here can be applied to any 3d packages out there. Please feel free to email me at hamed.sabri@gmail.com in case you have any questions or problems regarding this tutorial.

About The Author
You might be interested in