Make 3D Object with Shapes
Chapter 1: Lathe Modifier
Great For amateurs
You Need: 3dsmax Windows Knowledge; Work with Shapes Knowledge
In this lesson you will learn how make 3d objects with simple shapes. In 3dsmax, these modifiers will convert 2D lines to 3D object:
Lathe
Extrude
Bevel
Loft
Surface
……
You will learn to work with all of these modifiers but in this chapter you will become familiar with Lathe.
Let’s start. You will make simple beautiful cup.
1. Start 3ds max. If it is already running, save your work and then choose File menu > Reset. This resets the program to its default settings.
2. Click the Front view port to activate it. Its borders are highlighted with yellow.
3. Click the Min/Max Toggle found in the view port controls section at the lower right of the user interface. The Front view port is now the only view port that is displayed.
Tip: You can also use keyboard shortcuts to change your view ports. In this case, pressing F on the keyboard changes the view port from Perspective to Front.
4. On the Create panel, click the Shapes button and choose Line from the Object Type rollout.
5. On the toolbar, click the Snap fly out and choose the 2D snap type. The 2D Snap Toggle is located on a fly out of 2D/3D snap options.
6. Right-click the 2D Snap Toggle. The Grid and Snap Settings dialog appears.
7. On the dialog’s Snaps tab, Grid Points should be on by default. Turn on Grid Lines as well.
8. Close the Grid and Snap Settings dialog by clicking the X button in the upper-right corner of the dialog’s window.
9. On the create panel, click the shapes button and choose Line from the object type rollout, then place your cursor approximatelyin the center of viewport (x,y,z=0).
10. Press the mouse button and drag line sample Figure1.
11. At the end, press right-click.
12. On the menu bar choose Modifiers > Patch/ Spline Editing >Lathe.
Tip: You can also go to modifier panel and from drop down list, select lathe.
Tip: To read details of Lathe modifier parameters go to 3dmaxworker group > Files and get Lathe_modifier.pdf

Figure 1
13. After you added lathe, your 2D shape will appear in 3D. What happening? When you add lathe to 2d shapes, it will rotating that shape around an axis that you chose.
Tip: Always if you want having Solid object, first and last vertex of your shape must be on axis circulation.
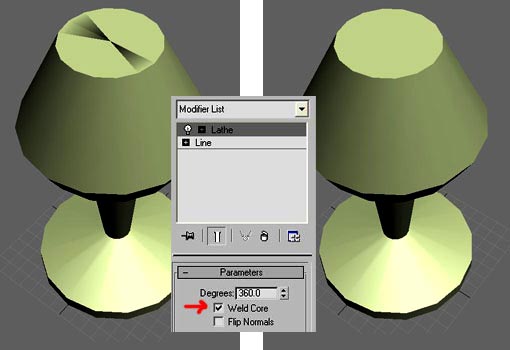
If you look at top and down of this object you will see in the face it have a problem and isn’t pure (Figure 2). For make it true, go to modifier panel and select lathe to lathe parameters appear. Tick weld core check box and see again top and down of your object (Figure 3).
We wish make, Cup and it isn’t solid so we must make it true.
14. Go back to 2D shape with delete Lathe modifier from the stack by pressing remove modifier from the stack button (Figure 4).
15. From selection panel select segment or from modifier stack click on plus-sign and select segment or Right-click on 2d shape and select segment (Figure 5).
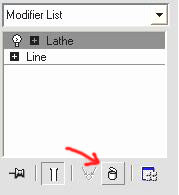
Figure 5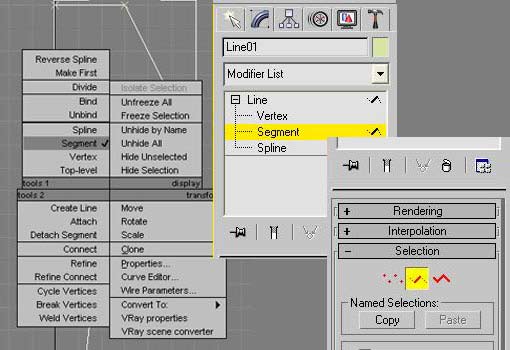
16. Delete segment that marked with sign in Figure6.
17. From Geometry rollout click on create line.
18. On the toolbar turn on 2D snap if it isn’t on. Right click the 2D snap toggle. In The Grid and Snap Settings dialog turn on Vertex as well and close windows.

19. Move mouse over the top vertex. When blue plus-sign appears, click left mouse to create line that show in Figure 7. At the end Right-click to end create line.
20. Again add lathe to 2D shape.
21. From parameters rollout, align group click on Min and select weld core.

22. Now our cup style is true but it isn’t smooth. For that come back to line by select Line in modifier stack. Your object will back to 2D (Figure 8).
Tip: Space between new line and old line will to specify thickness of your object.
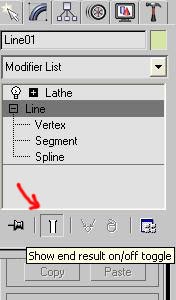
Tip: If you have some modifier in one object for example modifier A and B that B is upper modifier, when you select A, effect off B will turn off. If you want select A and also see B effect on your object you must turn on Show end result on/off toggle (Figure9).
Figure 8 Figure 9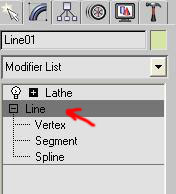
23. Go to Vertex Level from selection rollout (or other ways that I said in 14).
24. Select signing vertex in Figure 10.
25. From Geometry rollout click on Fillet.
26. Come back mouse over those vertexes. Fillet-sign will appear.
27. Move mouse up to smooth those vertexes.
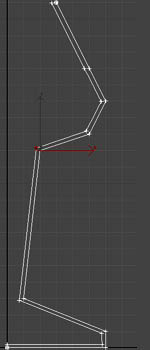
Figure 10
Now change every vertex that must be smooth (Figure 11).
28. Go to other panels to quit from vertex level or select it again.
29. Now our cup is better but yet isn’t smooth. It’s easy to make it smooth. Make sure your object selected and go to modify panel and select lathe.

Figure 11
30. From parameters rollout, change smooth number to 36. That’s all.
31. It is good but isn’t Nice. At this time it’s your taste to make finally object. For example my cup isn’t exquisite and for make true that I will change vertex or segments position or changing Axis position (Figure 12).
Tip: You can find Axis from click on plus-sign off Lathe.
Practice: Make optional scene that must all things create with this method then get it material and send it to this tutorial forum page in 3dm3.

Figure 12
You learn in this lesson use line to create 3d object by lathe. I hope it be useful and could help you. Try to make other object with this method. You will find that can create great models and scenes with this easy way.
Be Successful
Mohammad Saatchi

All rights reserved for Mohammad Saatchi, http://www.msaatchi.com andhttp://www.3dm3.com


About The Author
You might be interested in