Making of Monk Rhapsody
This is a tutorial step-by-step of “Monk Rhapsody”, this work has been all about colors theory and composition
Introduction

Hello everybody, this is a tutorial step-by-step of “Monk Rhapsody”, this work has been all about colors theory and composition, so that’s a tutorial mostly on them but I have included some technical tips too, anyways, let’s get it started!
STEP 1: THE COMPOSITION
I had already the image quite clear in my mind so I started off with placing the colors without drawing any lines or layout. I use this approach quite a lot, it helps me to visualize the image and his colors much better. In the image below are depicted the key lines of this composition:


As you can see the composition is simple but is going to get more articulate later on. (QUICK TIPS: always start with a simple composition then add more complexity to the scene if you want, just make sure that your image is readable by anyone at first sight, moreover a complicated composition is always difficult to handle because you may loose your initial idea in the middle of it).
Another simple but crucial thing is that I’ve distorted a bit the lines of the carpet as it goes up by the light making them and the whole image more dynamic and to converge the attention on the “ascension”.
STEP 2: THE BACKGROUND
I’ve painted the background and the monk with a square brush that simulate the oil style and organized them in two different layers, now we have got just two of them but later on we will have quite an indecent number of them (I always need to keep an eye on them while I am working, especially if I am doing a big painting like that one).
EASY TIPS: to select levels faster, point the part of the image that you want to select then press command keep holding it and Right Click and choose the level that you want
The colors are placed in a simple clear way, perfect! We can now proceed with the layout of the background.
Using a sphere brush I start to define the architecture of the background in a new layer .


Now I create another layer on top of the layout one and start painting on it.
I added some shadows on the carpet to define the main waves caused by this mystical energy coming from the light up in the image.
I painted just the mid tones without caring about adding details whatsoever, I’m now trying to find a balance between the colors of the column and the red carpet.
You have to be really careful about that because we need to keep in mind our main focus point, the monk, so don’t be carried away by the idea of adding all the details right away, just compose your image gradually.

STEP 3: THE MONK AND THE DECOMPOSITION
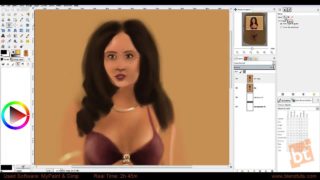
Ok, now we have to define the monk a bit just to pull him out the canvas, so lets add some stuff such as shadows, hair and so on.
We are now ready to add the decomposition which is basically the imagination off the monk that spreads out of his mind generating the most strange images, and to illustrate that, the decomposition itself needs a bit of order, so here’s a pic of the lines that I used to drive it, just simplified.
The main problem with that was to find suitable colors and a simple style, without spoiling the rest of the composition. To do that you have to really visualize colors and shapes, you can try different ways, one of them is to close your eyes and try to visualize it and when you are ready just paint down your idea trying to make it as much closer to the idea you have in mind. If it doesn’t work try to help yourself with sketching your ideas on paper just to keep away your eyes from the screen for a bit and refreshing your ideas dealing with a different media that in a way impose a different kind of mental process.

Righty, I’m now detailing the roses that comes from the carpet. First of all I decided not to add other flowers or painting other kind of flowers with different colors than red because they would have been too catchy and distracted from the main point which is the monk and his decomposition.
You may notice that inside the left flower there’s an eye that for me represent a kind of reincarnation of the monk due to the fact that he’s disappearing, but introducing an element like that we need some more composition studies, so I sorted it out pointing it in the monk’s direction to create a sort of side relationship between them and tried to fit it in the red of the flower in order not to attract at first sight, leaving the main relationship between the monk and the decomposition the most readable yet.
Most of the time it’s all a matter of prioritizing different stories in your image and find other ways to tell the sub-stories thanks to composition and colors.
Here’s a pencil sketch that I’ve done to figure out the expression of the flower, I worked on the petal that is a kind of eyebrows for it, it behaves the same way so it was important to give it the right expression.


STEP 4: THE CARPET
Now it’s carpet time! Well, I created another level and started painting the basic lines over it, I didn’t use any texture for the central graphics of it because I wanted to create my own theme.
I created every flower on different levels over the carpet’s layout, after the creation of a flower I just duplicated the level and then mirrored on the opposite side or wherever I needed.
Flower by flower I finished the composition, then merged in different layers and adapted to the irregular surface of the carpet so I selected individually every flower layer and modified it, Ctrl+T on the layer then use either the Distort or Warp modifier bending them to follow the waves of the carpet.

For the edge-pattern at each side of the carpet I used a small texture instead, that I duplicated and modified every time, I didn’t use the liquify modifier because the problem with it is that you can’t see the level below and I needed to follow the volumes of the carpet (placed on the level below) and keep the texture separated by it. The texture duplication and modifying system payed off in the end despite his slowness (which is not that awful after you get used to it, it’s just a matter of workflow).
So, up until that point I had the left line complete but I had quite a lot of levels in my UI so I merged all of them copied and then mirrored to the opposite side of the carpet then tweaked a bit, done!
Here’s where we are:

Now I’ve used a texture layering for the carpet’s fiber, here’s a shot with the set-up that I’ve used to render the fiber.
I converted two of them into black and white to simulate a sort of occlusion map to refine the intersections of the fibers.

STEP 5: REFINING THE DETAILS
For the flowers on the bottom of the image I didn’t use any kind of texture, just a simple brush and lots of patience to define all the intersection among the wires of the carpet that are now “animated”.

We have to refine pretty much everything, columns, flowers and the monk and his drapery by adding the darkest shadow and brightest lights all over the image keeping in mind the main light point. Sometimes guessing possible reflection and refraction because, unfortunately, your reference will never be perfect.

Now I decided to add those little squares meant to be pixel that are detaching off the monk just quite later in the process ( just personal (crazy) taste: I thought that was nicer than the classic dust in the cone of light and it would give a bit of a old school taste as images from games of the 80’s such as Super mario and so on) .
I used simply the rectangle tool of Ps then duplicated and moved about to create a side decomposition to accompany the main one, then grouped them all.
Here’s a shot of my layers order up until now:

STEP 6: LIGHTS UP!
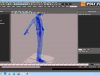
It’s almost finished, we have now to add the main light and some volumetric shadows by the monk’s body to enhance the sense of levitation.
I wanted a particular effect, a kind of spread streams of light.
1. Create in a new layer a semicircle with the pen tool and choose the white color, because that’s going to be the color of the light, then right click on it Stroke Path choose Brush in the list, then ok. Now we have a semicircle.

2.Now Filter —> Blur —> Gaussian Blur, put it around 7 pixels then ok, and what we’ve got is a kind of glow around the shape but it’s not enough yet. Then I added some outer glow in the Fx level options to make it a bit more bright.

3.Now we have to turn the shape by 90 degrees that’s because we are about to use the Wind filter and this particular filter works just from right to left or left to right.
So, Filter —> Stylize —> Wind, set it to Wind then right to left then ok, you’ll now see the rays, wonderful! I repeated the command again to make them as long as I wanted.

4.Free Transformation on the light then Warp and a bit of tweaking to bend the rays on the outside.

5.I duplicated the light then in the Fx layer options I chose Color Overlay and set it to yellow then overlaid it to the white one playing with them with the free transformation modifier and the Warp modifier to find a good compromise.

6.The halo: just two curves with the opacity set to 45% for the white one and 20% for the brownish one.

The shadows are simply painted using a square brush with 45% opacity. After that the Smudge Tool helped me to smooth their edges a bit ( EASY TIPS: this tool is particularly useful to blend different brush strokes together and attain a more realistic render while you are painting, always pay attention not to exaggerate with that, use it just to refine things ).

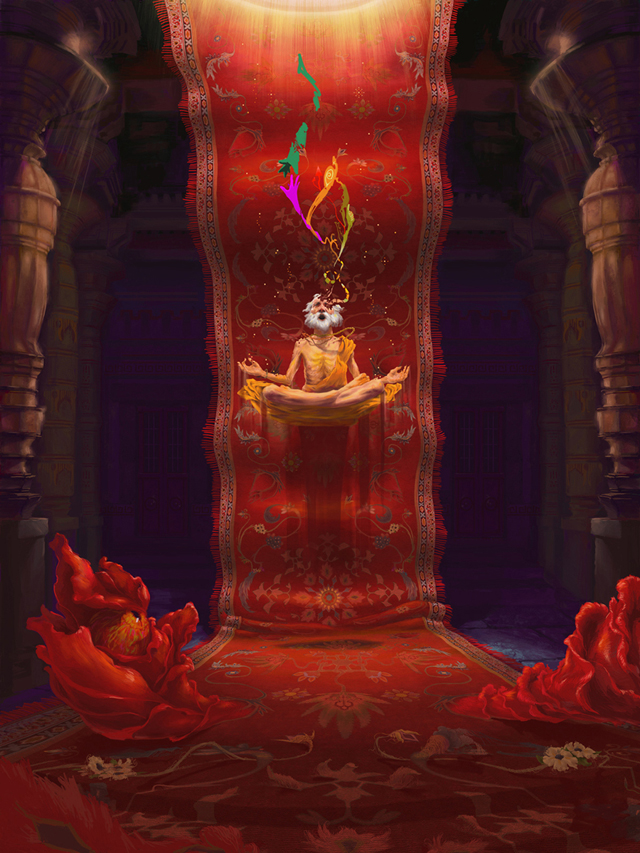
STEP 7: FINISHED

Just remember to keep your composition simple but strong, and your UI tide to accelerate your workflow, but most important: have fun doing any work you are doing or you will do!

About The Author
You might be interested in