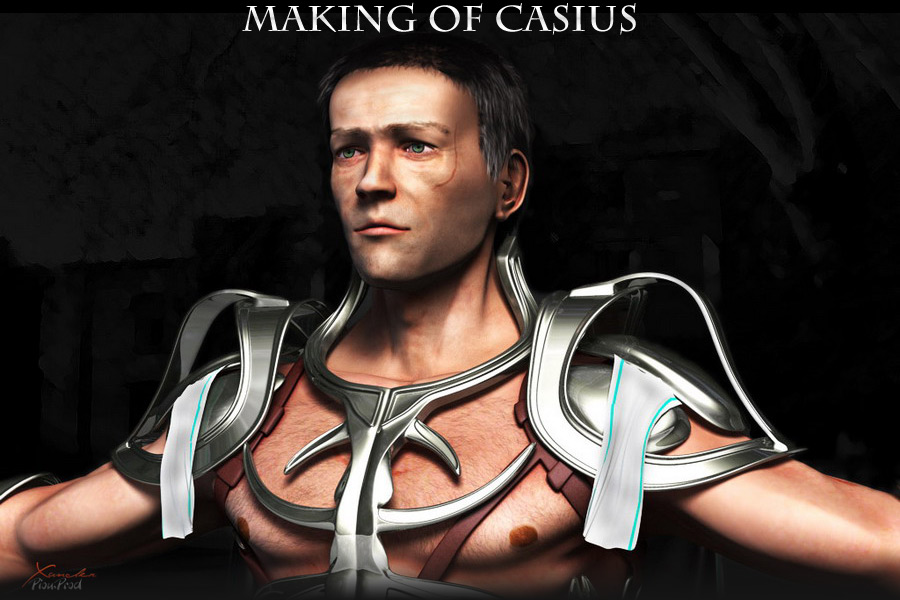
Making of Casius
The action will take place in the past. Caius could look like a Roman but it is not really one (his sword and his armour do not fit with the style). This character is the first of three main characters of a wedding which will gather: Caius – mother nature – a child.
|
The action will take place in the past. Caius could look like a Roman but it is not really one (his sword and his armour do not fit with the style). This character is the first of three main characters of a wedding which will gather: Caius – mother nature – a child. Used SoftwareCinema 4D 10 for modeling and lighting. ModelingBefore starting, I collect a lot of information about the human body on the web or by buying books on the anatomy. For modeling I started from a cube which I gave the basic shape of the human body. I use the following tools: extrudes, knife, move, rotate, smooth.
There I start to give more details to the body, It takes a lot time and patience to place each polygon:
DetailsThere I start to tackle modeling to add more details. I use the same tools as well as a good amount of patience. |
|
|
I start with the hands:
|
Then the feet:
|
|
Modeling the face I used photos as a reference as to have the correct proportion.
On the pictures below body modelling detailed shows: The modeling of the body being finished, I gave him an armour.
|
|
|
After, I go to ZBrush to add small details that will give more realism to the character:
Back to ZBrush, I create a basic texture then I add details with Bodypaint and make some adjustment in Photoshop.
|
|
To give a little more realism to the skin, I use the Vreelskin plugin. http://www.vreel-3d.de/plugins/VreelSkin/links.html I haven’t activated the translucency effect yet to save render time. For the hair, I use the cinema4D Hair plugin and I brush my hairs to get the desired result. This module is really great and fast it gives very good results in no time.
Lighting and RenderingFor lighting, I used a three point lighting . The main light is a area light with area shadow. The two others are omni with soft shadow. I also use a very weak GI and some ambient occlusion (for the skin this one is in shades of red)
|
|
| For the final picture, I adjusted the contrasts in Photoshop to get the image I am looking for and that looks less 3d-ish. I did not use cinema4D’s multi-pass option but I will use it later on to have better control.
Profile: http://xanderpiou.3dm3.com/ |
About me
My name is Alexandre De oliveira, I am 31 years old. I am Portuguese and I live in a beautiful country which is called France. At this time I am still a hobbyist but I will become a professional in 2008. I started to learn the 3D as autodidact in 2001 with cinema4D 5, with the help of the French Cinema4D community: http://www.frenchcinema4d.fr/ Release 8 was a huge evolution for me, it really helped to get my ideas on screen. e-mail: liquidlighta@aol.com |


 Texturing


