Making of Calamity Jane
This tutorial is a project overview for my imageCalamity Jane . This image is a personal project maybe you can say just make for for fun. In this tutorial I will not go in detail explanation, assuming that reader has some basic knowledge of modeling and rendering …
IntroductionHello! My name is Hatice Bayramoglu and I am a 3D artist and illustrator from Turkey. You remember me maybe by my first tutorial about human head modeling (‘Head modeling with 3dsmax’ by Hatice Bayramoglu ) and I will do a simple tutoriarial for you. This tutorial is a project overview for my image“Calamity Jane ”. This image is a personal project maybe you can say just make for for fun. In this tutorial I will not go in detail explanation, assuming that reader has some basic knowledge of modeling and rendering and texturing in any 3dsoftware. The method I used here is called edge loop modelling with 3dsmax and for the render I used vray and some use of Photoshop. Software Used: 3ds Max & Photoshop &Deep UV, Vray. Here are some sketches about character. I made some color sketch to capture the idea of what would look like. I used Photoshop. |
|
|
|
|
|
|
 |
|
|
|
ModelingLet’s begin with modeling process and make some google search. I worked on the characters cloth first. |
|
 |
 |


| We are not modeling from just one viewport, so dont forget to check the model from all viewports | |
|
|
|
 |
 |
 |
 |
 |
 |
 |
 |

 |
 |
 |
 |
|
|
|
| Next, I modeled the gun model. Again, I kept the geometry simple as you see. | |
 |
 |
|
|
|


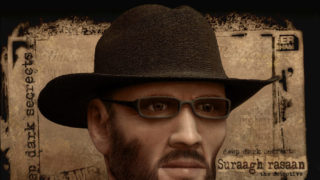
| And now for the head modeling. There are several good techniques of the modellings of the head but I always prefer edge loop modelling technique. I used Sherpical mapping and then adjuste in uvw unwrap and I ofcourse use some Deep UV. | |
 |
 |
 |
 |
| After I finished modeling the character and after adjustment of the textures I applyed the skin modifier and the use the Skin Utilities. | |
 |
 |
 |
 |
| And now I do think I dont like this camera angle. But when I was trying to some different camera angles I have decide to change the camera angle totally. And I decide to add a ghost model and add some more hangman’s Nooses. And because of this change I have changed the pose of the character too. For the hangman’s Noose here are setting in the below images. Start with just a simple circle and try to make iy as shown in the first image after that extrude it. After that draw another line like the picture. And add the first line a Pathdeform. Then rotate as shown on the picture. And other arrangement for the hangman’s noose will be as shown on these pictures. Exit from the sub-object kevel and add extrude modifier to the object from Modifier List. Set the parameters as follows (left fig below). Apply Twist modifier from Modifier List and set Twist Angle as 4544.5 and Twist Axis as Z. | |
 |
 |
 |
 |
|
And now for the ghost modeling. Again, I kept the geometry simple |
|
|
|
|
| Rendering was done with a simple settings with Vray. Here are some screenshots about the lights. Here you can see characters pose and the camera angle. (right fig below) | |
 |
 |
|
And heres the final image, I hope you found this tutorial Making Of interesting. Thank you for reading. Related linksProfile: eydi.3dm3.com |
|
|
|
|


About The Author
You might be interested in