Making of the Breakfast Wars
In this tutorial I will be showing the process and some techniques I generally use to create my artwork. Starting at how I approach sketching my initial designs, I will detail the steps I take that lead to the final rendering, I hope you can apply this method to a variety of your art projects and achieve consistently good results. Having been influenced concept artists the likes of Harald Belker and Scott Robertson when I first got into this stuff i’m sure you will see some of those influences in my process.
f
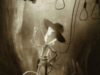
IntroductionIn this tutorial I will be showing the process and some techniques I generally use to create my artwork. Starting at how I approach sketching my initial designs, I will detail the steps I take that lead to the final rendering, I hope you can apply this method to a variety of your art projects and achieve consistently good results. Having been influenced concept artists the likes of Harald Belker and Scott Robertson when I first got into this stuff i’m sure you will see some of those influences in my process. SketchingI usually start off with a pencil and paper to work out my idea before heading into Photoshop. For this illustration I looked at a lot of different photos of kitchen appliances in deciding how the robots in a kitchen could look. Our knives selection guide provides with most best review and allows you to pick up best model for your kitchen. It helped to draw some juicers and toasters from reference to warm up and to better understand my subject matter before I jumped into the designing the bots. One of the design problems I faced was how to make plain kitchen appliances look like menacing, lively robots. After looking at some picture of animals I decided that a frog and a crab stance would work well for the toaster and the juicer respectively. Whenever I design I always focus on the subject having a great silhouette or outline so the frog and crab design elements just complement that. |
 |
| Before I add any light or dark tones to the image I set the sketch layer to multiply and lower the opacity. I then create flat base colors on a layer to block out the different parts of the subject and I then place it under the sketch layer. It also works as a selection mask for when we begin to add value to the image. This is how I start almost all my illustrations. |
 |
| Next, I pick where my light source will come from and I create a layer where I begin shading. I am aware that step seems like a big jump from the last one. All I did in this step was simply mask out one part at a time and shade the robots while working only with a soft black brush. If I am shading a complicated part I will create a new layer to work on the tricky part and merge it down to the main shadow layer when I’m happy with it. While you are working on this layer remember that shadow consistency is the key to realism. Consider your lighting, is it soft light or a direct hard light so that it creates sharp cast shadows? Where is the most of the light coming from? In our case the scene is back lit. And don’t be afraid to be generous with your shadows here, its OK to start dark as we move onto the light layer. |
 |
| Much like the previous step, here in the light/ reflection layer you slowly buildup definition by masking out the parts one by one while working only in white this time. As with the shadow layer is helps to work in multiple layers for more control before merging it all into the light layer. The bots have highly reflective chrome and glossy surfaces so it is helpful to think of the robots as reflecting the light in their surroundings and not as a matte form reflecting the light of a singular light source. Don’t forget that light will also reflect off the brightly lit counter top and onto the bots. Use a hard brush for the most part in this stage and not a soft brush because the nature of glossy materials call for hard edged reflections. |
 |
| Let’s focus on the toaster for a bit now. Seeing that the toaster didn’t have enough going on to appear like a convincing metal object I used a little trick to add distorted reflections that are characteristic of chrome surfaces. | |
 |
|
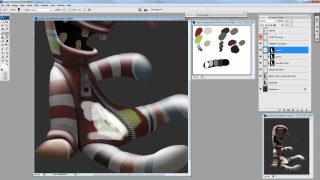
| To make this effect I set my brush to 100% opacity and brushed some soft light and dark gray tones on a layer over the toaster. I then selected the magic wand tool and set it at a tolerance of 2 or 3 and I begin clicking and deleting the parts that the magic wand has selected for me. As you can see the selections wrap around nicely and I am left with an effect that works well. | |
 |
|
| After finishing with the last step I realized that the side of toaster was still too dark so I worked in a stronger reflection into the toaster. For the hot toaster coils I drew out the shapes using the pen tool, added orange stroke to it and applied an Outer Glow layer effect to it. (left fig. below) In this step I fully flesh out the bread slices. At first I was just going to just cut out the slice of toast from a photo but it didn’t look good so I ended up sampling colors from the bread photo using the eyedropper tool instead and coloring the bread that way. I added some steam/smoke coming out of the toaster for some dynamism, any kind of movement is good in a composition like this. I also added some yellow lighting around the toaster because it was starting to look too monochromatic. (right fig. below) | |
 |
 |
| I move back to the juicer and add some yellow rim-lighting as I did with the toaster. For the oranges, I sampled colors from a photo reference and lit them to my liking, much like I did with the slices of toast. | |
 |
|
| For the cascade of orange juice I started by painting out the stream in a solid orange color and I then proceeded to add the highlights on the gush of juice by hand but they weren’t giving me the results I wanted so I tried a quick shortcut. I opened layer styles for the OJ layer and I applied a bevel and emboss effect with the texture option box ticked. I liked the look so I kept it to develop further.(left fig below) I separated the bevel and emboss highlights in to a layer and offset the layer upwards so it would more accurately depict where the light was coming from. I also softened the highlights a little and adjusted the color and size of the stream (right fig below) | |
 |
 |
| As I am almost finished with the illustration it is time to incorporate a background. I decide that I would use a real photo of a kitchen to serve as a backdrop for the warring bots as that would add to the realism of the bots themselves. I immediately see that it wont work as the photo is to overpowering in its details. | |
 |
|
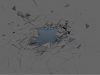
| I try a heavy lens blur on the image and it looked good so I add a marble texture to the lower part of the picture and blur its edge. Now I have a nice counter-top. To further integrate the counter-top into the image I brush some white streaks on a layer over the marble texture and run a small hard edge eraser through it. I add dark scratches to the war-torn counter to add to the feel. | |
 |
|
| I add the final touches like their cast shadows and a slight reflection. I moved the toaster’s shadow lower on its right side to give the illusion that his right feet are off the ground and he is about to do a dodge move. I put in some minor details such as the markings on the side of the toaster and I finish off the image by adding a ‘levels’ adjustment layer to enhance the contrast and I’m done. | |
 |
|
Related linksEmail: hubbache@hotmail.com |
|

About The Author
You might be interested in