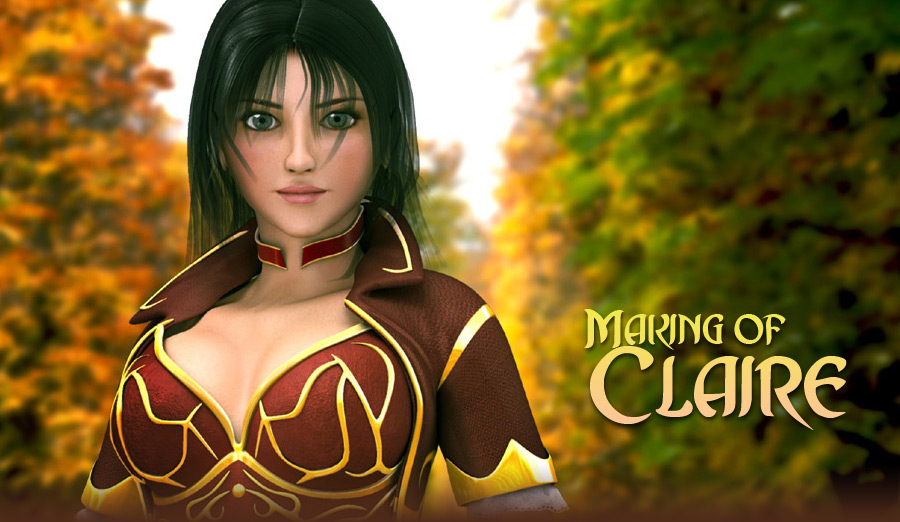
Making of Claire
On this Claire model i use 3DS Max, Mudbox with some sculpting and Mentay Ray as renderer. Finally Photoshop to composite it. In doing Claire, I try to apply knowledge that i learnt during my work into it.

Making of ClaireOn this Claire model i use 3DS Max, Mudbox with some sculpting and Mentay Ray as renderer. Finally Photoshop to composite it. In doing Claire, I try to apply knowledge that i learnt during my work into it. ConceptMy inspiration came from Lineage 2. Beautiful elfs with very nice sexy outfit doing their fighting. From there do some sketches and at the same time do up the blue print of Claire. I like female character with long black hair and big eyes. So I did up a fast sketch and color test to see the feel of it. ModellingI construct the Claire rather fast. Before i do texturing, i usually do a rought lighting set up. I started this practice when i read from one of my favourite artist Soa Lee as she mention she did lighting and texturing concurrently. My lighting set is quite simple. Bascially is 1 main light, 1 fill light and 1 skylight with final gather of 50 samples. It usually took ard 45s to render on my lousy comp. |
|
|

Hair settingsPlanar with opacity hair was selected as i wanted to push how far can i go with planar hair. At the same time i did try the hair FX in 3DSMax, but it was quite a failure as i got no knowlegde of how to style the hair nicely. The planar hair setup was rather straight forward. An alpha and a normal bump map. So the whole hair is base on this 2 maps but of course with different tiling base on the planar hair postion. The diffuse was a fallout map with a dark gray and almost black color in the slot. Settings see below. |
|
I using standard shader for the skin at first. No matter how i tweak it still kinda looks flat to me. End up i have to use SSS shader which i never use before. Well, after some playing around with the shader manage to something i like.
After the texturing i do up 3 rough pose.
|
Scene setupAs you can see from the 3 pose, the cloth and the hair look quite wierd. Really hard a hard time trying to get the hair and cloth to SIM to what i want. I not very good at this kind of technical stuff. Anyway, after log down on the pose, i begin my final lighting arrangement base on the background picture i chose and try to match the lighting as close as possible.
|

Judging from the background picture lighting there is no sharp shadow. Looks render setup window below. There are not many passes for Claire. There is only a complete pass and an Ambient occulsion pass.
|
|
|
CompositingCorrect me if i am wrong as occulsion don’t read opacity. That why in my occulsion pass i excluded the hair. As the inner white cloth that Claire was wearing has opacity map on it so i have to do some masking to it. Color correction was apply as well as DOF to apply to the background so make Claire blend into the surrounding.
|

About the AuthorMy name is Dias Leong. Currently working in Singapore as an 3d Artist. Before i was a 3d Artist, i was a web/graphic designer. Got really bored about publishing line and decided to get into the CG industry, i undergo a 9 mth intensive course and finally got into my current company as an 3d Artist. At the moment i’m seeking for chances to work in game company. In the mean of search for opportunity, will be constantly upgrading myself on the skills set and aesthetic sense. Portfolio: http://kokuhen.cgsociety.org |


