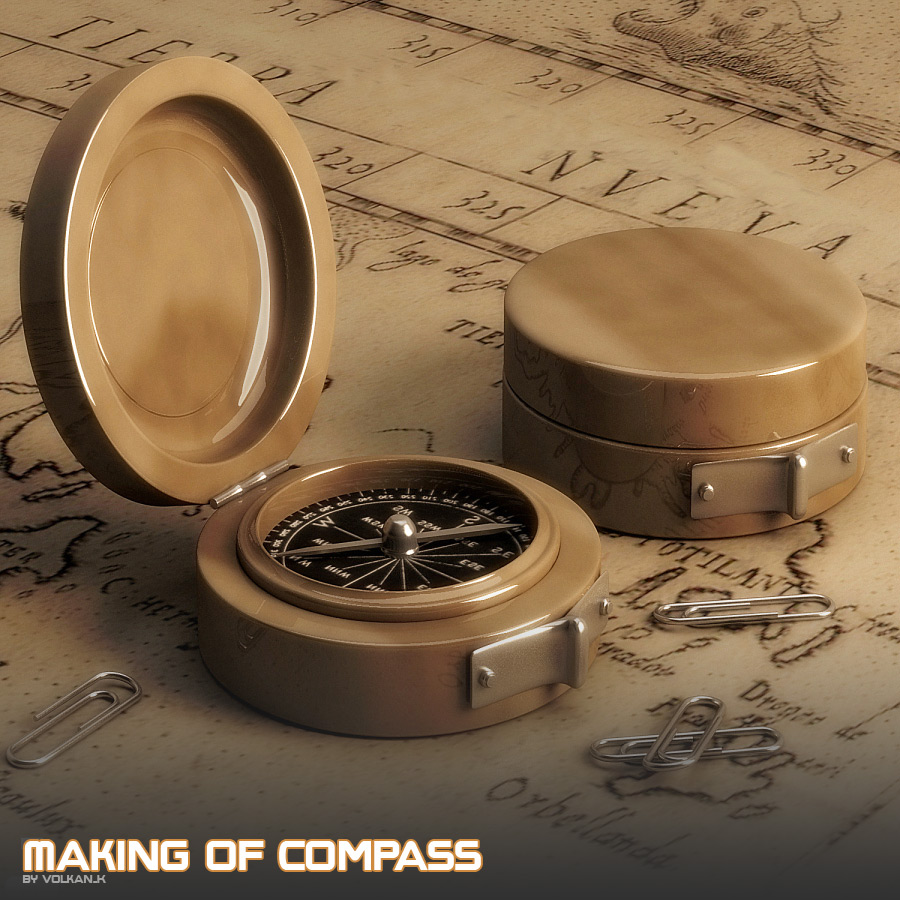
Making of Compass
I am glad to share the development process of my last work, ‘Compass and Paperclip’
|
Hi everybody, I am Volkan KACAR. I am glad to share the development process of my last work, ‘Compass and Paperclip’ – I hope you like it! ConceptI want to explain why I have chosen a scene for modeling and why I have used the Modo: First of all, I had seen too many compass types in my life, thanks to my grandfather :) and I was always thinking about to model a compass but because of my works I always forgot or didn’t have time to do it. And one day one of my good friends Cem Tezcan told me about Modo, especially its advanced modeling tools. So I have started to study Modo on modeling. Either its interface that never bores user while modeling and its shortcut keys are all in fit. I have been a 3ds Max user for 9 years and I decided to make my scene with Modo rather than 3ds Max. And my “Compass & Paperclip” work became the first serious work that I made with Modo. But on the other hand, I didn’t abandon the very powerful 3ds max :)) I want to use both 3ds Max and Modo on my future works. Now you may understand why I didn’t use a reference image because as I mention before I have seen too many compasses so I didn’t need to search for a reference photo and I believe that is more improvising for me. We can get on to work now. Modelling the CompassI didn’t use any reference images in my work; I simply started by adding a cylinder with a low number of segments into scene – I’ll smooth the mesh later. This is the reason for using a cylinder with a low number of segments, as cylinders with a high number of segments can slow down the software unnecessarily.
I then switched to Poly mode and modelled easily using the Bevel function (the keyboard shortcut for Bevel is "B"). The shortcuts in modo are what make it a much stronger programme.
Afterwards, I made my model smoother by using the Smooth tool (the shortcut for this is the Tab key). Some edges however should be sharper than others – there are a few ways to achieve this. I sharpened the edges that I wanted to sharpen with the Edge Weight tool.
|
|
While modelling the Metal accessory in front of the camera, I switched to Poly mode, selected front faces, and copied them onto a new layer as a different object, using the Ctrl + C shortcut.
I then bent the model using Bend Deform and finished the accessory using Bevel plus Subdivision.
At this point, the compass object was complete, but I also needed a compass with its lid closed. To do this, I used the Duplicate Clone function and fixed it with Rotate – this way I had a compass with a closed lid.
|
Modelling the PaperclipNow it’s time to explain the paperclip object. To be honest, modelling this object was quite easy: first, I started by adding a cylinder into the scene. Then, in Poly mode, I selected the face at the front and modelled my paperclip with the help of the Duplicate Curve Extrude function.
Texturing and RenderingTo achieve a good render, I first had to create a studio environment. For the first step, I made a plane and lifted the edges with the Extend function (the shortcut key for this is Z). I then bevelled (B) the borders.
I then added two planes, which I aimed to use as light cards. In my opinion, for this type of scene, this lighting method achieves more realism than other approaches can. I switched to the Shader tree, enabled Luminious Intensity and set the colour of the light to Luminous Color.
|
|
I prepared textures of objects by giving a material name to each object, switched to the Shader tree, and prepared their textures. I used the layer system in the Shader tree. The compass object used wood and noise materials, and for the ground I used an old map texture. For me, preparing textures in modo is always fun!
I made the best configurations in order to achieve a good render. The modo rendering system is really fast and high quality. For this image, the render time was 9 minutes, which is pretty short for a high quality render, such as this!
|
|
After rendering, I then added a new layer and selected Render Output, and from Effects I selected Ambient Occlusion in order to later go into Photoshop to do some retouching of the image.
After some final tweaks in Photoshop, my work was complete.
Conclusion:Scene is complete but I there were some issues that I encountered few times. These were in render phase. Reason is simple, when I have started to learn Modo, I studied on modeling with it. I didn’t have a chance to look over rendering and texturing properties much. So while I was creating this scene I have spent 3 or 4 days to take test renders simultaneously. That was the real deal for me for a short time but I believe I have created a visually good scene. Related links:
|


