Making of Garage
It’s a pleasure for me to give you an overall view of this project! This image started last summer…
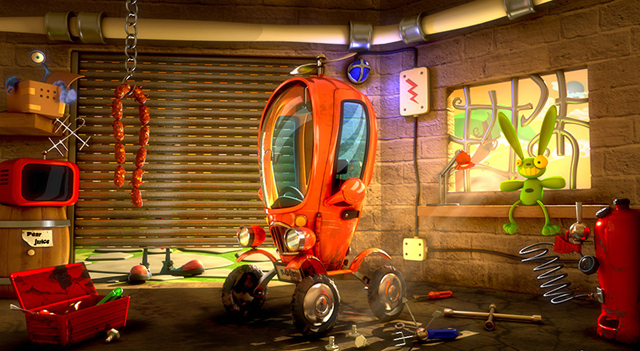
Hi all! It’s a pleasure for me to give you an overall view of this project! This image started last summer… Due to vacation I decided to take a model from our short in development and use it to study lighting and shading with a cartoony look.
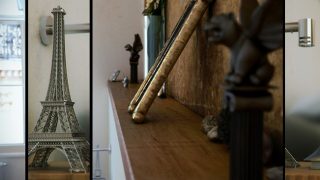
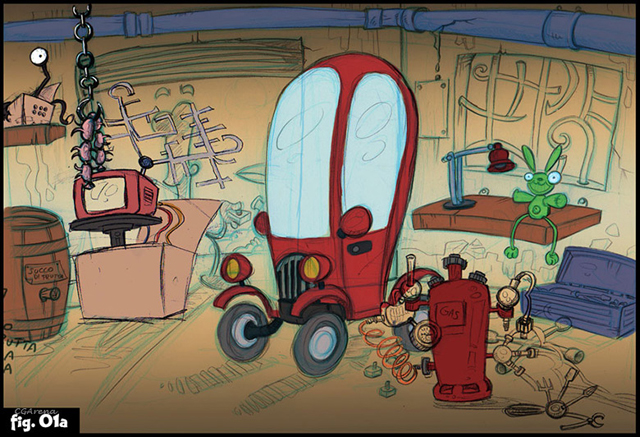
I wanted to create an ambient with an alien look… The principal character is from another world (the one with the big foot outdoor) and I wanted to communicate that with little details here and there. As usual I asked Giovanni Lo Re (a really good friend I used to work within Italy) to make a little sketch of the scene and to design the objects.
STEP 1: Sketch
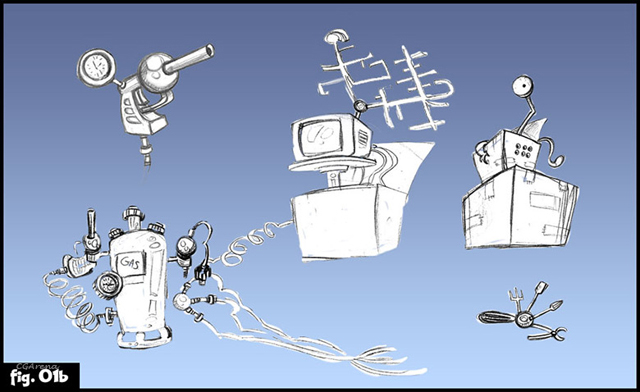
After collecting some reference images (especially from other 3d artists) and after some emails he ended up with this drawing and was a really good starting point! Then he sent me some detailed drawings of the tools and the car. He also said that the compressor looks very old but he swore it has passed the test of time and is one of the sturdiest air compressors he owned. I might try the Campbell Hausfeld in my future car paint projects in line for next month.
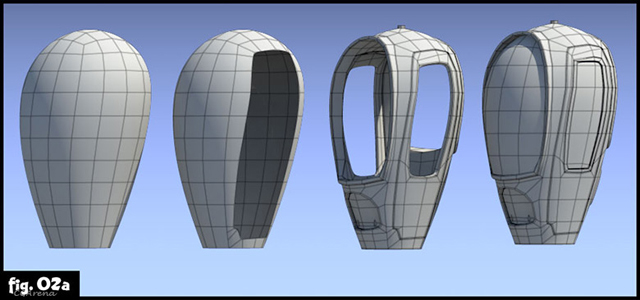
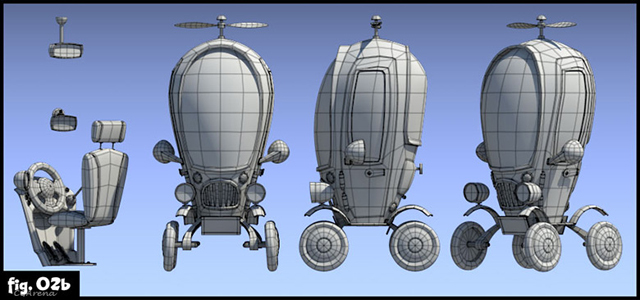
STEP 2: Modeling
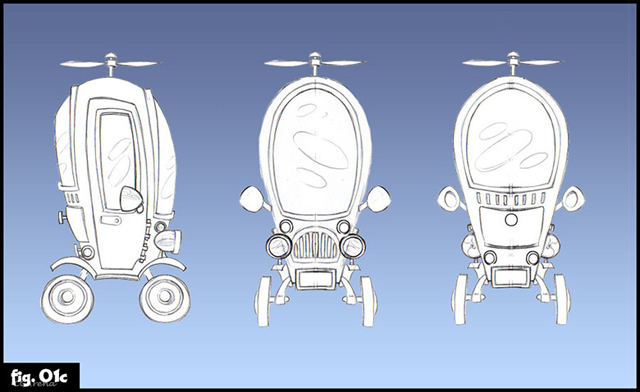
Modeling was pretty straightforward… All poly modeling and a lot of little pieces! For the car, after the body was finished, I started modeling the interior and the details.
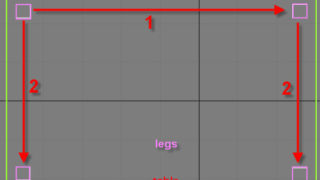
As to the environment, I modeled every object separately and then imported them as references. I wanted to find a good camera angle, similar to the one of the drawing. At the end I decided to turn wall on the right side about 45 degrees to have more space and get a nicer shot.

STEP 3: Texturing and Shading
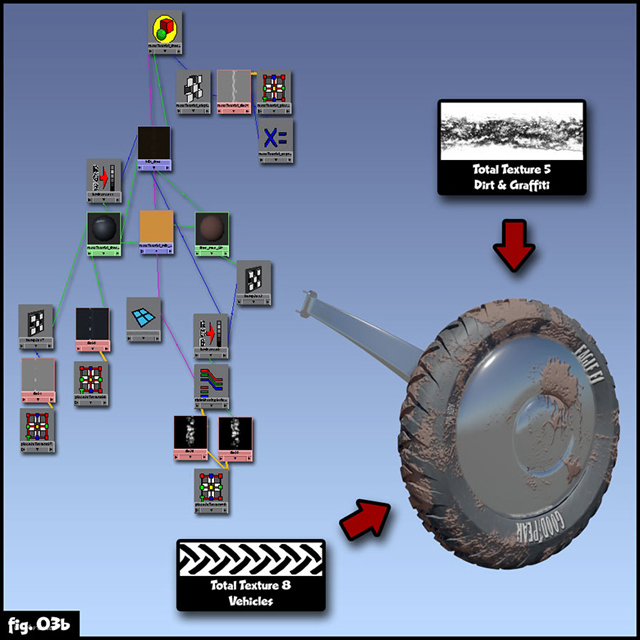
For texturing I’ve been using the Total Texture collection. For the wall I took the base layer from the Total Texture 1, some dirt from Total Texture 5 and 2 and mixed them in Photoshop following the UV layout… same for the tires.
For the sky Giovanni started from a base from the Total Texture 15 and continued adding details, painting clouds and little planets.
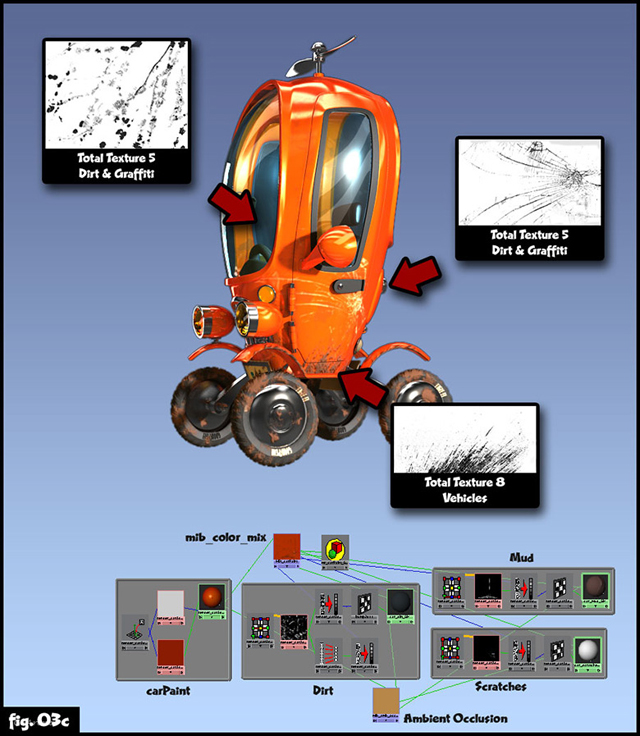
For the carPaint and tires material I decided to go with layered materials… this gave me the ability to add dirt, scratch and all the little details I wanted with the minimum effort. The texturing is based mostly with Total Texture 5 & 8 because they’re full of dirt masks… after importing them in Photoshop I reduced the details to make them cartoonier
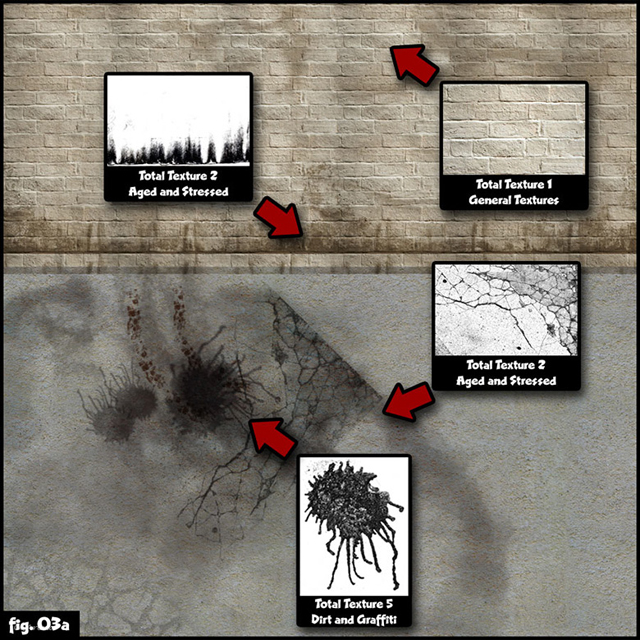
and I make a lot of masks to control the layering. The shaders are quite simple, lots of fresnel effect for glass and metal and then simple shader trees layered with a mib_color_mix node.
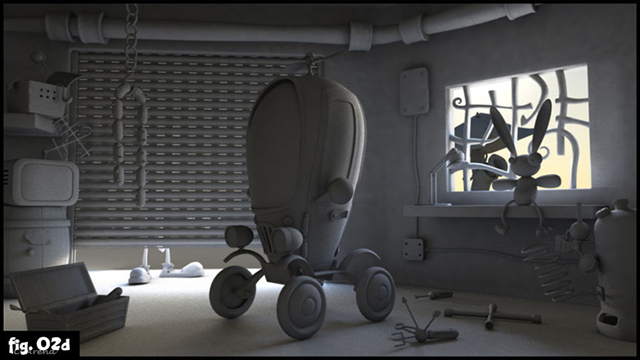
STEP 4: Lighting and Rendering
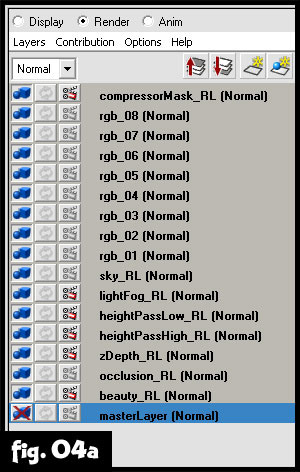
At the beginning I wanted to try the new Mental Ray pass system, but after a while I liked the raw render from Maya so I decided just to use beauty pass, occlusion pass, one pass for light fog and some masks. I ended with 16 passes, mostly masks because I wanted to do separate color correction while still doing an image ready for animation without hand drawn masks or retouching in Photoshop.
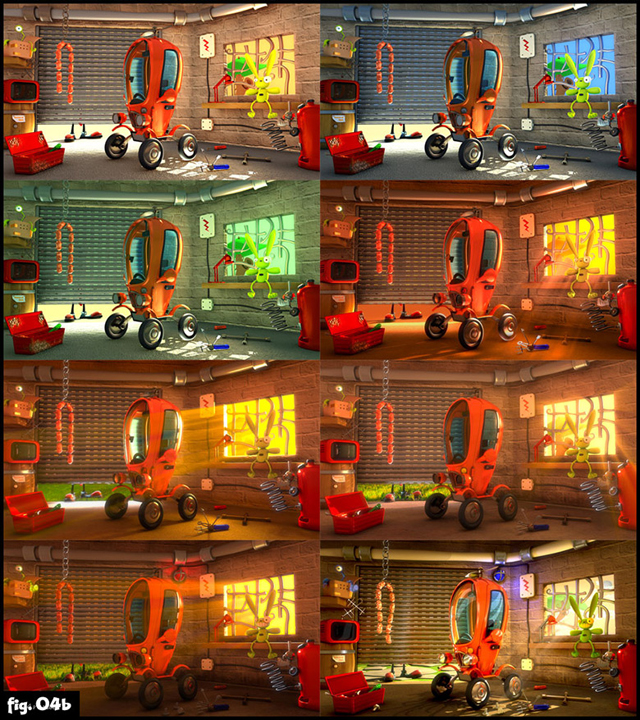
Lighting was real fun and also time consuming… I think I’ve spent most of the time on this and on compositing. I rendered a lot of different versions with different colors and light rigs going back and forth between versions until we found a good combination of mood and details.
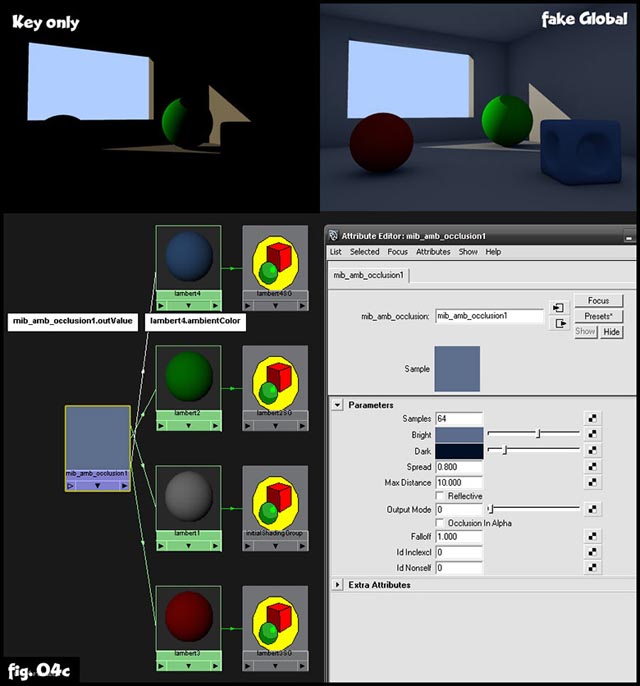
I used a technique I saw in a DVD from Jeremy Vickery (www.jermilex.com) on the use of Ambient Occlusion to simulate bounce/fill lighting: all you have to do is to connect the output of the AO to the ambient color of ALL the shaders in the scene. You have to think about it like this: the light color is going to light the non occluded parts, while the dark one is going to light the occluded ones… so, avoid pure black and pure white!!! I put some orangish tones to warming the image up.
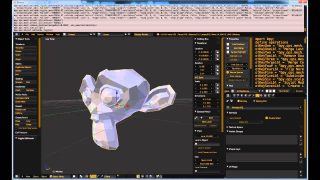
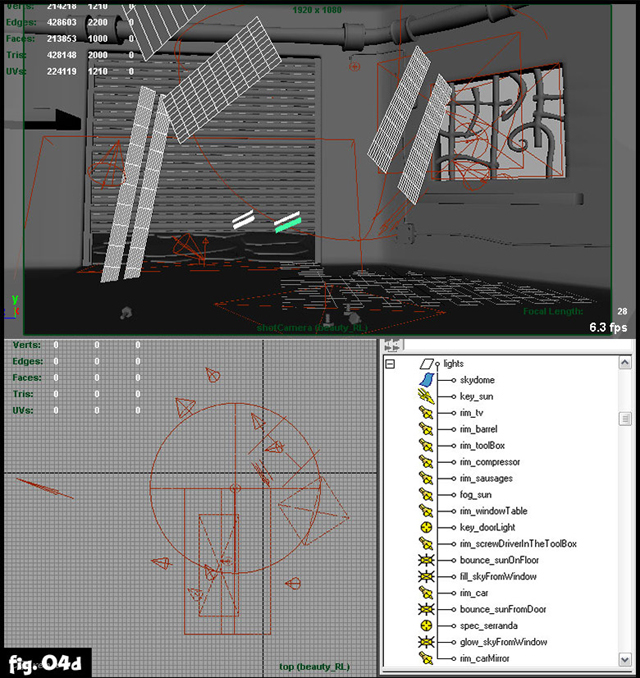
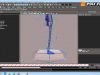
After establishing the key + fill I started adding bounce lights for the sunLight and a lot of rim light to separate the objects from the background. This is a screenshot of the scene and a list of all the lights in the scene. I also added some reflectors with a white surface shader to give that cartoony look to the reflections on the glasses.
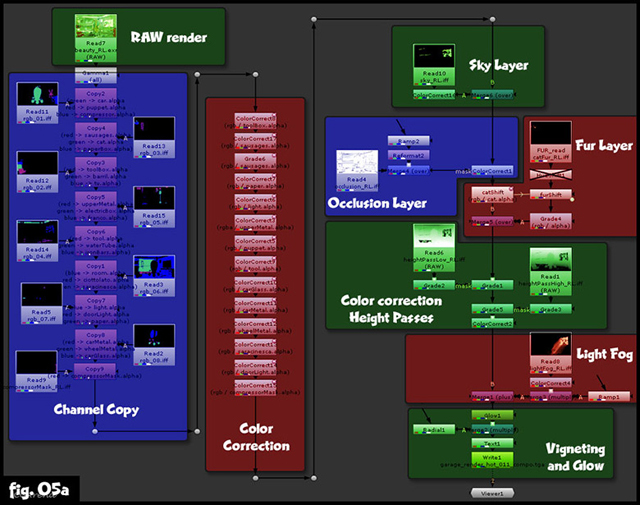
Nuke gives you the possibility to create new channels from images, so I used the colorID passes to put new channels into the pipe in order to select the various objects with just one click through the whole script. This was especially useful while doing color correction. Height passes and the light fog helped me to improve the atmosphere while the vignetting allowed me to concentrate the attention on the car, which was supposed to be the most important spot of the image. Here you can see a screenshot of the whole script with some explanations!
STEP 5: Compositing
This was the first time I tried to use Nuke and I really learnt a lot!
I rendered some passes as 32bit floating point openEXR (beauty, zDepth) to have more freedom and the rest as 8bit iff.
Nuke gives you the possibility to create new channels from images, so I used the colorID passes to put new channels into the pipe in order to select the various objects with just one click through the whole script. This was especially useful while doing color correction. Height passes and the light fog helped me to improve the atmosphere while the vignetting allowed me to concentrate the attention on the car, which was supposed to be the most important spot of the image. Here you can see a screenshot of the whole script with some explanations!
STEP 5: Conclusion
I’m really happy about writing this tutorial and sharing what I’ve learnt with you! I think that this has been a little like a production workflow because we had to get feedback from each other by mail… sending progresses and trying to understand each other just by reading. Maybe if we had been able to work side by side we wouldn’t have done all those tests, but I think that this has been a nice research and I’m just looking forward to start a new project :) If you have any questions feel free to write me! Thank you to everyone!

About The Author
You might be interested in