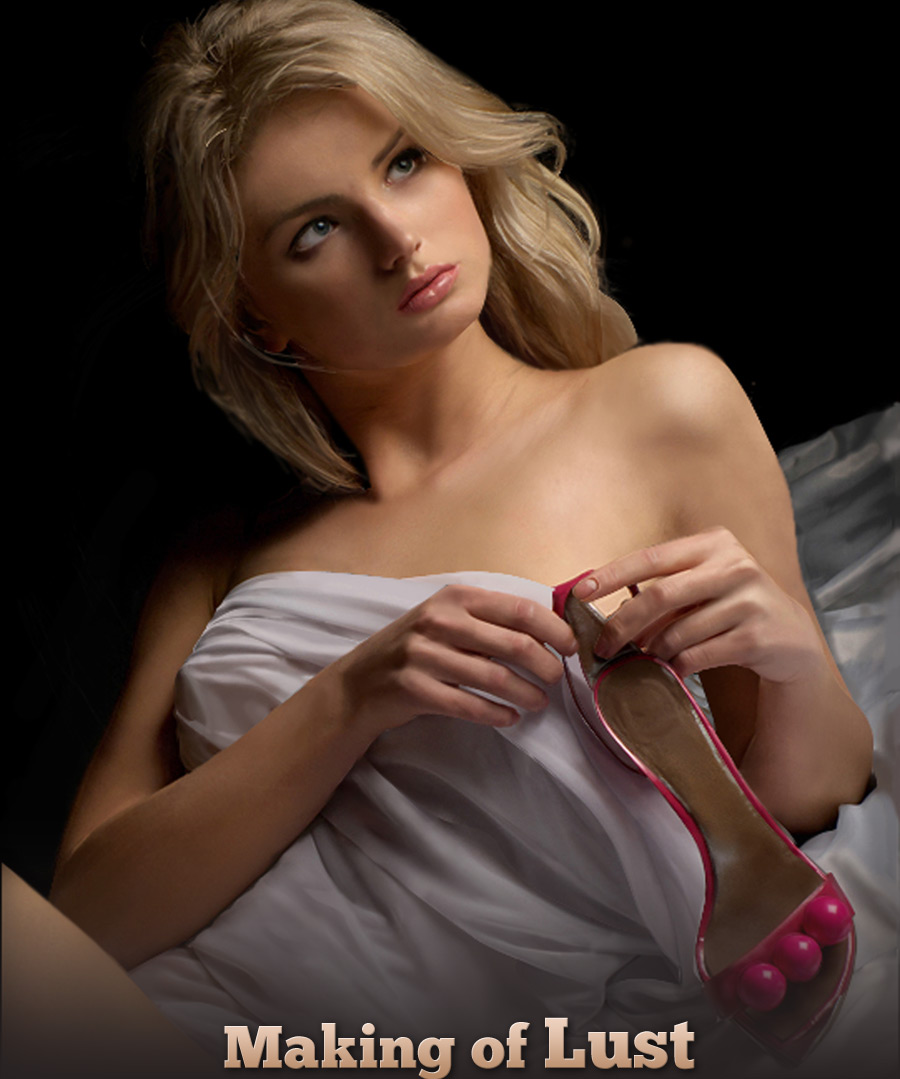
Making of Lust
Find out step by steps photoshop tutorial “Making of Lust” took lot of effort and patience in drawing, using the optical mouse.
IntroductionI spent a lot of hours collecting good references on the net. Of course Google helped me a lot. Finally, I found a good image from flicker. I chose the image because of the mood and lighting information is very high. So I would like to discuss the steps I followed for "Making of Lust" took lot of effort and patience in drawing, using the optical mouse. Coloring and ShadingI put very basic colors with shadows and light informations |
ToolsI used adobe Photoshop CS2 and Optical mouse. PreparationI decided to go with this small resolution 541x 747 because it was comfortable with the screen size i had. |
|
Paint very basic shadows and lighting information for entire image. So we can understand the light variations and Shadow depth. I used simple steps to paint the image. I like to reveal the steps at this point of the painting. |
I added some more detailing on face and trying to shape the image. |
|
I used the Smooth brush for painting the body and the cloth folding and also play with the opacity and the brush presets. |
At this point I added more details in the hair and Cloth area. |
|
Now am going to discuss the core part of my painting, the opacity and jitter value of the brushes, I spent a lot of time to get the nice result. So lets look at the steps of the process here. I used both hard and soft brush set for painting and also adjust the flow of the paint by using the opacity jitter and flow jitter. I used the duel brush in brush preset for the skin painting and also switch on the Noise Presets Brush Set Up
This brush set I used for adding very small nice in skin and hair sets
|
|


|
The skin painting that I used was the soft round brush because it gives nice smooth results; I chose spatter 39 pixel brush set because the bump can easily build up. For the final adjustment I use the blur-Gaussian blur value is .2
In cloth painting I built very basic folds by using the hard air brush sets, and add more color variation in between the folding by edge smoothing I use the soft round 300 pixels Brush sets. Finally I adjusted the hue/saturation light to 7
In Hair painting I used the soft round 300 pixel brush set for initial coloring, and again added the highlight stroke by using the spatter 14 pixels and also I played with the shape dynamic size jitter -39% for random distortion. I played with the smooth and dry brush with opacity in final adjustments.
This is the basic setup of brush I used the entire image painting. So now we can go through the remaining part of the making of "Lust" |


|
Now I am going to play with the face shadows. |
Add more realism to face by painting the eyes and nose. |
|
Add more Depth in Face and neck by using the air brush. |
I put specular highlights for lips and nose and also lot of care to paint in the skin. |
|
Hair Detailing |
Finalize the hair by using the smooth and dry brush set. And also I played with the opacity and flow jitter |
|
I am going to paint the hand and fingers; it takes a lot of time to attain the correct lighting. It is really a head breaking job J |
Final Adjustment on fingers by using the smooth brush set and opacity. |


|
Add more detailing into the footwear and skin. |
Add the specular highlights into the footwear |
|
Adding the fold and light and shadow depth into the cloth by playing the basic smooth brush, I played with the layer opacity to gain the inner depth of the cloth .I used the brush opacity is below 20 |
Am going to add more detailing on cloth a kind of white balancing ,I put more contrast to the cloth by using hue and saturation and curve parameters. |
|
Add more detailing on the back side of the cloth |
Erase the unwanted paint behind the hair and also finalize the cloth by using soft brush set and blur tool. So here I reached my limits . :) |
|
|
Here is my final image am using the blur tool to correct the sharpen edges. <- Click on image to enlarge. |
|
|


 About the Author

About The Author
You might be interested in