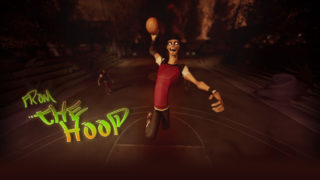
Making of Toyota Matrix “Cell Splitting”
This is an extended section containing more detailed information regarding the production of the Toyota Matrix “Cell Splitting” cinema commercial.
May 17, 2005 | Stryker
This is an extended section containing more detailed information regarding the production of the Toyota Matrix “Cell Splitting” cinema commercial. Since I am specifically involved in the 3D digital animation industry, this section goes into further explanation of the 3D aspect of the spot, particularly the vehicle splits and the android girl digital effects. Because this paper goes into fairly detailed specifics, an advanced knowledge of computer graphics and animation is recommended.
Toyota Matrix “Cell Splitting” was awarded to Redrover in April, 2004 by Saatchi & Saatchi Toronto, and pre-production began immediately after that. Redrover was to produce all digital effects, which were key components of the spot since the requirement was photorealistic Toyota Matrix vehicles splitting into multiple others in much the same way cells do. The commercial was to launch in theaters across CANADA on August 31, 2004. Unfortunately, the live action shoot could only take place in the last week of June/first week of July which left only one month of actual production time – a very short and limited schedule for such a demanding job.
Due of the short schedule, we tried to produce as much of the spot as possible during the first three months of pre-production. Without the live action, of course, this too becomes somewhat limiting. Therefore, we focused our attention on modeling the vehicle, research and development regarding the procedure for splitting the vehicles, and creating a full pre-viz of the spot.
Modeling
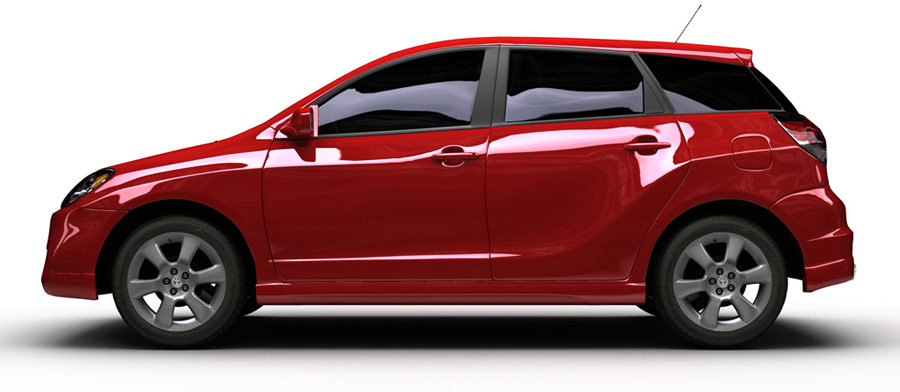
The model was created by Ben Pilgrim. Because this was going to film and therefore high resolution renders were going to be required, we made sure that every detail was modeled into the car. This went as far as modeling screws on the windshield wipers, and even the tread on the tires.
Because Toyota doesn’t disclose their CAD models, we had to take a trip up to the Toyota dealership and do extensive photography of the vehicles, from every possible angle, capturing every possible detail, for our modeling reference.
This is when we realized that photographing the lights would give us no indication whatsoever of it’s form because of its highly reflective complex shape. Therefore, we had a Toyota Matrix front light shipped to Redrover which we could study, take apart, and visually reconstruct accurately.
The model took approximately one full month to model and texture. There were also setbacks in the modeling since we still had no procedure for producing the split and the model would inevitably have to be built around that. Once the model was near completion, I began lighting and texturing it, piece by piece. It was important to do this at this particular stage since model problems only became visible during render tests.
As soon as a problem was found, Ben would fix it, then hand it back to me and I would continue rendering tests until we had the perfect car.


HDTV Composite Test
As soon as the car model was finalized, I did a test animation with some live action HDTV footage we had previously shot in the downtown area. This test was performed in order to figure out what types of layers would be required to do a convincing composite, as well as how many. Obviously, we wanted to keep the number of layers to a minimum since working with numerous high resolution layers can become quite computationally intensive and slow. In addition, the test provided some insight as to what kinds of compositing effects and color corrections would be required for a convincing composite. The test took about four days to put together, since there was a lot of initial experimentation and re-renders in order to get the settings right. However, it is still very much a rough test and there are many additional enhancements it could benefit from.


Research and Development
The research and development was perhaps the biggest hurdle of all to overcome. To our knowledge, we had never before seen such an effect on film or television – that is, the splitting of one 3D mesh into two, in the same way cells multiply and divide. This would have been very easy to pull off as a 2D effect using morphing/warping software such as Elastic Reality, but we needed full control of the vehicles so they had to be 3D meshes. As a result, we tried several tests which were bordering on such an effect, but were based on particles rather than mesh distortions. Some of the results were exciting and compelling, but not what the agency wanted so we had to go back to the drawing board and start over.
The following tests were produced by Richard Rosenman and Mike Oliver.


Dispersion test with Particle Flow.
DOWNLOAD

It was around this time that someone pointed out that lavalamps were a good example of what the effect should look like so we took a ride to Walmart and stocked up on lavalamps, one for every animator. Once we had a clearer direction to go in, and after trying test after unsuccessful test, we stumbled upon 3dsmax’s symmetry modifier.
This allows you to use a mirror plane which can be placed anywhere within the mesh, and a symmetrical mesh is copied and welded on the opposite side of the corresponding axis. This was our first major breakthrough although there were still dozens of fixes and modifications that had to be applied to this in order to get the effect we were after.
For instance, the seam between the symmetrical objects was sharp – we needed a soft, curved blend between the two meshes. We realized this could be fixed by using a volume select modifier at the seam with a soft selection enabled, and then applying a relax modifier on the selected vertices. The relax modifier effectively smoothed out the vertices at the seam and produced a nicely blended symmetrical object.

Source mesh with symmetry modifier in center.

Source mesh animated with symmetry modifier in center.

Source mesh with volume select modifier at the seam, with soft selection enabled.

Source mesh with relax modifier applied to sub-object volume select.

Source mesh effectively split into two.
Although the symmetry modifier was effective at producing something similar to what we wanted, it also presented various problems, especially the fact that objects had to be symmetrical. That meant if one car turned to the right, its symmetrical counterpart would turn to the left. Obviously, this was extremely limiting as we needed each vehicle to perform a specific action and drive in a particular direction. To resolve this, we decided to use model swaps. For instance, once the vehicles have split, the symmetrical vehicle is hidden and replaced with two independent vehicles exactly where the respective cars should be at that current frame. This would then allow us to animate each car independently of each other, without the limitations of the symmetry modifier. This, however, presented additional problems.
Our model was already quite heavy in polygon count and needless to say, it had to be substantially subdivided for the high resolution renders. Model swapping meant we had to include two additional vehicles for every split and if you’ve seen the spot, you can see that in many scenes, especially the last one, there are up to five splits all happening in the same shot. This meant we needed fifteen (15) high resolution vehicles in one scene and this, in turn, led to rendering problems which are discussed later.
Previsualization
“Pre-Viz”, short for pre-visualization, is becoming more and more popular these days, especially for feature films where directors will sometimes have the entire piece pre-visualized before going into production. A pre-viz is generally a glorified animatic. You use low polygon models, animated in rough motion, to produce a basic version of what the final commercial/film will look like. The pre-viz is extremely helpful as it shows you what works and what doesn’t before going into production. It also helps give you an indication of timing, cutting, staging, composition, and much more, all of which can be used as a guide for the live action shoot. We produced a pre-viz for the spot exactly for this reason – to have a rough cut of what we intended the commercial to look like which we could show Saatchi and Industry Films. Of course, just like animatics, the pre-viz is not a final lockdown by any means and additional refinements were made throughout the production. The pre-viz took approximately three weeks to complete with all the numerous revisions we made on it.

Live Action Shoot
By this time, the shoot had come upon us. We had a total of four nights to shoot, from dusk to dawn every night, in various sections in downtown Toronto including the Docks, Chinatown, Financial District, Club District, Queensway, etc. It was gruesome work adjusting to the all-night schedule and if Chris Stewart hadn’t continuously supplied us with an unlimited supply of candy, we would have surely passed out. Early in the pre-production, we had decided to shoot “Cell Splitting” in HDTV. This presented both benefits and consequences. For instance, HDTV would allow us to shoot most of the street scenes without having to pre-light entire city blocks – a task which would have taken far too much time and money to do. In addition, HDTV would eliminate the necessity to shoot “day for night” for some shots – that is, shooting a daytime shot and then treating it in post to look like nighttime. I was very much against this since we needed to recreate photorealistic cars and it was imperative to get a reference shot of the vehicles under correct physical lighting conditions, not simulated ones, to base the final renders upon.
Finally, HDTV is digital and therefore we would be able to shoot considerably more footage than film, as it is a fraction of the cost. Consequently, HDTV video can be very finicky – brights tend to blow out easily and darks can turn black easily as well, thereby seriously limiting the number of tones in the image. In addition, increased grain becomes a factor, especially in dark environments. There were specific requirements we needed for the shoot. The most important of these was a shot of a real car as a stand-in where we would insert a CGI vehicle. This is crucial because it provides us with a lighting reference model to work from. The real car shows us where the light is coming from, how intense it is, how bright/dark the ambient light is, the number and color of reflections, and much, much more. In addition, we also had a van mounted with five digital motion cameras pointing north, east, west, south and up, which would drive in the same direction the CGI car was intended to and would therefore capture the surrounding environment which we could then use as reflection motion maps for the android girl and several other shots. Finally, Chris Stewart photographed every set in order for us to have reference material to recall on, as well as for environmental texture maps. The pre-viz turned out to be particularly helpful for the shoot and Sean Thonson, the live action director, was able to use his time very effectively thus providing us with a great deal of footage to work with in the end.
Tracking
As soon as we got the High Definition footage loaded into our systems, we immediately began tracking all of the shots involving CGI. Chris Crozier was responsible for all the tracking, both the vehicle split shots as well as the android girl. We use Boujou for our tracking purposes, and Chris became an expert at it within a few weeks of experimentation during the pre-production stage. As a matter of fact, he even built a custom light rig to sit on the android actress’s head to facilitate in the tracking.
Almost all of the shots tracked well partly due to Boujou’s exceptional tracking technology and partly due to the high resolution footage, with the exception of a few problem scenes which had to be tracked manually. Because this was to be shown on cinema screens, the margin for tracking errors dropped significantly as any slipping would be much more noticeable on the big screen.
Lighting, Rendering and Compositing
Once tracking had been completed, virtual sets were constructed in 3D for all CGI shots. For instance, if a vehicle would have to split while driving down the street in the club district, the exact street was rebuilt in 3D using photographs for texture maps which were taken by Chris Stewart during the shoot. Chris did an excellent job at capturing virtually every single building, one panel at a time, so that we could reconstruct entire city blocks if needed. Using these photographs as textures maps, as well as the HDTV footage, we were able to recreate almost identical environmental lighting conditions for the CGI vehicle as in real life. Next, lights were placed in approximately similar locations within these sets, each mimicking it’s real counterpart in intensity, color and falloff. Self illuminated spheres were also constructed and placed at each light location to act as reflection highlights for the vehicles, since 3D lights don’t produce reflections on their own.
Continuation on the newx page…

Lighting, Rendering and Compositing
Rendering Toyota Matrix “Cell Splitting” was no easy task. Using global illumination within enclosed virtual sets, each containing numerous shadow-casting lights and reflection maps, working with extremely high polygon count scenes, and rendering for cinema resolution proved this. Probably the biggest problem we encountered was the fact that motion blur simply would not work as a result of the per-frame vertice renumbering produced by the symmetry modifier. The only way to get real 3D motion blur to work would be to eliminate the modifier altogether and this was not an option. So we had to begin exploring alternate motion blur techniques. Some of these methods didn’t work such as exporting the motion vectors into maps using specialized Mental Ray shaders, exporting motion vectors using the RPF/RLA file format for Combustion, using 3dsmax’s Camera Multipass Motion Blur, using 2D Post motion blur within 3dsmax or using 2D Post motion blur filters within 3dsmax. We did, however, find several options which would work. These included Revision FX’s ReelSmart Motion Blur plugin for After Effects/Combustion, as well as general directional and radial post motion blur routines within the compositing software. In the end, a mix of many different approaches were used, each based upon what would work best with a specific scene. As a result, we had to be very careful regarding image degradation as this can often occur with many post motion blur filters.
“Cell Splitting”
“Cell Splitting” was modeled, rigged and animated with 3dsmax 6. It was rendered with VRay 1.09 using global illumination in conjunction with traditional lighting techniques and image-based lighting. It was composited using Combustion as well as After Effects.
Directed by Richard Rosenman and Andy Knight. Vehicle modeled by Ben Pilgrim. Android modeled by Chris Crozier. Boujou tracking by Chris Crozier. Vehicle rig by Mike Oliver. Animation by Richard Rosenman, Mike Oliver, Chris Crozier and Ben Pilgrim. “Blobby” animation by Kyle Dunlevy. On-site photography by Chris Stewart. Lighting and rendering by Richard Rosenman and Mike Oliver. Lighting and rendering of android girl by Chris Crozier. Edited by Scott Buscis. Composited by Brad Husband. Produced at Redrover Studios Ltd.
Copyright by richardrosenman.com