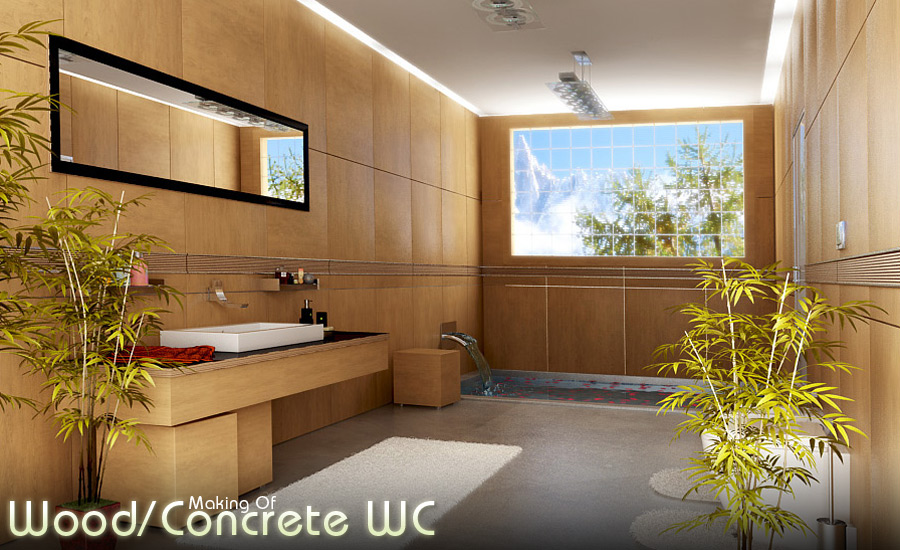
Making of Wood/Concrete WC
This was a client work, and we ask me to create a simple and modern Bathroom with similar lines as the exterior house, very simple and with a lot of concrete and Wood.
|
MODELINGDue the fact this is a client job and the time is limited I use some premade models for filing the scene and make this more eye appealing! BATHROOM MODELINGThe Bathroom modeling actually is very simple, I started with a spline and from the top view I started modeling the bathroom walls, then with the extrude tool I give that walls volume. (FIG. 3). To create the windows and doors in the walls I convert the model to editable poly and then use the cut tool for creating them (FIG. 4). The ceiling and the ground floor are just planes and simple boxes. |
|
For the wood/metal plate around the bathroom I use a spline and then use the extrude modifier again to give volume. (FIG. 6) |
|
|
BACKGROUND MATERIALOnce I don’t have a HDRI for this image I use a VrayLightMtl with a .JPG image applied, with Intensity of 2 in the color slot, this will give me a soft light and reflections in the interior. (FIG. 15) GLASS BLOCKThis map comes along with max, you can find him in the ArchMat Folder in 3dmax root; the only thing I made was creating a Gap mask, so I can control the Gap Color between Blocks (FIG. 16) |
|
 5 – Acid Glass FIG. 14 |
 |
LIGHTSFor Lightning This Scene I Use a Directional Standard Light That I’m gone Called ‘’SUN’’, Two Big Vray Lights Filling the Exterior Windows And Doors and 6 Omni Light in The Fake Ceiling to create Indirect Light in the Walls. You can see the lights in the Fig. 17 – TOP VIEW – And FIG. 18 (FRONT VIEW)
Little explanation about the Lights I Use: THE SUNI Use a Standard Directional Light for Simulating a Very high Sun Position with Sharp Shadows. This light have a Yellow Color (RGB: 255; 255; 200) in the slot with a 0.85 multiplier and Vray Shadows. (Remember I use these values for this image particularly, not every model/image has the same parameters, and everything influences the light; model dimensions, sun high, day time etc…) Also in the Directional Parameters don’t forget to mark the Overshot Slot and Chose a Falloff big enough to cover the model. VRAY LIGHTS IN WINDOWS:I use this kind of light in the windows because even I use GI in Render this is not enough for lightning the interior, So for this I create big Vray light planes filing all windows in the Scene, with this I will have more light in the interior with soft shadows and that’s what I need to simulate the bouncing sky/sun light in the model. In this case particularly the Vray lights have a Blue Color (RGB 231; 238; 241) and with 3.0 Intensity. Also in the Vray light Options Check the Invisible Option (with this checked, you will not see the light plane and the sun can pass thru the Vray light plane) Normally when I use Vray lights in the scene always use a very high subdivision sampling, in these case 65 subdivisions, with this I remove almost all noise this light produce in the scene. This is a little boring sometime because more subdivisions you have, more time you will render, so if you don’t have a faster computer I don’t recommend to use a very high subdivision sample. OMNI LIGHTS IN FAKE CEILING:Instead of using Vray lights in the ceiling for simulating a decay light in the wall I replace them with Omni lights, with this solution I render faster, (Note: Only use Vray light if you don’t have any more light options, these lights are very good but take longer to render), after this another problem… How can I block the light in some places to give impression that I have a Fluorescent light? Simple solution, in the ceiling above the Acid glass i add some boxes separated 1 meter each, with these simple solution I give the impression that i have a florescent light there. (FIG. 17 and FIG. 18 – Detail in the ceiling) In this case particular I have 6 instanced Omni light with a pure white color with 1.30 intensity multiplier. All lights have Vray shadows. |
|
RENDERINGAs I said previously, for rendering I Use Vray, for me this Render engine is very useful, either in interior or exterior Architectural renderings. I do always the same things before rendering final Images… – Ensure I have a good subdivision in the Materials parameters (Both in Reflection and Refraction Slots). -If I have a value in the Refl. Glossiness (Reflection) or in the Glossiness (Refraction) less than 1.0 I must increase the subdivisions to remove the noise from the material. – 25-50 Subdivisions is good for almost every material – 8-12 Subdivisions is good for Metals like Chrome; gold; Stainless steel…, Etc… Note: Remember, if you increase the subdivision the render time will increase too. So try to balance between materials and render time… if a material is less visible you don’t need to increase the subdivisions!!! – Test renders to View models/materials in place end light. Light/render Tests in Vray always take longer because this is a very slow render engine, the fastest method I have is in the following parameters (FIG. 19)
This will create a very ugly and noisy render but is fast, you can see the models/materials in place and if you need more light, or not. – Ensure nothing is blocking the lights; in these case I have the Background plane, the plane is blocking the sun light because is very close to the window. (FIG. 20) For that, I go to the Object Properties and uncheck Both Receive and Cast shadows.
Finally, the Final render… My Interiors almost the times have the same final render settings (FIG. 21)
After the render I always make some color correction with Photoshop, to give that Glow look in some pictures in Photoshop I duplicate the layer and then go to Filters > Blur > Gaussian Blur (2.0 Pixels Radius) Blend with the Original layer using Lighter Color and change the Fill Value until I get a good result. (FIG. 22)
I enjoyed making this article and I must thank you all for reading it.
If you have any questions, comments, criticism or anything else that you want to share with me, please send me an email and I try to get back to you soon as possible. Mário Nogueira (RIP) |

 CREATED IN:


 After making the base model I start to add detail to the bathroom, first was the wood panels in the wall, I fill all walls with panels in wood, for making this I use the Chamfer Box (In the Geometry > Extended Primitives > Chamfer Box) with the Following values (L;W;H;F) 90cm; 90cm; 3cm; 0.50 cm. (FIG. 5)


