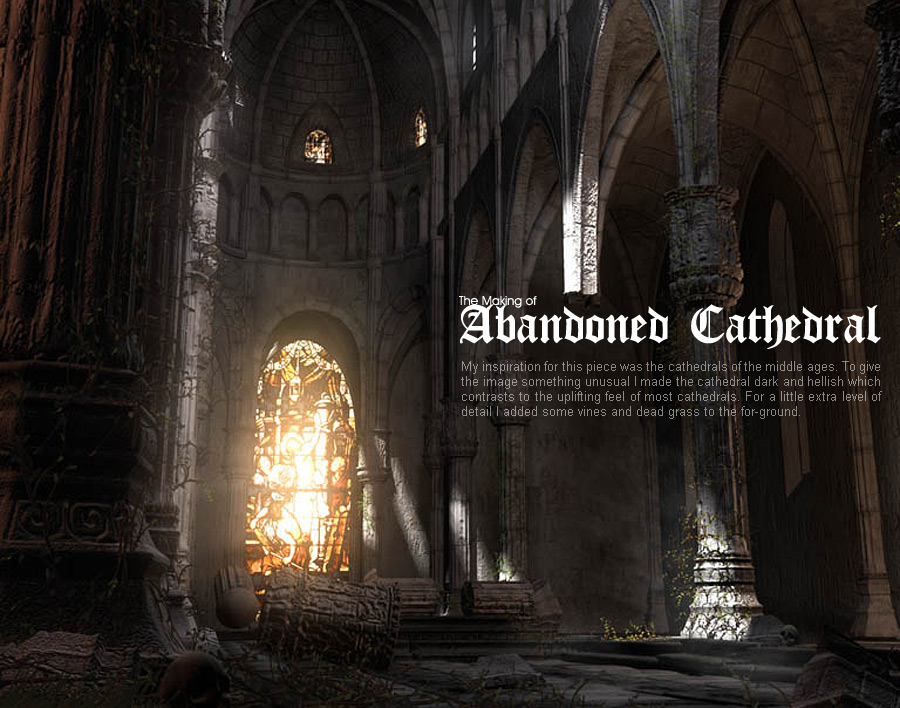
The Making of Abandoned Cathedral
My inspiration for this piece was the cathedrals of the middle ages. To give the image something unusual I made the cathedral dark and hellish which contrasts to the uplifting feel of most cathedrals. For a little extra level of detail I added some vines and dead grass to the for-ground.
|
“Abandoned Cathedral” was made for CG Society’s Spectacular contest. After visiting the Vatican the summer before, I was inspired to create something architectural in nature. Walking through the Vatican filled me with awe, so I thought it would fit the idea of spectacular perfectly. To give the idea more interest I had the cathedral abandoned, and gave it a dark light scheme. By having the Cathedral old and abandoned I could add more dirt and texture to the image. After choosing a direction I began gathering reference of cathedrals. I borrowed several elements from each cathedral and in a short time I had something similar to most cathedrals yet different.
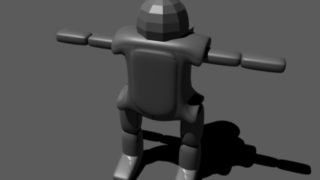
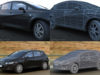
After I settled on a concept I began the modeling process. The first thing I did was make a simple model version so I could work on scene composition. Once I was happy with composition I started making the pillars. To ensure each side of the pillars would be the same I just modeled one side and duplicated it around to form a cylinder. I made the sculptures in the middle of the pillars by creating a simple Maya model, and then Zbrushing it to get sculpted detail. To make the arches I used the curve tool to get the basic shape and I lofted it along an imagined arch curve. As my arches began closing in areas I created low poly objects in between for filler. For the final touch I added some paint effects vines.
|
||


|
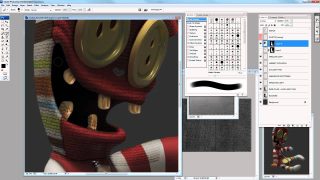
Once I finished UV mapping, I began the texturing process. I started by finding a high resolution picture of stone or marble. Then I clone brushed this picture across my UV’s in Photoshop. Once that was finished I put each of the models into Zbrush and added cavity maps. Cavity maps are a great way to add a little depth to your models because they simulate dirt in low lying areas of the mesh. Once a cavity map is created you can import it into Photoshop and use it as a multiply layer. After this your models will look more used.
For lighting I didn’t use global illumination because I wanted to have as much control over the light as possible. I started with the main light shinning in from the ceiling. I then added a spot light to where the outside light was hitting the inside of the cathedral. I found the image was still rather dark so I added several weak blue lights where it was too dark. For that final touch I add a red light to show off the dark areas better. Also I only enabled shadow mapping on the main outside light. This saved me render time and made the lighting make more sense.
|
||


|
I rendered the image with Maya software because I wanted to have the ability to use IPR render, which allows for quick adjustments.
After I had a render I was satisfied with I put it into Photoshop for post production. To make the image pop I adjusted the brightness and contrast. Then I dodged and burned several areas of the image to add a little extra pop. For the final touch I added a little dust in the light.
|
||


About The Author
You might be interested in