The Making of Lulu
Like a good number of rpg players, I’m an addict of Final Fantasy series.So I decided to make my own fanart of an in game playable character. I chosen Lulu from FFX because she’s very adult ,serious and has a cold glance.
About me
Hi, my name’s TAURU Jimmy, I’m a 23 years old french 3D infographist. I made this work during 3 weeks in october 2006 trying to do my best,pushing my limits and knowledge in computer graphism.So I’m proud to show you my " making of Lulu"
Inspirations
Like a good number of rpg players, I’m an addict of Final Fantasy series.So I decided to make my own fanart of an in game playable character. I chosen Lulu from FFX because she’s very adult ,serious and has a cold glance.
|
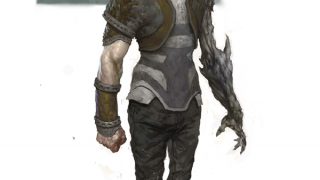
Modelisation I worked on 3dsmax to create the mesh and zbrush helped me to have good shapes and for texturing. I began making the head mesh, just doing the minimum required, i dont’t build the parts which’ll be hiden in the future. Then I build the hairs in polygons , it takes a long time to have this result, that was a hard test for my nerves but i didn’t give up. The clothes and props were quite simple to make, except the belts, placing them together trying not to interpenetrate eachover, patience required too.
|
|
|||


|
Textures First step, making the texture coordinates. I used the usefull " pelt mapping " in 3dsmax. I love this tool, it’s so easy to create the seams you need and the automatic UV stretshing is always fun to see. I used photoreferences for the hairs, the skin, and the clothes. Zbrush helped me to place them correctly and quickly. Then a lot of modifications were brought to those maps retouching colors, contrast stuff like this in order to step away from reality and get a stylised illustration. |
Some maps: |
|||
 |
 |
|||
    |
||||
|
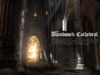
Render settings Now we have the diffuse maps , but before making the materials i must set the render parameters. I do it before because light is the most important part of the picture conception and materials will depend of those settings. I made an interior scene with 2 lights one for the global illumination, the other to simulate sun rays.
Render tests:
|
||||


|
Materials: The light is good, now we can seek good materials, this is about testing and adjusting until you have what you want. There is my own materials evolution:
|
|
|||
|
Skin shader:
The diffuse map gives the colors, the reflexion map gives the speculars, the glossiness and the bump are for the lips. I made a sub surphace scattering effect with translucency. |
||||


|
FINAL RENDER:
Raw picture before photoshop
Final picture (with different eye map)
Other works from me at http://www.kami.venez.fr RELATED LINKS:
|
||


About The Author
You might be interested in