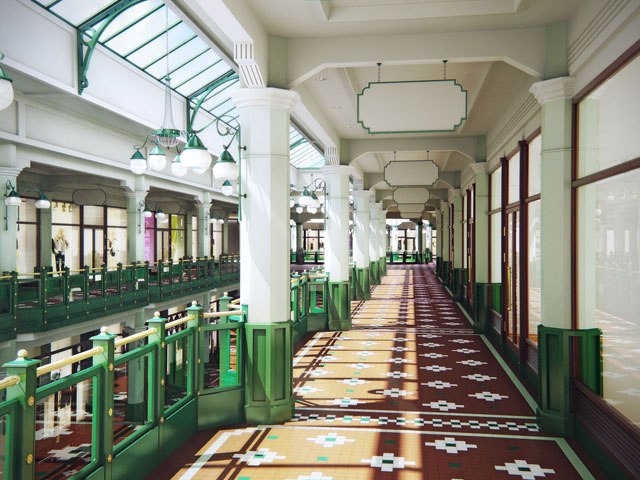
3DS Max Vray – Making of “The Mall”
This is a new tutorial from VrayGuide
Step 1
First thing, of course, is to get some references, talk with architects, get your “working plan” ready…
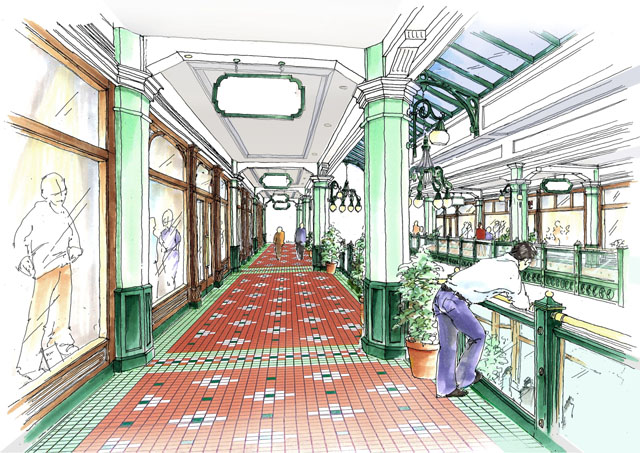
This was my reference, this image will guide me trough the process. It is really important to know where you “driving” before you hit the “road“.
You can also search in the internet and prepare good quality and “understandable look” images.
It is always good to show them first, to your boss, or project manager, before you start creating them in 3D.
Step 2
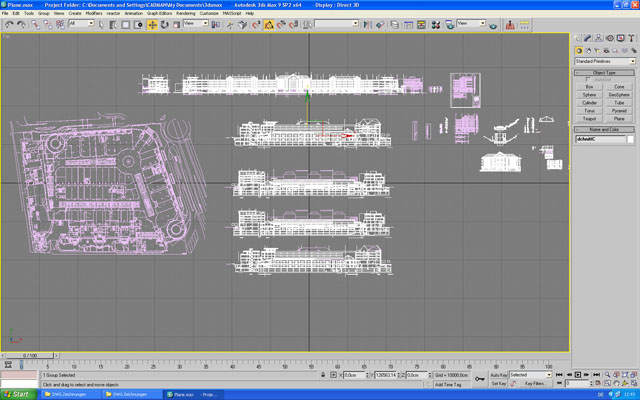
Import you DWG files in to 3Dsmax max and place them in a appropriate view- TOP, LEFT, RIGHT views. Study them and make it clear with the architect, you must understand all the construction details.
For me it was not much of a difference so I’ve started to model from the TOP view and after completing one side I’ve flip and aligned the DWG drawing and the modeled part in to the side view. But I force you to place the drawing from the very beginning, so you will not get messy later on.
The best way of handling complicated drawings after importing them to your programs it to isolate them and delete unnecessary elements, stuff like dots, or text explanations, things that usually comes with the plan but you really don’t need it for modeling. It will give you much better performance, cos’ you will not overload your computer with unnecessary information. Afterwords you group the plan, name it (“Side Plan”), and place it to the view it represent, (left view).
Buy the way, you can place all the plans on one layer, so it will be much easier to hide/un-hide it, that way your work will bee good organized and you could faster track your next modeling step.
Step 3
So the modeling begins! I like to remodel and not to extrude from the plans directly, just from my experience I got so many bugs later on in render, so I’ve made a rule for my self, “Know what you are rendering”, so I know that sucks but you must keep your scene clean. Just open another layer and start you clean model.
I’ve used line with snap tool in order to model it quickly upon the DWG plan. I’m suggesting you to use 2,5 snap option so your vertexes will not dive in to the depth.
As you know some of the architectural plans might come with depth, it is not necessary happened, but it happened to me, after I’ve extruded the shape it got curved polygons, in place where it should be straight surface. The problem accures when you use 3 as snap tool and not 2.5, one of my vertexes shifted in the depth.
So by using 2.5 snap option you’ll be able to snap vertexes and ignoring the depth.
Step 4
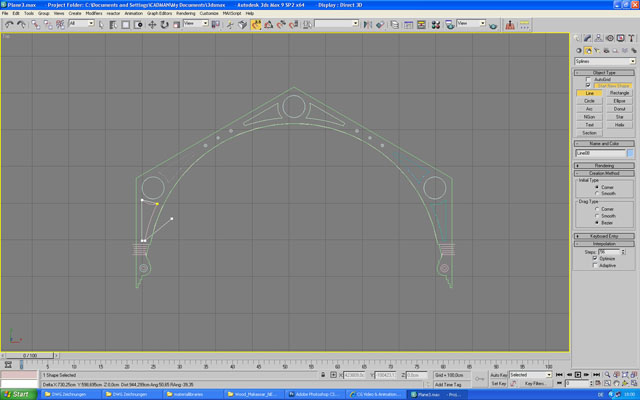
After I’ve finished modeling the structure with line, splice and circle option, I’ve attached them to one piece and used “Extrude” modifier to get the 3D shape. At this point it is always better to apply some texture, VrayMTl that will define your modeling parts by color, it will be much easier to select them by texture later.
Try to stay clean and simple as much as possible. Work with layers and make separate layers for glass, model and plans. Hide and un-hide necessary parts so that you could model fast and clean. High detailed models might cause a very low performance, so by dividing your model to groups and layers can give you much better control over your scene.
All curved or rounded splines must be modeled with “Adaptive” option “ON“. It will give your model nice and smooth arcs and you will not add too much unnecessary vertexes in order to extra smooth your object.
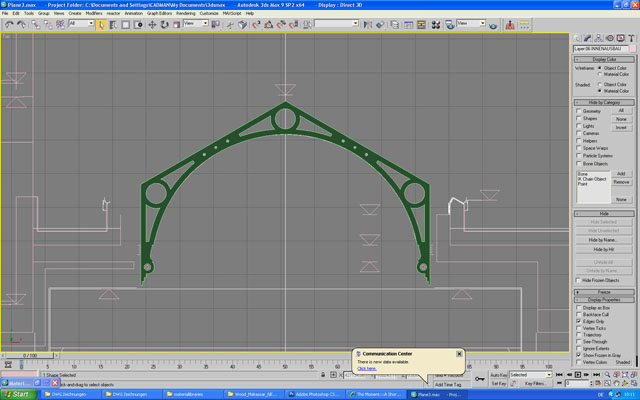
Step 5
I’ve used “Box Modeling” in order to build the window frames, columns, and floor. I also used “Pro Boolean” option in order to do some detailed structures in the wood.
It is not advisable to apply Boolean commands, it might cause some really weird bugs while rendering, any way convert your model into editable mesh or editable poly after finishing the model, it will kill the Boolean surprises.
So if you can avoid doing Boolean, please do so, it might save you lot’s of trouble and keep your model nice and clean.
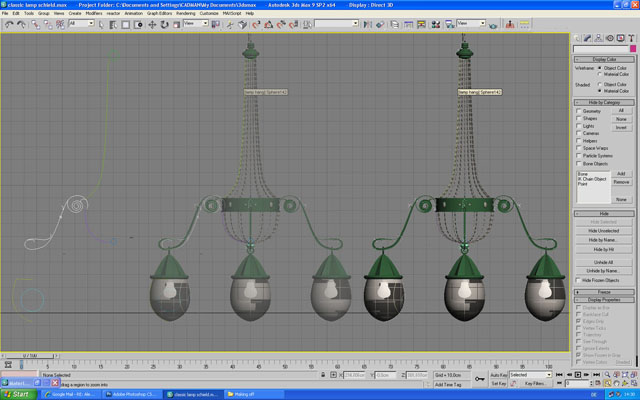
One of the biggest speed modeling advices is, not to over do it. Do a good modeling but do not go into to the high detailing every inch of it. Only the front objects must be high detailed, other, far range objects should stay in lower profile when it comes to vertexes, faces and polygons. So remember closeups must be good looking but far way models or background details can even be images in particular situations.Lamps where modeled with “Loft” function. Simply created one spline for the “shape” and another for the “path“, applied “Loft” function in order to create an object structure.
You can see all the different spline shapes and circles with different radius, I used different “path steps” for the lamp holders. so the shape would start dick go thinner and then expand again at the end.
“Path steps” is a grate way to control the thickness of your shape/line.
Please note that, while working with “Loft” function you might get flipped faces/polygons upside down, these parts might turn black in render, so just after modeling, hit the render button only to check that they are fine..
If you got them black, you can fix it easy, by selecting these polygons and pressing “Flip“, the function will flip the polygons back to their normal place, as they should be, with their face to the camera.
Distribution of the glass shapes on the chandelier I did with “Spacing Tool“, it’s a nice option to duplicate objects that follows the path. You can simply the create an object (in my case it was small glass) and apply “Spacing Tool” to the object, selecting the spline for the path, and your object will be duplicated as much times as you need along the path that you’ve created.
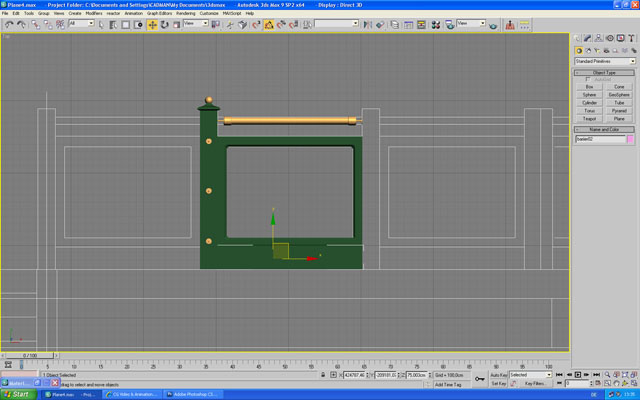
Made some nice parapet by using really simple object types, sphere, cylinder, tube…etc.
The detailing was made from extruding splines in to shapes and “Boolean” them from the balustrade. As you see, the parapet structure did repeated it self 5 times and created balustrade, the there was a simple need in creating only one complete shape and duplication it along the plan.
Most of the time such duplication made with “Instance” option and not with “Copy“. It is good for the 2 reasons: One- it will keep all the data in the RAM and provide you with better performance. Two- If you make a change to one object all the instance object will get it automatically as well.
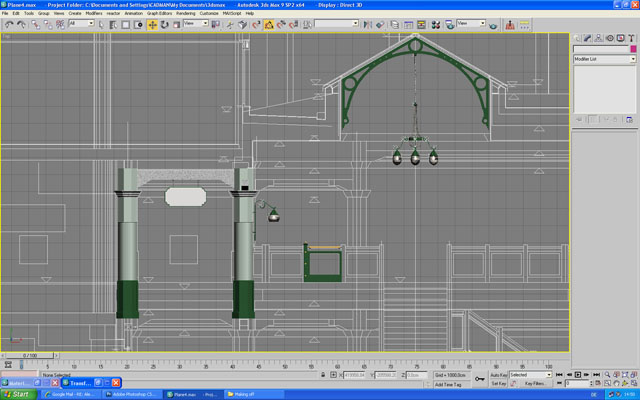
Ok, so I’ve made final adjustments, made a “sign” and the whole thing was ready for start working in depth-Z axis, and putting all the parts of the model together.
You can use the snap tool here as well in order to put your parts much more quickly and efficiently.
Don’t forget to give textures to your parts, it doesn’t have to be final, you can always adjust it latter, but it will be much easier to do it now, and not later on, and try to give clear names to your objects before you start to duplicating them.


Step 6
This one is the tricky, combining all the parts together buy using TOP, FRONT, LEFT view. But before you start doing that you must find the “perfect” cutting place-or the “perfect” connection place.
What do I mean by that ?
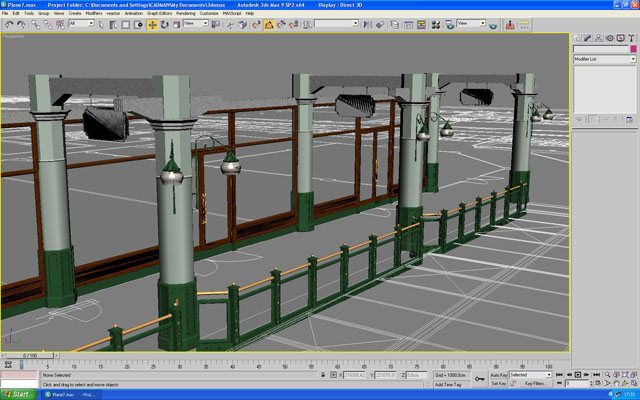
This one like a puzzle, you need to find the best cutting place for continues loop, so you could duplicating your part as many times as you need, and you will not see the cutting line.
Most of the building and massive interiors built from “repeating templates” and they are pretty much the same, so in order to create your model fast you need to track where are the repeating parts, and how do they repeat.
After you do that it goes really simple, just create your repeating part and duplicate it in a loop along the plan.
Mosaic floor was made manually, of course I could of do it with texture and displacement map and it would look the same, but I had no architecture plan for it, only the reference painting, so I’ve made some test and understood that making this texture in Illustrator or InDesign will take me much more time than duplicating boxes in 3Ds max.
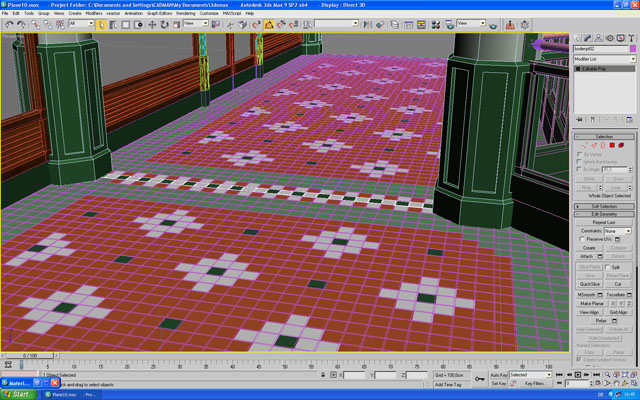
I didn’t had any clue of the size or the amount of the mosaic patterns, so I just had to make it on the spot and calculate the size by measuring the distance between the column and the wall.
Any way some fast calculations and a piece of paper with the a pen gave me the correct number of the mosaic structure.
Step 7
Finally the Group for the Loop was done, and I was ready for massive duplication, but I thought to do some test, before I kill my computers memory.
I’ve duplicated 3 times this group and my computer just hang up in the air for about 5 minutes, buy the way don’t forget to save a “copy” of your file before you do such tests.
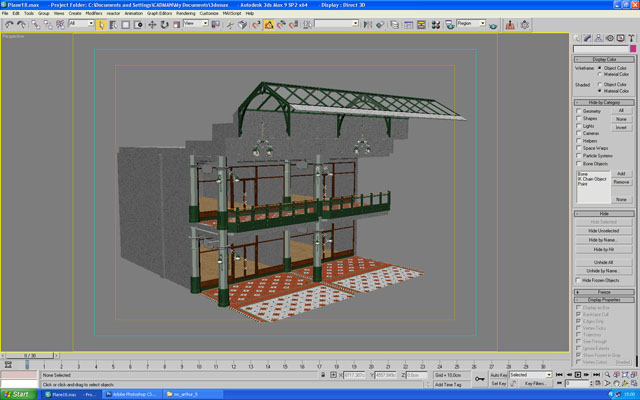
Why a copy ?
Because 3Dsmax, sometimes, like to get stuck when he runs of RAM and there is no way to get out unless you restart your program or even worth your computer. and to drop down file like this may not bring him back. Believe me 50% of the cases you’ll never get to open that file again.
So the only way to duplicate this Loop was to create a VRay proxy from it, in other words a “.vrmesh” objects. I went to each part and convert it to “.vrmesh” object, collecting my Loop all together now but only from “.vrmesh” objects. (don’t forget to use “Instance” option when duplication “.vrmesh” objects.
And Voila! my Group for the Loop was perfectly made for duplication, so I will not have to kill my computer or my self for damaging the files.
The performance was grate, I was able to work with all the model in all views, flip it, rotate it, all was just fine..
It took me a while to create the parts, and to think of the loop, but eventually it payed of. I did accomplished this part in half of a time that I planed, and got much more time for the fun part! Yep I’m talking about, Lighting & Rendering.
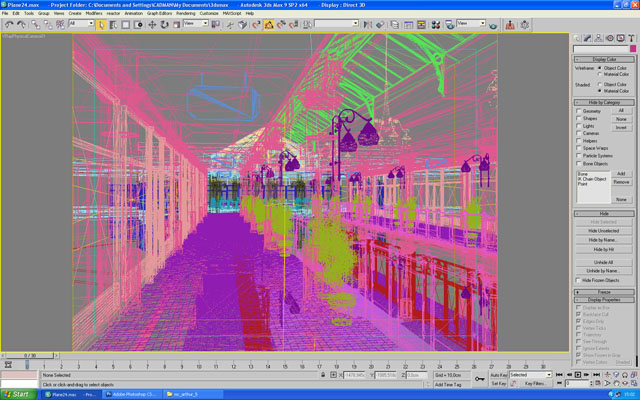
Are you ready ? Let’s GO!
Step 8
Here we are a the most tasty part of this project “Lighting“. On this stage you want to get your renders really fast in order to get a quick feedback and move on, so use rendering paramenters a low as possible, while adjusting the lights. (I’m using GI with Irradiance map and Light Cache with really low parameters).
I like to start from applying 3 fundamental lights:
VraySun + VraySky
VrayLight as a Sky Portal-at the openings, to get bluish fill light coming from the sky.
VrayLight as Key light, just behind the camera, with a bit yellowish saturation.
After a quick render I saw that some far places got really dark areas, so I’ve added some more VrayLights just to get enough illumination in those dark places.
Make some quick preview renders, just to see how the textures and the lighting behaves. Better to use “Region” option on you renders, while working with textures, so you will not have to render each time the whole image.
Final tweak goes for the VrayPhysicalCam f/number just to get the right exposure, the white balance just to nail the temperature of the scene, and here you go! you’re ready to do the high quality render, with passes of course.
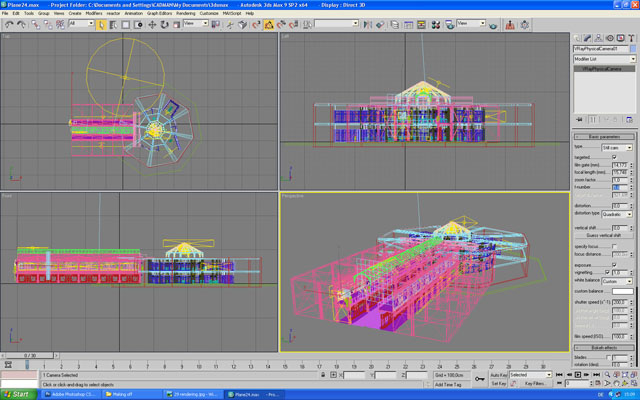
Step 9
Rending with passes is a really simple function but very useful for post production stage, as you see I’m rendering almost all the available passes in Vray while using 3Dsmax.
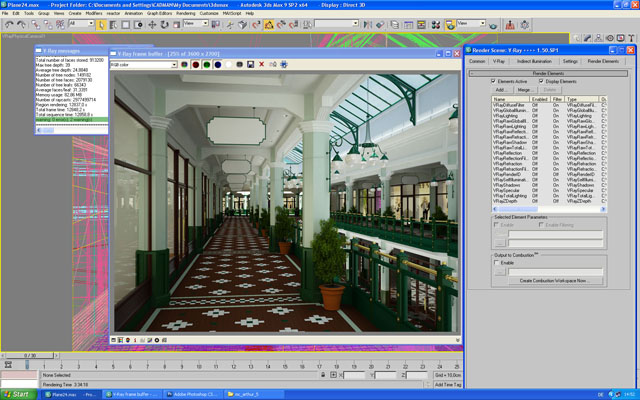
So in order to render your passes you have to enable the “Split separate render channels” on your Vray frame buffer, and save a path to your images.
Most of the time I’m rendering really big resolution, 3500 pixels, or even 4500 pixels and saving it with PNG or TIFF.
PNG works for really good, it got 16 bit channel pixel depth, and for me it is just good enough to work with in Photoshop.
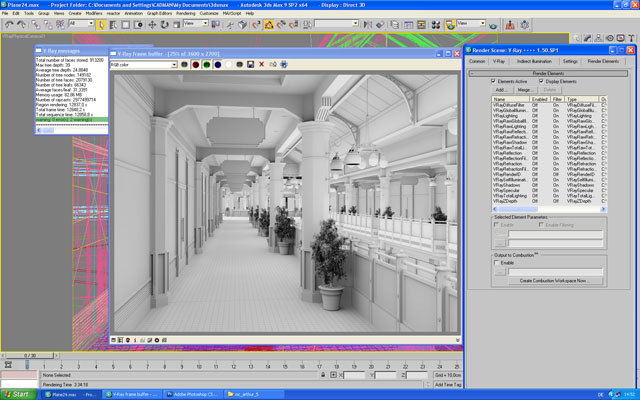
TIFF will give you much bigger range, 32 bit, and you’ll be able to recover all over-exposed areas, but in my previews I didn’t over exposed or under darkened my image, so I went on PNG, saved me a lot of space on my hard disk.
Another really useful pass is an Ambient Occlusion (AO), this you must render separately from all the other passes. The procedure of creating this pass can be adjusted manually by 2 light maps or just by using this free plugin from “Lele’s” wonderful Blog.
I’ve used this plugin, just to go really quickly on that one. It’s a simple drag and drop plugin, and after installing it, you’ll find it under Tools->ml_plugins->Vray Ambient Occlusion. You’ll probably have to adjust your camera exposure (f/number) just to get bright image, I’m working with gamma 2.2 on my Gamma/LUT in 3Dsmax, so most of the time i get really dark AO pass, but no worries, just lower you f/number and you’ll get it bright.
Step 10
Post production! Yeah baby! I really love that part! here you get really artistic and give your stile and personal look to the image.

Volume light was added in Photoshop, this is really nice Light effect that I use a lot in order to simulate the sun volume light. The method is really simple, just create yellow and while gradient add a mask to with clouds filter and then add wind filter in order to get nice long lines.
You can add some levels to it in order to make stronger lines.
Lower the opacity and you’re good to go! Try also to experiment with the Photoshop modes, most of the time you’ll get nice overlay results, if it is too weak you can always duplicate the layer in order to make stronger appliance.
Just to make some additional photorealistic look, I’m using a “PT Lens” for chromatic aberration, that a really nice plugin and ads lens destorsions, in my image i’ve used Nikon D80 and Zeiss Jena Flektogon 20mm f/2.8 lens.
Final
Now it can be adjusted with people and logos’ and everything you like
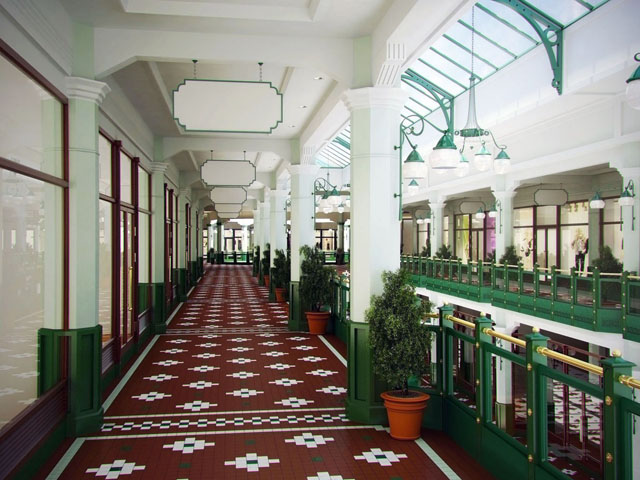
This was my basic pipeline production for 3D images, I hope you liked it and feel free to comment.
This was Alex, your Vray Guide
Have fun and do it like a PRO!


