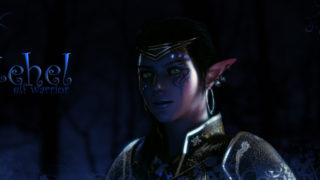
Making of Clara
This is an explanation of the making of Clara and how I like to draw my pictures.
Introduction
Hello all people, my name is Simon. This is an explanation of the making of Clara and how I like to draw my pictures. That means it’s not necessarily the best or the most correct way to paint. What works for me don’t necessarily work for you. I will not dive too deep into explanation of the different stages, consider this as a summary and feel free to use what you think is handy.
Background
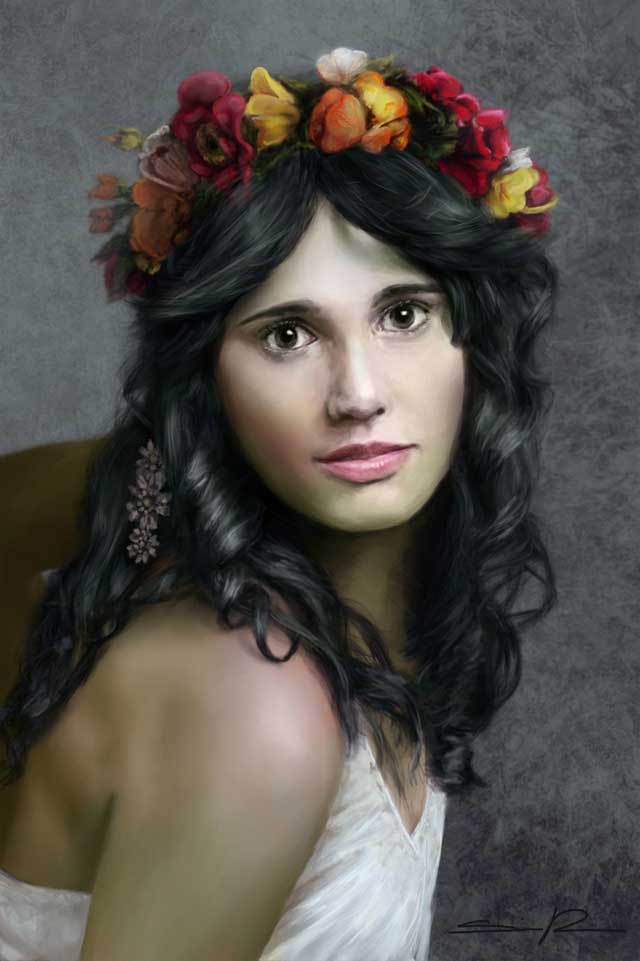
It all started as a project for practicing skin values and learn how to paint hair. It was also a gift for a friend of mine. I had some photos given to me and picked what I considered to be the most expressive one. My idea was to paint realistic but painterly like an oil painting and also add some changes from the reference photo.
The process
I first started to block out the most elementary shapes. I think it’s of great importance to get the proportions right in an early sketchy stage. It will save time since you don’t need to edit the basic shapes later on when you’re in a higher level of details.

I prefer to start paint the face. In a portrait it is the most important part of the painting because you want catch viewer’s attention to this area. There are lots of ways to choose a color palette but I like to use what I call “the color picking technique”. It’s exactly what the name says. You pick the color from an already existing photo, drawing, etc. I prefer to use photos because you have a very good balance of colors in real life that I consider makes a really good palette to play with. In this case I color picked from the reference photo. At this stage don’t worry about the color scheme you can always tweak it to your liking during the process and you will probably do that before finishing the painting.

To paint skin I use two brushes. Airbrush Pen Opacity Flow and Airbrush Soft Round. I start to paint with Airbrush Pen Opacity Flow, 100% opacity and flow with a middle tone color. After that I paint the darker and lighter areas with darker and brighter colors. To blend the colors I use the Airbrush Soft Round brush with opacity 30- 40% and flow 100%. I color pick colors from the photograph and simply keep on doing this over and over till I have a good blended spectrum of colors for my skin. I never use total black or white for shadings and highlights, in real life you almost never have these colors. Keep in mind to maintain some brushstrokes; it will give more life to the painting.

For the hair I used one color to start with. As Clara is black-haired it was good to start with nearly total black for the base. I created a new layer on top of the skin layer and with a big brush I blocked out the shape of the hair. With the eraser I removed the areas that were wrong. I started here to paint the garland of flowers and as before I basically blocked out the silhouette of the garland. I used very strong colors to start with but later when I had defined the flowers I made them more transparent and blurry to get rid of the feeling of being too solid.

Now it was time to go back to the hair again to define it even more. I started to pick lighter colors and with a custom brush give the hair more texture. To get a realistic feeling I painted the hair not as single hair shafts but hair shafts putted together. I also varied the direction how the hairs were falling. Lastly I took the Airbrush Pen Opacity Flow brush with 100% opacity and flow and pixel size set to 2-4 to draw some single hair shafts.
At this stage the most fun part of the painting starts, to paint details and add shadows and highlights. For saving time I always try to keep the painting in the same level of details under the process. It will not only give you a better overview but also prevent you from painting too much on one place so the picture not becomes unbalanced. I try to consider the painting as a whole piece not as small pieces I have to put together. I wanted the face to be the focal point of the portrait therefore I painted the highest level of details in this area and I also made it the brightest. I used Airbrush Pen Opacity Flow brush with 100% opacity and flow set to 6-8 pixels to paint most of the details. To direct the viewers’ attention to the face I blurred the areas around it.
When the picture was done I played around with different color balances to see what I liked most. I added the color balance as an adjustment layer on top of everything which made it really easy to try different variations.

So, finally, this is the whole process. I hope you found something useful and if you have any questions just send me a mail and I’ll try to reply.


About The Author
You might be interested in