Making of Toony in 3DS MAX
Hi everybody. In this tutorial we will see how we can design a lovely toon characters scene, light and render it. Also we will see what is composite material and how to use it. You need to know some 3ds Max essentials, but i tried to explain everything detailed. Used 3ds Max 2009, VRay and Photoshop.
Final Result

Modeling
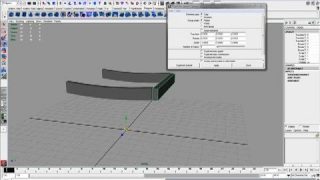
First we will create our floor. Create a plane, apply edit poly modifier, select back edges and move them to upward. last apply turbo smooth and its done.

To make our green creature, you can begin with several primitives. You can create a hemisphere and work with that. But I want to use capsule here. First create a capsule and make it editable poly. Select bottom half polygons and delete them. Select bottom spline and while pushing “shift” key shrink it a few times. Now there is a small hole, find “cap” button under edit poly settings and close that hole.

Now select the middle edge and loop it. We will reduce it size but first to get a smoother result enable “soft selection” and set values like the image below. Now you can shrink it. When its done select bottom and outer polygons then extrude them. But make sure “extrusion type” is set to “by polygon”. Move polygons that you extruded outer of the body. And last apply a Turbo Smooth and set iteration to 3. Our little creature is ready.

Again create a capsule and apply edit poly. Now we’ll make a mouth for this.By using “Cut” tool, draw two new cross edges. Select polygons in mouth and extrude back two times. First one has very low extrusion value, because when we apply a turbo smooth this will make a sharp edge for mouth. Second one is a deep extrusion. When you are done apply Turbo Smooth with 3 again.

We will make our little pink character now. It is almost same to make this creature with others, there are just arms and ears. But making them is easy like make a mouth as you will see.
Create a capsule again with values that i gave you in the image,again make it editable poly. Make its mouth same way as the previous creature. Draw 2 edges with Cut tool and extrude two times. For arms select each polygons on the sides and apply a Bevel modifier. Extrude a little bit and give some outline amount as I did. Now we want those hands up. For that select edges that you extruded and move them upper a little bit then rotate them a little. Now we will make ears, but I want them different positions. So first select edge on the right side and extrude it. Select front edge and with “Inset” tool shrink it and extrude it back one time. This ears is done. Now select other side edge and extrude it two times. We want to bend this ears. For that select the top edge, move and rotate it down a little bit and again move and rotate. Its up to you a little bit. When you think that’s done apply Turbo Smooth with 3 iterations. If left ear looks weird, keep moving and rotating top edge until you like the result. As you can see we are done with this character.

Making heart is really easy, just create a box with 4x3x2 and make it editable poly. Then select vertex and move them to make a heart shape. If you cant make a good heart shape you can get a heart image from internet, create a plane behind your box and apply that heart image as a bitmap image material on it. That will really help you to get a good shape. When you got your heart shape select middle edge and loop it. Then increase its size a little bit. And apply Turbo Smooth, there is our heart.

Lighting
I will use only VRay lights on my scene for lighting. Set a big Vray light on the left side. It’s for main white light. Place a same sized VRay light to opposite it. It’s for warm orange light from the right side. Create 3 little Vray lights and locate them to top of our creatures. And last create a Vray light and locate it upper-front. I gave all values and light colors in the image below

But why did I set several lights in this scene? There is 6 lights in scene. To tell effect of each light, I have got different renders. In each render only one light is open. And in the last image all lights are open. You can understand well by examining at this image and seeing that how each light affects the scene.

Rendering
I used Vray Render Engine in this scene. You can get quick and reasonable with this engine. These are the values that I used in scene:

Materials
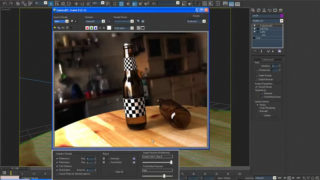
I used Composite materials on our creatures. You can use many maps and bitmap images in a material and mix them. For example green creature in this scene I drew mouth and eyes in different documents and they got also alpha channels. that means they haven’t got backgrounds. With composite material I can create a background material put my mouth and eyes map on it and I can locate them as I want by playing with values. When you saw images you can understand well.
Second thing is UVW Map. When you created and attached you material, you will see that material is not suitable on object. We can fix this problem using UVW Map modifier. I used cylindrical UVW maps for this scene because our creatures are some like cylinders.


At this point I want to talk about color correction setting. In composite material there is a small button next to map slot in each layer. When you click that button you will see some settings like brightness,contrast,saturation,etc.. With this we can give a better look our rainbow texture. I showed effect of every parameters in image. We can get better results by playing that values. As you can see I increased some parameters there, and now we have got a nice, colorful rainbow like texture.


Camera
I used Vray Physical Camera, because there is a lot of value that we can set and with that we can get so much better results. Set film gate to 35mm, zoom factor as you like, f-number 4,5 , shutter speed 60 and film ISO 200. And locate the camera as I did.


Maps
Maps can be found here:
DOWNLOAD LINK
Conclusion
You see it is not that hard to make a toony scene, just imagine and push the limits. Please don’t hesitate to contact me for any question.
DeviantArt
Facebook
Twitter
Formspring
Mail: alicanrusen@gmail.com
MSN: unreal.4@hotmail.com
Skype: alicanrusen
Final Result
Here is another render that I used different values and map.
High resolution (1920×1080) version can be found here: HQ Wallpaper Version


About The Author
You might be interested in