Building a Polygon Arch
This tutorial will show the method I used for making my arches in a building. There is obviously more than one way to do it. This is not the standard method to make an arch, it is just my way of making them. Let us begin….
1. Whenever I start up a new project, I always make a project folder for the work, that way everything is organised and in order. So in Maya I make a new project and set it to that project.
 .
.
2. After that has been done, we begin the work. Go to the side view and create an arc with the Three Point Circular Arc tool found in your create menu. Use your grid snap by holding in X on your keyboard while you are making your arc, that way the arc will be perfectly aligned with your grid.


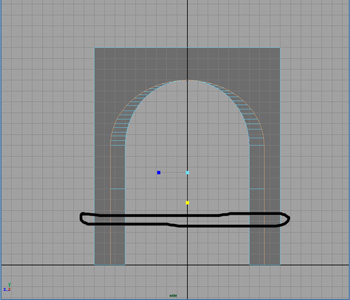
3. Now that we have our arc shape made, we are going to be using the arc shape for reference. Using the Create Polygon Tool, we start making an “Arch” poly. Make your first point on the right side of the arc shape by clicking just above it and work your way left and then down and then start making your way right again and then up until you reach the first point of the arc shape. When you get to the arc shape start making the points closer together as you follow the arc shape so that the arch will come out smooth. Once you are done making the shape hit enter to complete the poly. After you’ve hit enter, delete the newly created polygons history so that we can work with a clean polygon without any history on it.


4. Right, now you can see that you have made an “Arch” poly, without using a boolean. Pretty cool hey, anyways, now we need to give it some width. Before we do that now would be a good time to fine-tune the vertex points of your arch if you feel like you need to and then you should save the scene, you never know what could happen. Once that is all done, switch to your perspective view and select your poly and then select your polygons face and extrude it using the Extrude Face command in the Edit Polygons menu. Extrude the face about 0.6 or so in the Z axis. Once that is done delete it’s history once again.


5. Cool, we are nearly done. Next step is to add a bit of detail. Select your poly and go into Edge component mode and select the first edge at the bottom, then go to the Select Contiguous Edges under your Edit polygons selection menu. Once you have executed that command it should select all of the edges on the front part of your arc. Now that all of those edges are selected extrude the edges by going to your Extrude Edge command in the Edit polys menu. Just remember to not deselect any edges before the extrude. Once the extrude has been executed, the transform handles should be at the bottom, once again before deselecting anything hit R on your keyboard to bring up the Scale handles, once that has been done the handles should move to the center of your poly with the newly extruded edges still selected. Next step is to switch to your Side View, again without deselecting anything. Now that you are in your side view select your little blue( Z axis) scale handle and scale it out to your left, that’s when you should see the newly created polys form another “outer arc”. Once that is done, you need to deselect the bottom two edges without deselecting the rest of the edges, you do that by holding down your Ctrl key and dragging a selection box over the two bottom edges. Once the bottom two edges are deselected scale the remaining edges down by selecting the little green( Y axis) scale handle and moving your mouse down. Once you have done that you should see all of those extruded edges that we made earlier form the outer arch. Now that we have the outer arch done we can now deselect all the edges and return to object mode and delete it’s history again. :)


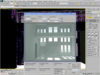
6. Okay cool, now for the final part. Staying in our side view, go into Face component mode and select all of the outer arcs faces.After you have selected all the faces, switch to the perspective view and extrude those faces about 0.5 or so in the Z axis. Once that is done, delete the arches history once again for a nice clean polygon arch.Save your scene now, because that’s it, we are done!! Pretty cool hey. So now if you want to have four sides all you have to do now is duplicate the arch and position and rotate it so that it is aligned properly with the other pieces. So to check out how it turned out make a ground plane and make a plane for the roof, and then add a light or two and give it a render!! :) :) I have included a rendered image with a ground plane and a roof, aswell as the Maya scene file for you to download and check out.


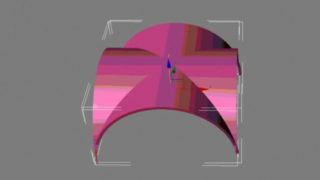
Preview Renders:


Maya Scene File: Click here
Thanks for going through my tutorial, I honestly hope you enjoyed it, and most importantly, I hope you learnt something new that can maybe help you in any way.
I would love to hear your feedback regarding the tutorial. If you have any questions about the tutorial or need any help, or didn’t like it, then please feel free to drop by My forum and let me know, it would be greatly appreciated if you let me know how my first tutorial was. If the response is good, then I will do a few more tutorials. Anyways, I hope you enjoyed it…..See ya!! :) :)
© A. De Carvalho (Millies45) 2004


About The Author
You might be interested in