Missiles Tutorial
Hello every buddy,
This is from one of my tutorials series, in this tutorial I will show you how to work with (Instancer) inside Maya.
(Instancers) can be very useful and handy when you have one single object and you can convert it with particles in your scene, and then you can create many of them at the same time to create more realistic effects, (Instancer) can save allot of your time. this is the point to think about that how much (Instancer) can save your time?
Suppose you have a big spaceship in your scene and you want to emit small ships from inside the big spaceship, if you think here it will be very boring and time wasting if you create one by one the small ships and then to animate them, that is why (Instancer) will work very strongly here, to work with (Instancer) just you have to create one single object to emit from any where you want.
Before going to start this tutorial you should have (intermediate) knowledge of Maya and familiar with fundamental tools to use.
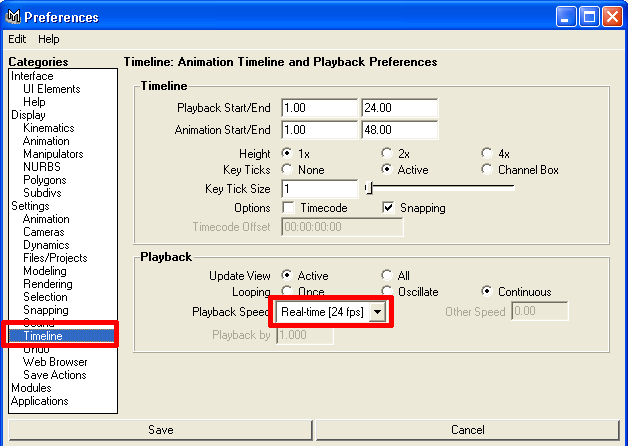
Ok now its time to start our lesson open Maya and make sure you are selected (Real-time[24 fcs] in preferences window and then hit (Save) like the picture below.
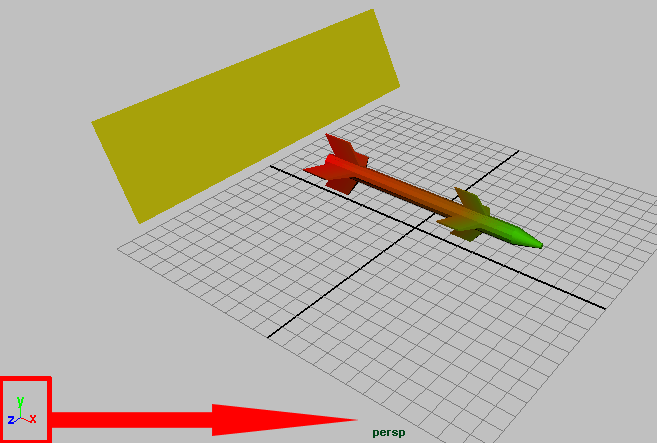
1-Ok lets start if you are working with (Instancers) always make sure that your model is pointing down to X axis, if you dont do this then may be you will face some problems with (Instancer), the image below is indicating you how to fix your scene to work with (Instancer), if you have any other object in scene that you want to experiment with (Instancer) you can, or if you want to follow along with me then download the Starting Scene from ( here ),
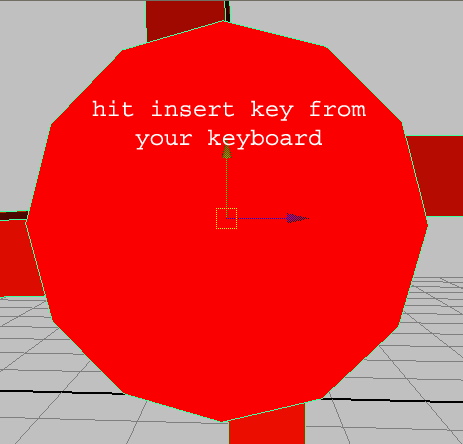
2-When you understand the scene setup, lets do some more tuning in object, now select missile and if you see the transform X Y Z is in the middle of missile lets move this to tail of missile, to do this hit (Insert) key from your keyboard and now you will see the transform for X Y Z is changed, and now move it to tail as image indicating down.
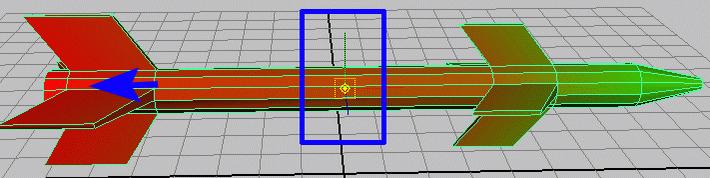
3-And then move it here in the tail as the picture illustrating below.
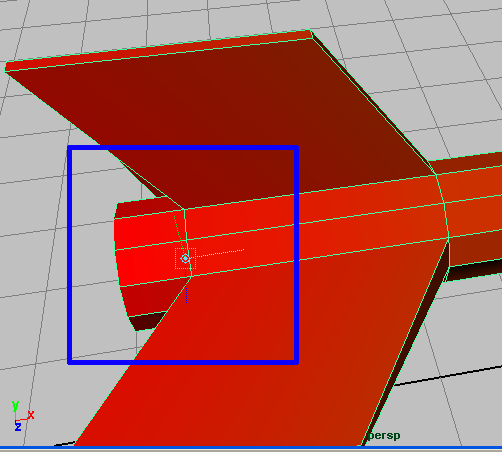
4-Ok now once again hit (Insert) key from your keyboard to fix the transform for X Y Z, as the picture below.
5-Now select the missile and bring the transform X Y Z to pivot point, I mean translate X Y Z to 0,0,0. still with missile selected go to (Modify>>Freeze Transformation) as like the picture below.

6-Its the time to start, make sure you are in (Dynamics) type as in the picture below.

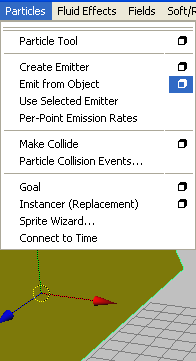
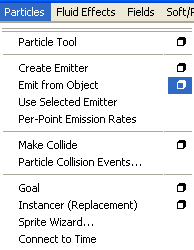
7-Select the plane now and then go to (Particles>>Emit from object) hit the small rectangular box like the image below.
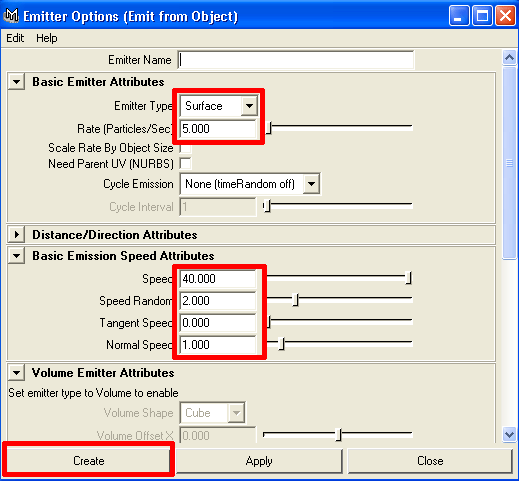
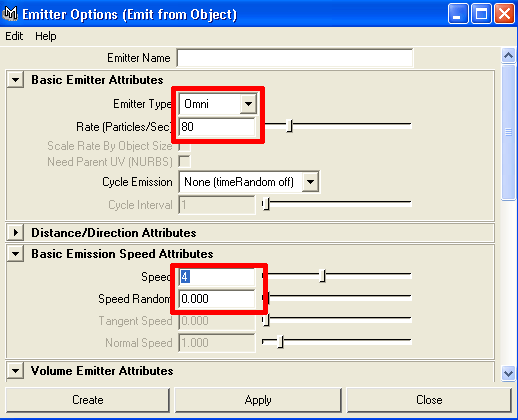
8-Now you should see the window for (Emitter Option) then do the setting and then hit (Create) like the picture below.
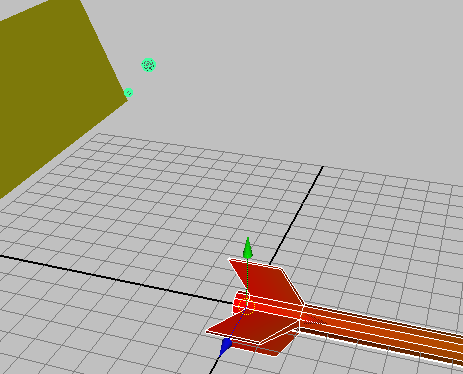
9-If you hit play you will see the small particles emitting from surface to see bigger particles in size First select the particles then by (Ctrl+A) you should see the attribute editor click (ParticleShap1) then scroll down (Render Attributes) then do your own setting as the image indicating below.

10-Now you should see the particles become visible and bigger in sphere mode. as in the image below,
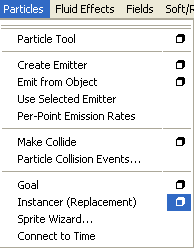
11-When you done Now select the missile and then hold down (Shift) key from your keyboard and select the particles, when particles and the missile is selected now we will start (Instancer) here, to do this go to (Particles>>Instancer (Replacement) then chose small rectangular box as in the picture below.
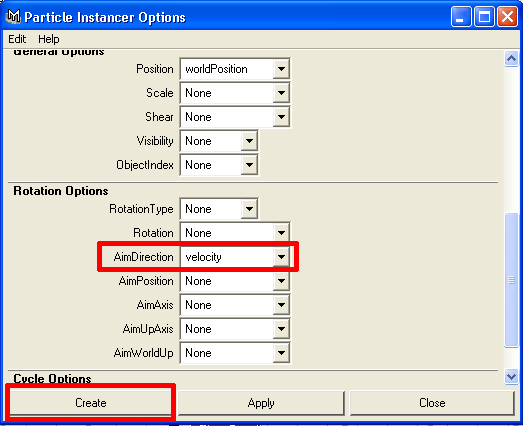
12-And now you should see the option for (Instancer) and then change (AimDirection) to (velocity) and hit (Create) as in the picture below.
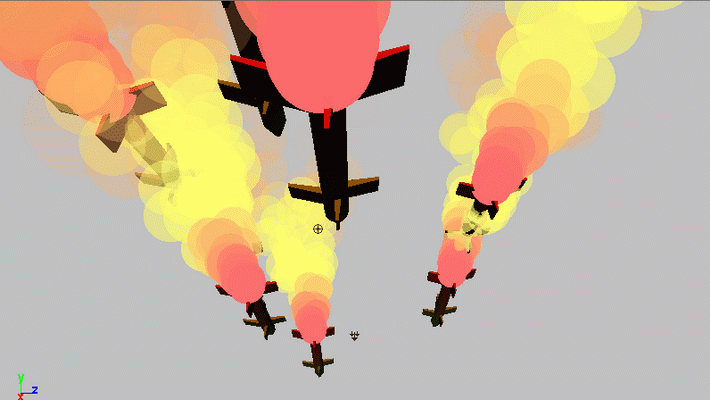
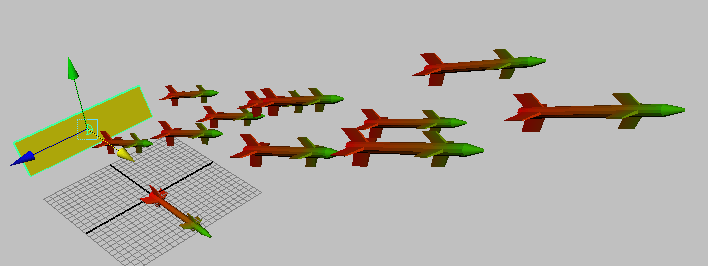
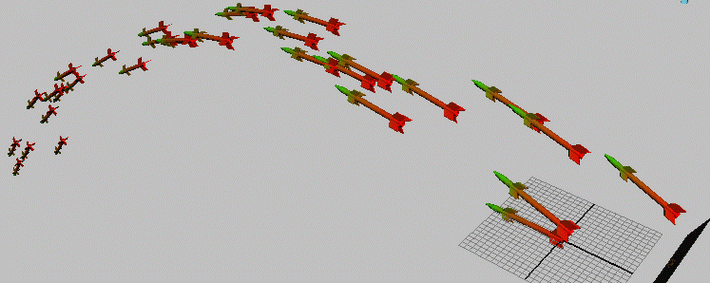
13-Hit play and you are watching missiles are coming up from surface and they are going through with out aiming, like the image below.
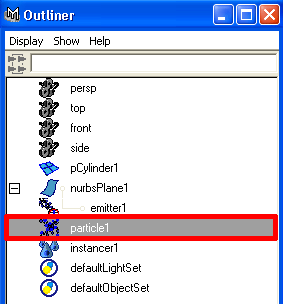
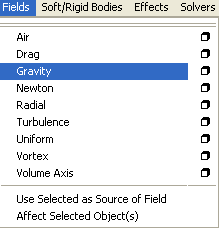
14-To create more realistic motion we need to have some gravity in missiles to do this first go to (Window>>Outliner) then chose particles from list as in the picture below.
15-And now go to (Fields>>Gravity) like picture indicating below.
16-Ok hit play now you should have nice and neat aiming motion on the missiles like in the image.
17-Once again go to outliner and this time select the particle as like in the picture.

18-Here we want to add trails of fire and smoke to our object, This is very important thing to understand when you play with particles you always should note the rate of particles for example if you keep the rate of particles more then hundred first it will be very heavy effect in your computer if your computer already slow, second it will take allot of your time when you render it, keep in mind always make sure you are happy with rate of your particles.
Here we want to add fire and smoke coming up from tail of missiles, to do this go to (Particles>>Emit from object) then chose a small rectangular box beside it, like in the picture illustrating below.
19-And now from Emitter option do as in picture below.
20-Play now and you should see something like in the picture below.

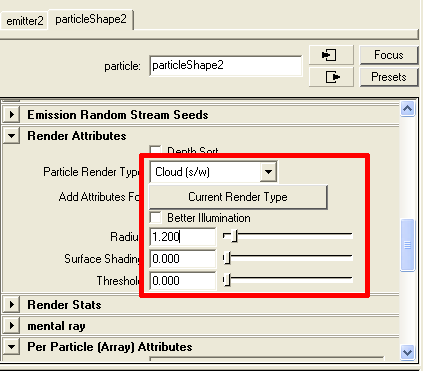
21-Select the small particles which is coming up from tail and then (Ctrl+A) to see attribute editor, now hit (ParticleShape2) tab and then scroll little bit down to (Render Attributes) chose (Cloud [s/w] from dropdown menu, and then hit (Curent Render Type) button to change radius of particles, as like the picture indicating below.
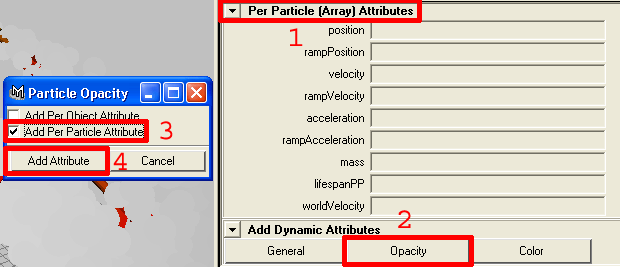
22-Ok scroll down to see (Per Particle (Array) attributes) click on button called (Opacity) and then check mark from small window (Add Per Particle Attribute) now click on (Add Attribute) button, like image.
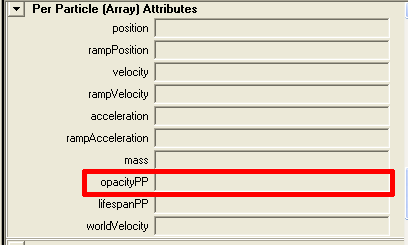
23-If you see now there is (OpacityPP) is added in list, Opacity is obvious by its name that it will work for opacity, like in the picture below.
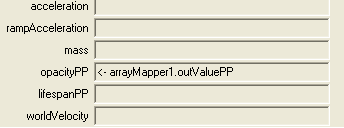
24-Now right click inside (OpacityPP) bar then from pop up menu chose (Create Ramp) like the picture below.

25-Your (OpacityPP) bar should look like the image below.
25-Now hit play button and increase play range to how many frames do you want its up to you, and now you are watching that the trails are coming up from tail and then after some while in the end disappearing, it because we add the (Opacity) for our particles.
Like the image below.
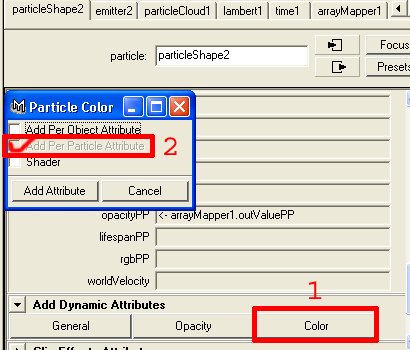
26-Its time to add fire effect ok to do this click on (Color) button and you will see small window will appear then check mark (Add Per Particle Attribute) then hit on (Add Attribute) button, like the picture below.
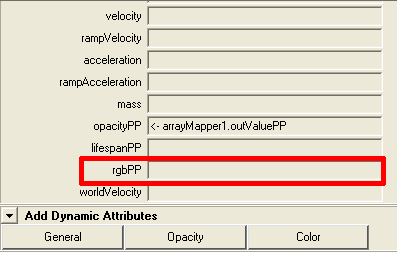
27-Now in list (rgbPP) is available like the picture down.
28-Right click inside the (rgbPP) then chose (Create Ramp) as in the picture below.

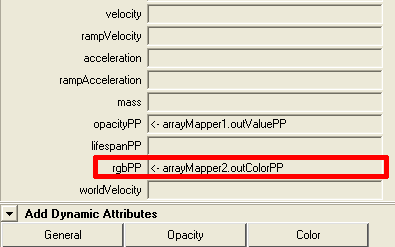
29-You should see now like in the image below.
30-Ok now hit play your scene should look similar to image below.
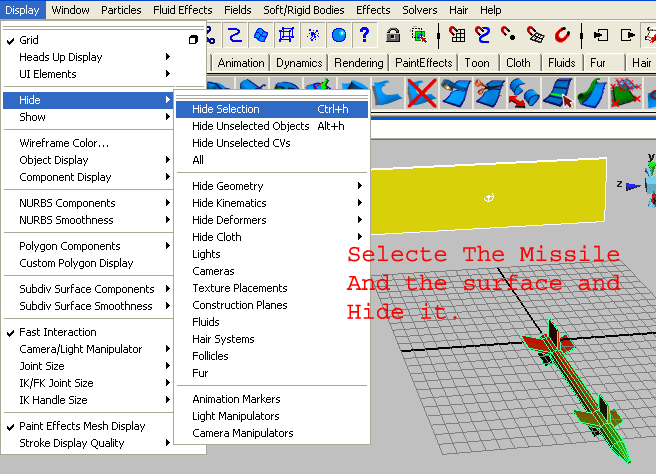
31-Its time to hide original objects from scene to create nice and tidy scene, to do this first select the plane and then reference missile then go to (Display>>Hide>>Hide Selection) as like the picture below.
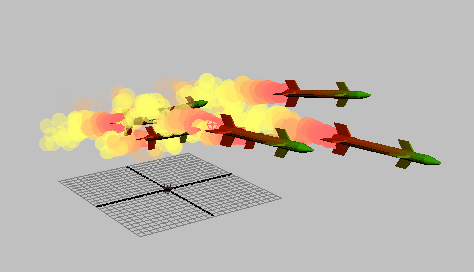
32-And now your scene should look something like in the picture indicating down.
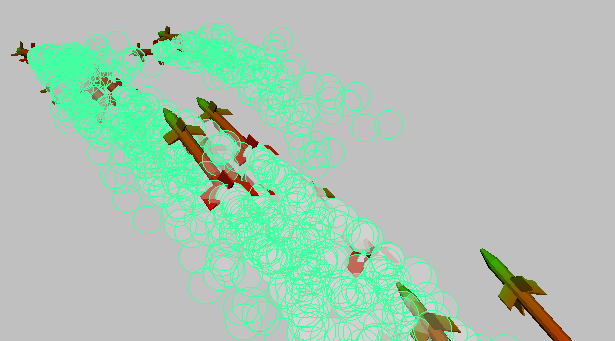
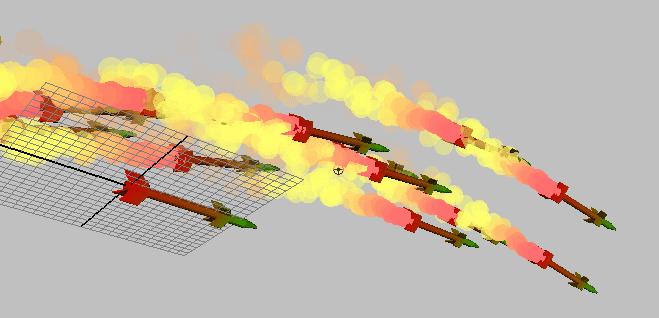
We are done here and play your animation you will see the missiles are coming and the trails are dissipating in the end and then after some while they are disappearing, the image below is screen shot not render I adjust camera and fix it to see missiles like the picture below.

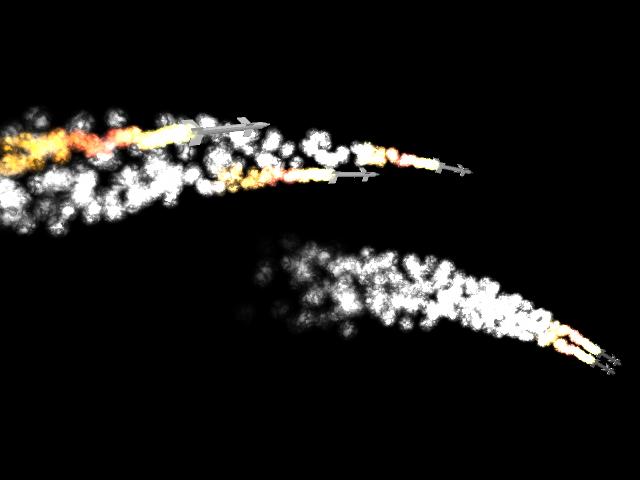
And this image is rendered view of mine below, in this image I used some advanced things wait for the tutorial which I am going to write it soon.
Here you can (Download End Scene)
Here you can (Download ANIMATION)
Hope you Understand now how to create these kind of effects, this is endless try it your own pace you will find it very useful and experiments with different objects and experiment will make you perfect.
I hope this tutorial helped you to learn something new, and you can wait for my next coming tutorial that I will show you how to create a realistic fire trails of missiles which I have done in my final rendered image above.
Please feel free to write me

About The Author
You might be interested in