How to make VRay chrome material
QuickMax is a new series of simple 3dsmax tutorials that I created, which will feature all aspects of the program itself, including modeling, texturing, lighting, and animation.
Welcome to section one, this will feature the 3dsmax Material Library.
Section 1: Materials
VRay Materials 2:
How to make a nice VRay brushed chrome material
(To complete this tutorial, you will need 3dsmax and the VRay rendering system.)
To start off, open up the material editor in 3dsmax, then go to any free material slot and select the “standard” button on the right, and then choose a VRay material:

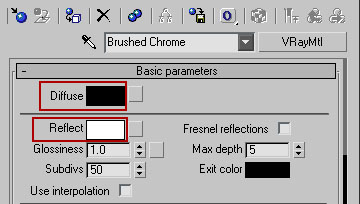
Now after you select “VRayMtl” go back into the material editor and rename the material “Brushed Chrome.” Then go to your diffuse color and set it to RGB: 0-0-0, then go to your reflection color and set it to RGB: 255-255-255 so that it reflects like pure chrome:
You can stop here if you just want a regular chome material, but if you want the brushed type effect continue on. Go to your maps rollout and select the bump map slot:
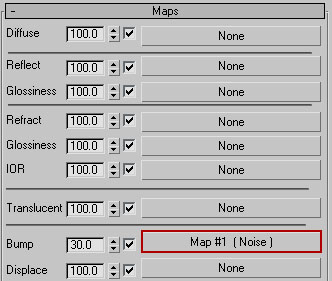
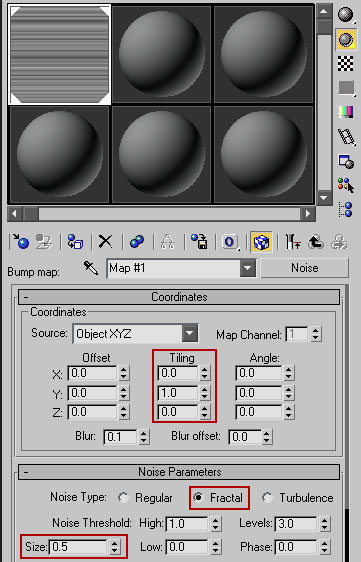
create a new “noise map” and give it the same settings as shown below:
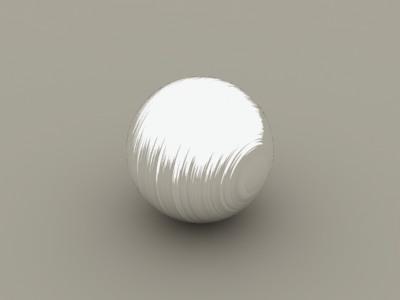
Now after giving the noise map those settings go back to the original material and apply the new material to an object (a sphere for example). You should come out with something like this:
Now we’re done! You can use this material on cool things such as flagpoles, metal walls, junkyard metal type objects, and others. Happy maxing!
This tutorial is copyright by Necksmasher/Xeron3D © 2006


About The Author
You might be interested in