Making of Chrome Material by Florence Design Academy
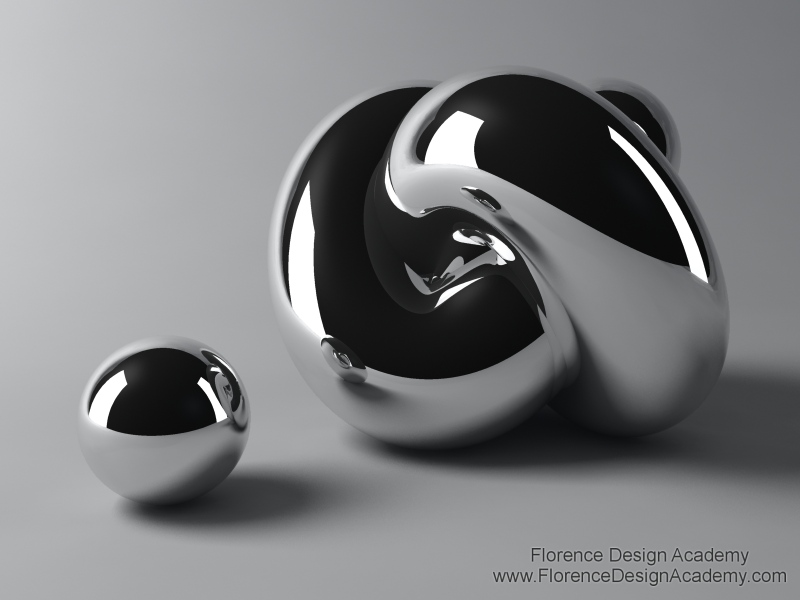
Chrome is one of the most used materials in the Design field. This material needs only a few settings to be rendered in an optimal way. You can see many samples of chrome in the design gallery of the Florence Design Academy
Let’s begin:
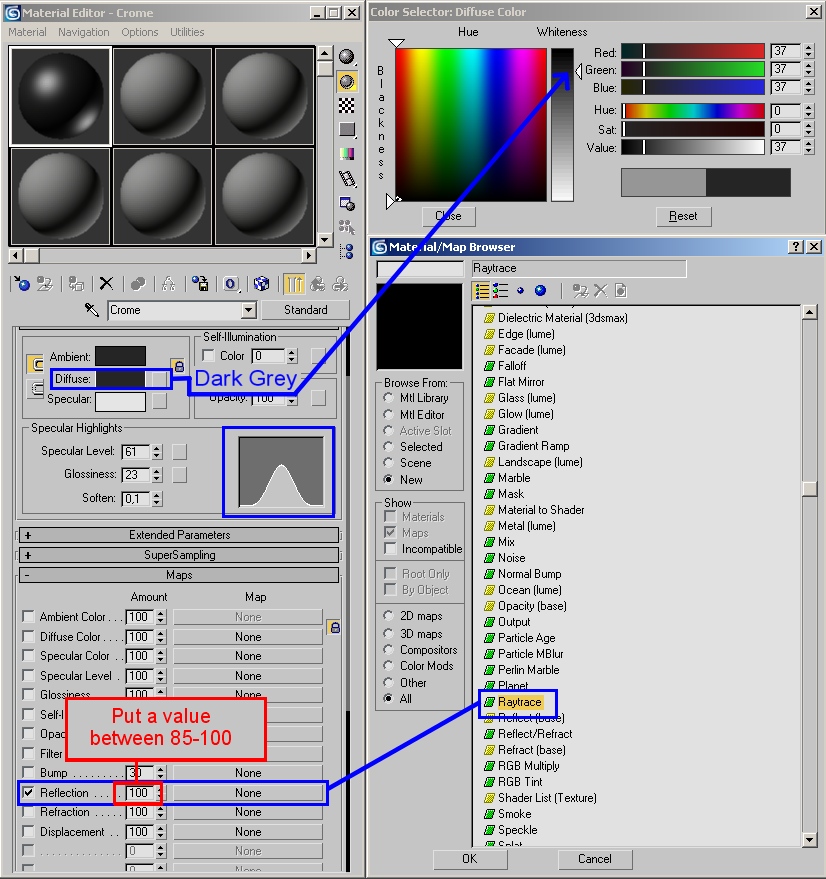
1.) You need a dark gray diffuse color (for a perfect mirror it should be black, but often a dark grey color has a better effect on chrome).
2.) Now go to add glossiness and specular level (there are no fixed values, the correct effect is strongly depending by the light that you create. You can begin with the value 40 in both slots).
3.) Go to maps and assign to the REFLECTION map "RAYTRACE". This will allow you to
have REAL reflections of other objects in the scene on this material. The value in the reflection slot should be between 85 and 100 (a mirror must have 100)-( image 1).
Very often you need to have a environment which reflects on your object to achieve a good rendering. A good reflection will give a touch of realism to your object and will describe better organic shapes. But what if we don’t have any other object in the scene that can reflect on our model ?
We will use a FAKE reflection. This kind of technique simulates to have a environment reflected on surfaces which in reality does not exist in your scene. In fact we will use a simple image to create a Fake reflection.
After you have insert RAYTRACE in the reflection map you will see that the material editor is showing new settings. This are the settings of the raytrace panel (on the right side of the material editor you can see written RAYTRACE instead of standard). Like on image 2 go to assign to the NONE button in BACKGROUND a BITMAP (image 2).

image 2
After this step you will see that the material editor is showing you the settings of the Bitmap panel (Image 3). Normally you must reduce the output amount of the fake reflection (this is the setting which will make more or less visible the image that you choose as fake reflection). To make the image "less visible" you must go to "Output" where in the "output amount" slot you must put a value which is a little bit smaller than 1 (for example 0,7). Normally the standard number 1 is too high as value.
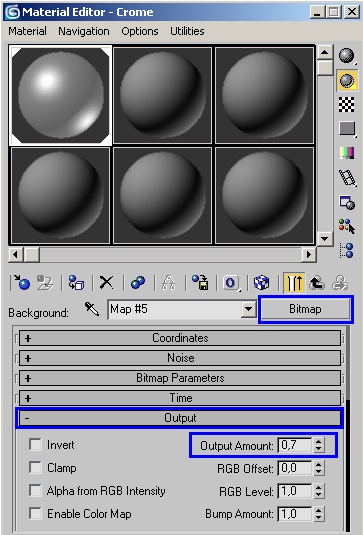
image 3
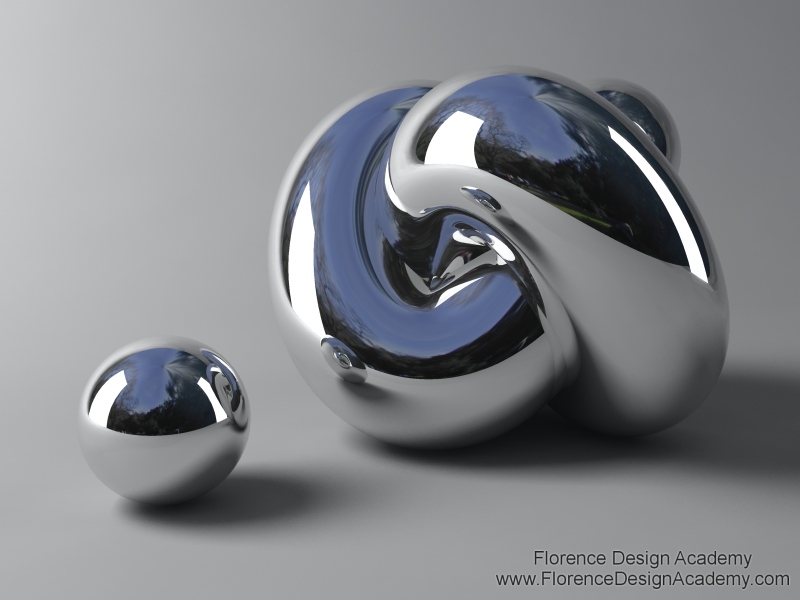
Picture used as fake reflection for the rendering below
In this way you can obtain really very good reflection effects. Here below you can see a sample.
On this image you can see the reflection of the gray environment + 2 white boxes + the fake reflection
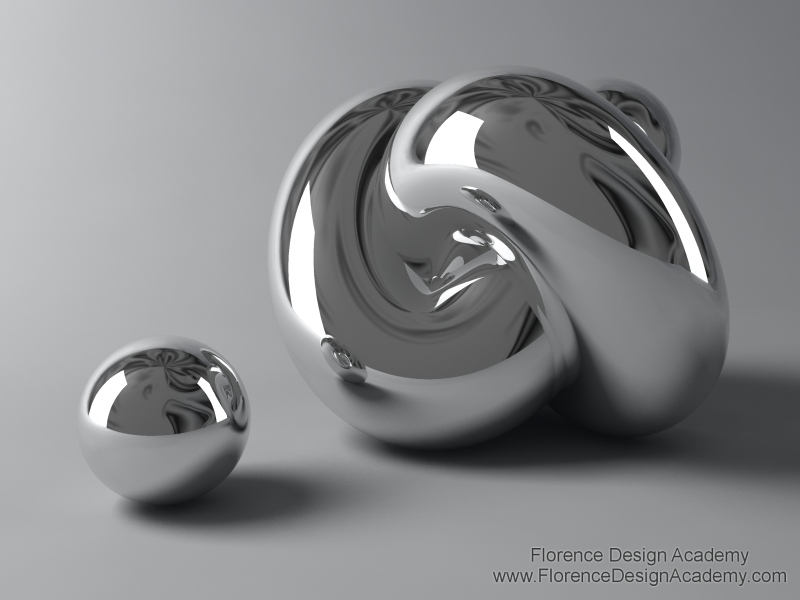
Here we have the same scene with the same settings like above. Only the image for fake reflection is different.
Tip1: Remember that with Mental Ray the fake reflection is NOT visible in the material slot as preview. You must make a test rendering to see the result.
Tip 2: There are many ways to create Chrome. Another way to create Chrome is trough a RAYTRACE material (change standard with RAYTRACE in a new material slot). But the result is the same as in the standard material.
Tip 3: A HDRI image can also used as a fake reflection. HDRI renderings will be explained in other Florence Design Academy tutorials or lessons.
Tip 4: If you want exclude an object from reflection: go to the chrome material, select raytrace that you have in the reflection maps slot. Click on the button LOCAL EXCLUDE. Now just select the objects that must be excluded from the reflection of the chrome material. This will make the selected object invisible in the Chrome material.
Tip 5: A mirror material is very similar to Chrome: Black diffuse color, no specular highlights and Raytrace 100% in the reflection map.
You can find the informations for the illumination&render settings in other Florence Design Academy tutorials.
I hope you have enjoyed this tutorial.
Best Regards


