Making Shiny Glass Logo Tutorial
Introduction
Hi everybody.
In this tutorial we will see how can we design a shiny logo in 3ds Max. I used 3ds Max and VRay for this project.
Step 1
First open an empty project in Max. Under shapes click text button and create a text like the image below.
![]()
Step 2
In the modifier list find and click bevel modifier and set values like me.
![]()
Step 3
In geometry create a tube with values like in the image.
![]()
Step 4
In modifier list find edit poly and apply it for tube. Under edit poly select edge mode. Select an edge like the image below.
![]()
Step 5
Then click loop button to select whole edges on that line. In the end you have to select edges like in the image.
![]()
Step 6
Then apply it chamfer with 1. In modifier list select Turbo Smooth and set iteration to 2.
![]()
Step 7
In shapes create a star with values like in the image.
![]()
Step 8
Apply a Bevel for star and set values like in the image. Then create a plane and put it under the objects in the scene.
![]()
Step 9
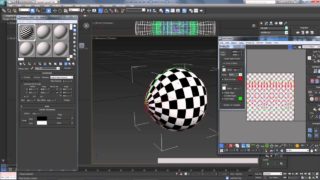
Press “M” key to open material editor. In the material editor. Use the settings image below for every object in the scene. then apply materials to objects.
![]()
Step 10
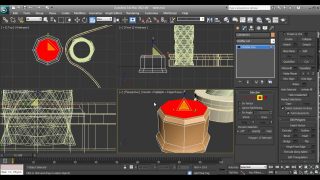
Set render engine to VRay. Then set the settings like in the images and hit the render button
![]()
Also you can modify objects as you like. You can add some extra details and add more chamfers. In material editor you can play with values to find several nice results as you like. I used a HDRI for environment and reflections. You can easily find free HDRI images by typing “Free HDRI” to google.
Best Regards…
Alican Rusen
Final Result
![]()
About the Author
![]() Alican Rusen
Alican Rusen
Istanbul, Turkey
alicanrusen@gmail.com


About The Author
You might be interested in