Reactor Wheel Tutorial By Aziz Khan
Hello and welcome again to my (Reactor Wheel) Tutorial, I am writing this tutorial for request of some friends whom they needed this to their project, so I thought its should be for you too, hope you enjoy this tutorial and be able to learn some thing new.
Ok I am not going to waste your precious time lets get started.
In this tutorial I have created a very simple scene to show you how to use (Reactor Wheel) in 3ds max, so if you have your own scene also you can use it if you think that you will do it later on, you can use my provided scene from (here).
In the scene which I am providing you I have created 10 frame animation it will help us when you create a animation of that small car, in (Reactor) later on, if we have not any animation in the car or what ever which you want to animate it, then reactor will not animate it because of no animation. Lets get ready and start.
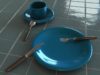
1-I have created the simple scene which I am going to use in this tutorial, image below.

2-Go to (Reactor) panel and then chose (Rigid Body Collection) from the list, as in the picture below.
![]()
3-Now created it any where do you like the scene but make sure not so far, and then from (Rigid Body Collection) Properties Chose (Add) as in the pic below.
4-And now the window will appear select all the names in the list (All) then (Select) as in the image below.
5-You should see now the ret of list in the (Rigid Body Collection) like the picture illustrating below.
6-Now its time to add wheels for our little lovely car to do this go to (Reactor) Panel and then chose (Wheel) from the list like in the picture below.
![]()
7-Ok create the wheel some where in the scene and go to its property then check the small check box called (Parent) then button called (None) will be Highlighted chose the (none) button then click on the body of our car to parent it for the tires, ok when you done now chose the (child) and then click on tire to assign it into child of body as like the picture below.
8-And Then do the same for all remaining 3 tires to assign it into the body of our car. as like in the picture below.
9-When you done with all of your wheels assigning to body you should see something like the image indicating below.
10-We are going now to add (CSsolver) to wheels to do this go to (Reactor) Panel and chose the (CSsolver) as like the image below.
![]()
11-Create the (CSsolver) some where in your scene, and now from it property chose (RB Collection) button then chose the (Rigid Body Collection) then hit (Add) button to add wheels in (Solver), like in the image illustrating below.
12-The window will appear from the list hit (All) button then chose (Select) button as like in the picture showing below.
13-As you see all of the (wheels) are added into (CSsolver) property, in the image below.
14-Now select the body of car first then from (Reactor) panel chose (Open Property Editor)![]() then window will appear in the (Mass) give value of 200 and then in the (Simulation Geometry) Chose (Mesh Convex Hull) as like the picture illustrating below.
then window will appear in the (Mass) give value of 200 and then in the (Simulation Geometry) Chose (Mesh Convex Hull) as like the picture illustrating below.
15-Now its time to give (Mass) value for tires, same for all 4 tires, ok to do this as like the body, first select the tire and then from (Reactor) Panel chose (Open Property Editor)![]() from window change the (Mass) Value to 60 and the (Simulation Geometry) chose (Mesh Convex Hull), do the same for all 4 tires, like the picture below.
from window change the (Mass) Value to 60 and the (Simulation Geometry) chose (Mesh Convex Hull), do the same for all 4 tires, like the picture below.
16-When you done select the road and go to (Open Property Editor)![]() from (Reactor) Panel and then change the same as like in the picture illustrating below.
from (Reactor) Panel and then change the same as like in the picture illustrating below.
17-Now we will do some tuning in our animation do this go to (Utilities) from the list chose (Reactor) as in the image below.
18-Now from list expand (Preview & Animation) tab then expand the (World) Tab change the setting as in the image below.
19-Now you have to test your Animation, to test your animation just hit the button called (Preview in Window) when you happy with your animation just hit (Create Animation), yeh one thing more to memorize you if your animation is more then 100 frames you can increase the number of frames in the Text box called (End Frame) like in the image below.
20-When you tested your animation from all point of view and you are ready to create your animation, just now hit the button called (Create Animation) In Reactor Panel, like the image below.
Here is my final image with all process completed below.
You can download the End scene From ( Here )
Also End Avi is Available ( Here )
I hope you enjoy this tutorial and I expect you got something new from this tutorial.


About The Author
You might be interested in