Active Key Frame Tutorial By Aziz Khan
Hello every buddy, in this tutorial I will show you the most important part of (Active Rigid Body) and (Passive Rigid Body) called (Set Active Key) and ?(Set Passive Key) these 2 options some time very necessary to work with, allot of people asked me to help them or to write a tutorial about (Active Key) and (Passive Key) that is why I am here to show you how to do it.
For the starting scene you should have some animated objects like robot arm, bulldozer, caterpillar, to act like taking something and to shift it somewhere, so in this tutorial I am going to use robot arm to show you how will work with, if you are new and you don’t know how to create this kind objects inside Maya don’t worry I will give you the starting scene to work with, so you can download the starting scene from ( Here ).
ok now its time to get started, fire up Maya or if you already running create new scene and then open robot arm if you follow along with me if you have any other object to work with go and open it to start the lesson.
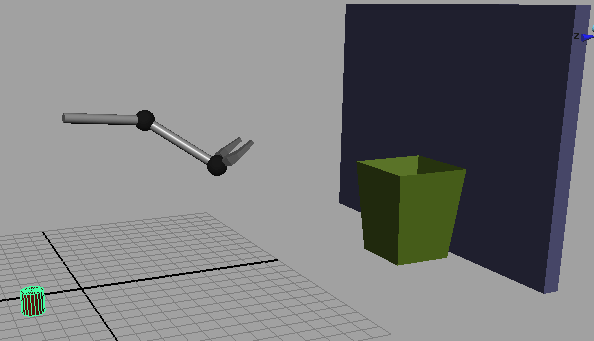
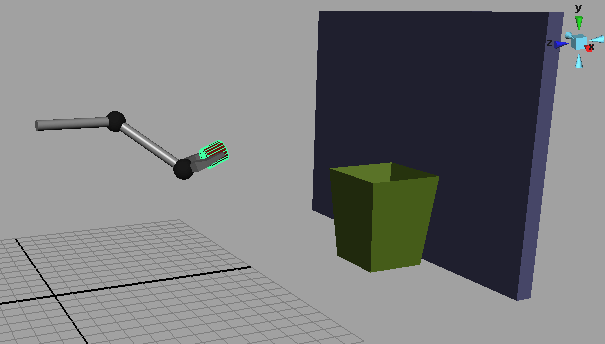
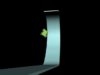
1-When you open the scene robot arm hit play button you are watching that the arm is moving but the can is still in its place in this case we want to arm take the can and through it inside the garbage bin, so you might be thinking how to do that ohhh crazy is that? don’t worry its pretty easy, the image below illustrating the first step of of our lesson.
2-Now what we have to do? ok first we will make child under claw, to do this go to (Window>>Hypergraph) and the window will open, from the window just select the (CAN) like in the image below.
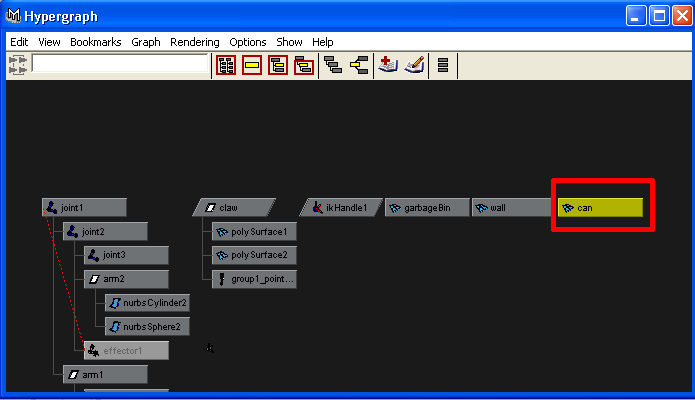
3-When you select the (CAN) drag it with middle mouse button and put on the claw it will automatically create child node under claw, as in the picture illustrating below.

4-Ok now hit play and you will see the (CAN) is connected with (Arm) and moving with but one problem is here the arm is not leaving the (CAN) is still connected we want to arm leave the (CAN) in this stage how to do this? in the pictures below.
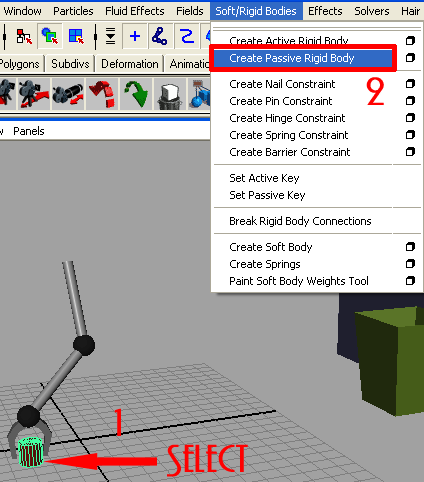
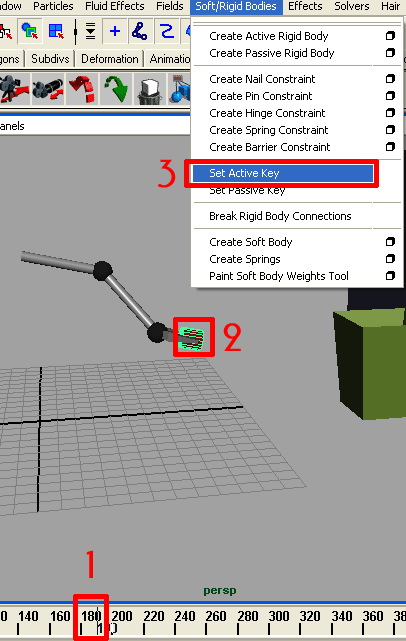
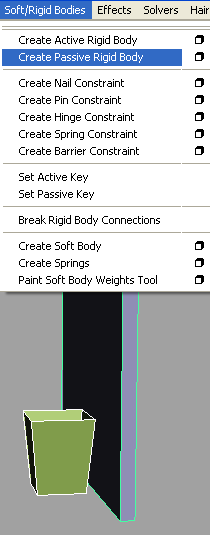
5-Now we will do something cool here arm should leave the (CAN) after frame 180, come back to frame 1 and select (CAN) and chose (Soft/rigid Bodies>>Create Passive Rigid Body) like the picture below.
6-Hit play you will see nothing happens don’t worry, go back to frame 1 and select the (CAN) and then go to (Soft/Rigid Bodies>>Set Passive Key) like in the image illustrating below.
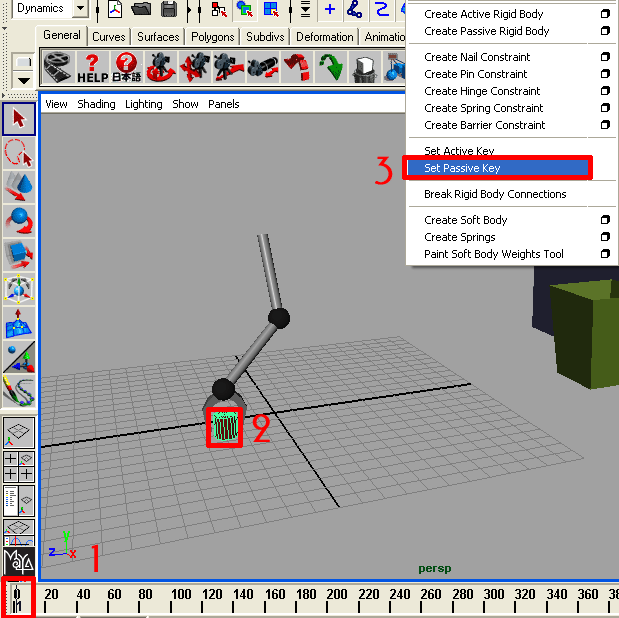
7-If you play still nothing happens still don’t worry, ok now scrub your time slider to frame 180 or above and then stop there now go to (Soft/Rigid Bodies>>Set Active Key) as in the picture illustrating down.
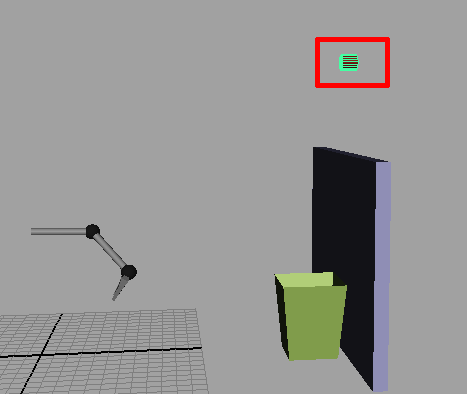
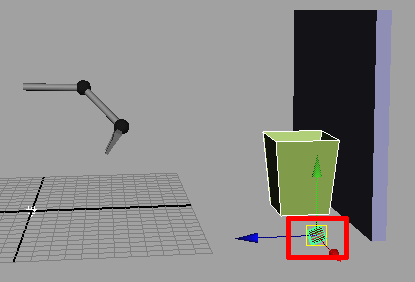
8-Now hit play and see the arm is trough the CAN but it has no
any gravity and very fast, in this case here we want to can collide the wall and
then fall down into garbage bin, like in the image below.
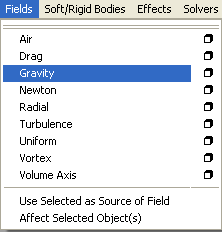
9-Ok with (CAN) selected go to (Fields>>Gravity) like in the picture indicating below.
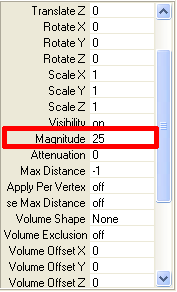
10-And then change the magnetite of gravity to something like in the image below its depends on you how much you like to accurate your animation and how arm trough the (CAN) inside the garbage bin, mine is here set to 25.
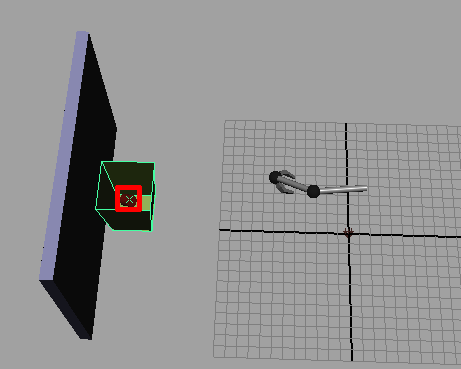
11-Again hit the play button and the other problem is here that when arm trough the (CAN) and then (CAN) pass through the wall there is no collision between then (CAN) and the wall, ok to make collide these 2 objects, select the wall and the garbage bin then go to (Soft/Rigid Bodies>>Create Passive Rigid Body) like image below.
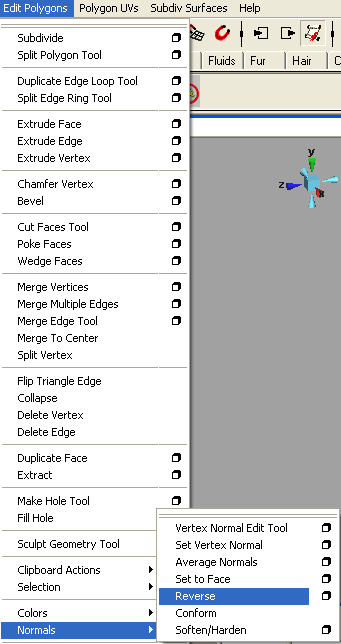
12-Now one more problem when the (CAN) falls down inside the garbage bin it dose not stay inside and falling down you might be thinking what the hack is this now? its because every object has back and forth, if you like to read more about this issue please download the short tutorial about this problem from (here),
ok to solve the problem select the garbage bin in the modeling type go to (Edit Polygons>>Normals>>Reverse) like the picture below.
14-Wow we are done and hit play and you will see the (Can) fall down inside the garbage bin and it stay inside like in the picture below.
We are pretty done here and ready to create the animation experiment with your own settings until you don’t find the final result, I hope you learned something new about the options illustrated above.
If you have any comments suggestion feedbacks and questions please fell free to write me.


About The Author
You might be interested in