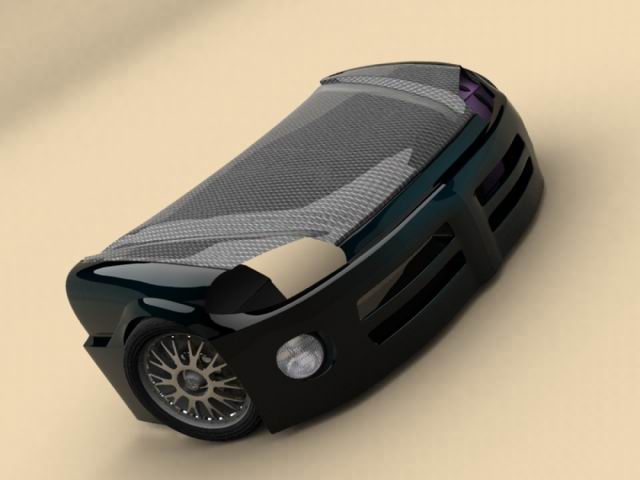
Modeling Omega Tropic Tutorial by EL_Shadow [TeknoBrothers®]
Ok, everyone!
After receiving tutorial requests, here am I this time to realize the desire of many of you. I received many mails asking for the techniques I use to model my cars and…err, well… I do use polymodeling by deforming patches, if you know what I mean. I do use a bit of splines-modeling, sometimes. I’ve tried “box modeling”; but to me, polymodeling is the best way of getting global shape control.
Ok, let’s get to work!
This tutorial is either for who’s getting started with MAX and for those who well know. This’ll be a step by step tutorial and you all will learn how to use essential tools to start modeling by yourselves.
In this tutorial we’ll only model the front part of a concept car to satisfy your modeling desires. The rest will be easy to model after finishing this tutorial. I personally think that is a good idea to start from the difficult to the easiest because once we dominate the harder way of doing things, we automatically discover easier ways to do so.
Setting up blueprints.
As I use views of existing cars to model others pretty much different, let’s use blueprints of three known cars to model the “Omega Tropic”;. Of course I’ve got my own designs but, they’ll only come out on my next project with self made blueprints. To give a good body shape to the car, it’s important to correctly choose the top and the side blueprint view. See below:
Omega Tropic
Side: CLK-DTM
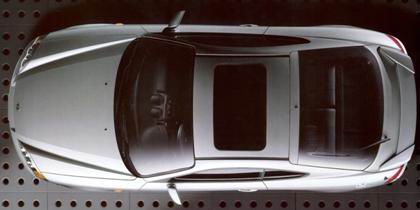
Top: Tiburon FX
Front: Viper Competition
Rear: Viper Competition



Open or reset MAX.
On each view port, drag a box with the following settings.
Top view box:
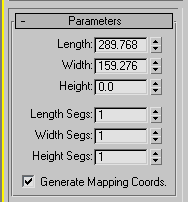
Side view Box:
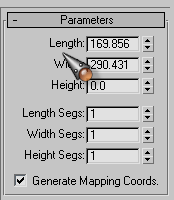
Front view box:
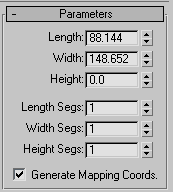
Align the four boxes as shown below:
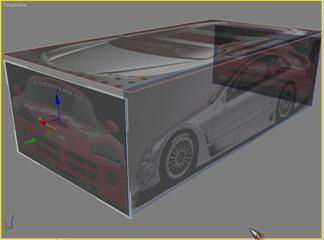
Use the top, front and left view port to align the boxes.
Don’t forget that the front blueprint of the car must be at the back view port witch means that on the top view port it must be facing upwards and vice-versa.
Now let’s assign the textures to the boxes.
Open “Material Editor“; by pressing the “M”; button on your keyboard.
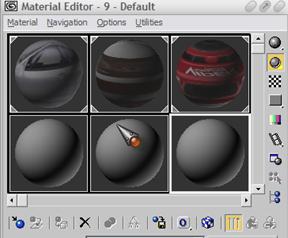
If you never configured your Material Editor before, you should see this picture, what is completely boring to me. Let’s configure it to let us see all material slots. Right click at any material slot. Now you should see a slide menu with some options. Select the “6 X 4 sample windows”; option and you should be notice that by now you are able to see the material slots smaller than before and with more slots.
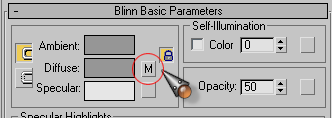
Select the first slot.
At Blinn Basic parameters, click the button aside “Diffuse”;.
At map browser popup window, select “Bitmap”; to browse textures and select the side view picture located inside the archive [*.rar] you downloaded and press open.
Press “Go to parent”; to return where you were.

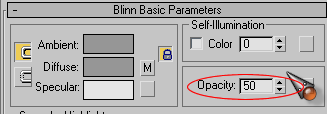
Change the opacity value from 100 to 50.
Select the box you drew on the side view that’ll be used as the side view blueprint.
Assign the material to the object by pressing the “Assign Material to Selection”; as shown below.

Select a different unused material slot and repeat this action for the top, front and rear view and make sure you got the picture shown below at the end and save the project as “Omega Tropic”; or as whatever you want to call it and close the “Material Editor”; because we’ll only need it at the end of the modeling:
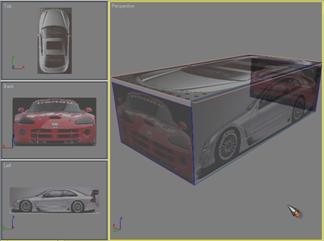
If you didn’t get the same settings as mine, you can download the file with the blue prints, ready to be used and lets go for some action.
Click here.
Modeling the hood
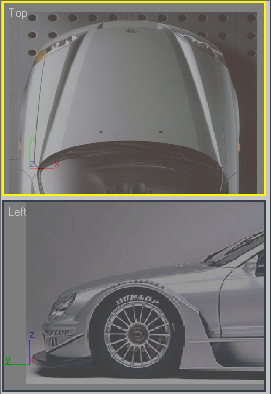
Highlight the top view port by clicking on it, and maximize it by pressing “ALT+W“; on your keyboard.
Now press “CTRL+W“; on your keyboard and zoom to the hood region by dragging your mouse while holding down your left mouse button.
Press “ALT+W“; again to see other view ports and repeat the action to the left view port.
See the picture below:
 |
Tip: Most of the shortcuts I pointed here are Max’s 6 default configuration. I advise you to confirm all known shortcuts by accessing the “Customize User Interface”; located on the “Customize”; menu at default menus bar. It’s important to use shortcuts to help doing most used functions instead of walking through menus looking for the right icon or option to click. Don’t forget, Using Shortcuts can only boost your modeling time.Highlight the top view port and maximize it by pressing “ALT+W“; on your keyboard. At the “Creation Tab“;, access the dropdown menu and select “Patch Grids“;. 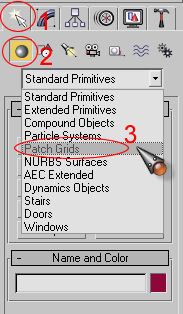 |
Still on the top view port, Press “G“; on your keyboard to display grids on the view port.
Press “F4“; on your keyboard to display the wires on the objects currently visible at the view port.
Click the “Quad patch“; button and drag a patch as shown below:
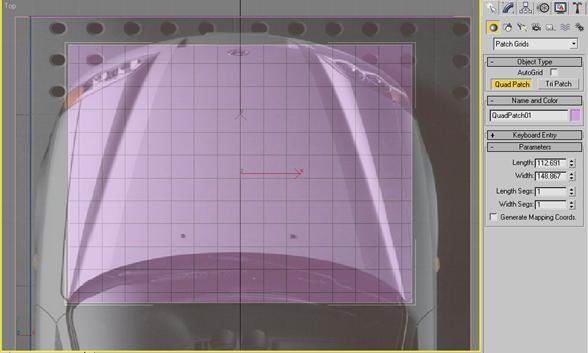
Select the “QuadPatch01“; ( the object you just created), and right click on it.
On the Popup menu that appears highlight “Convert to“; and select “Convert to editable Poly“;.
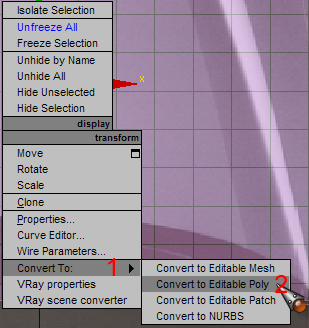
Now press “1“; on your keyboard to start “vertex editing“; mode or simply click the vertex icon at the “Selection Rollout“;.

Select the vertexes as shown below and delete them by pressing “DELETE“; on your keyboard.
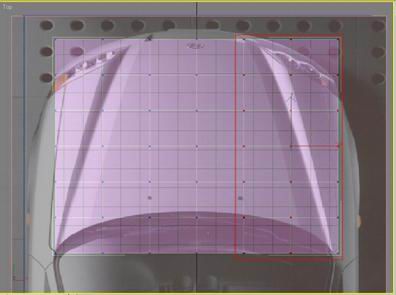
Click and hold the left mouse button at “Zoom Extents“; (located at the lower right corner of the view ports) and select the white cube. You should notice something at your top view port.
That tool is to zoom until the selected object fits the view port.

At the “Edit Geometry Rollout“; Click on the “Cut”; button.
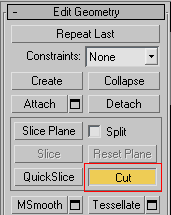
By clicking on the horizontal wire lines, create a line using the vertex cutting tool you just activated. To finish just right click your mouse button anywhere, inside the view port.
See the picture below to understand.
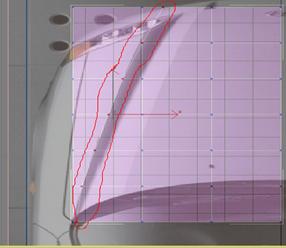
Tip: If you don’t know how to select multiple vertexes, just try holding down your “CTRL“; key pressed while you select the desired vertexes.
Select the vertexes shown on the picture below and align them by following the hood edge on the top view port.
See where the arrows are pointing at the picture below:
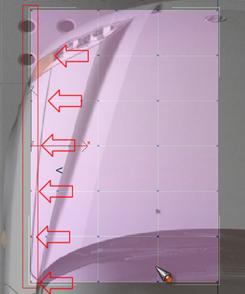
Press “ALT+W“; on your keyboard to access the four view ports. Highlight the Left view port and maximize by hitting “ALT+W“;, again on your keyboard. Select all vertexes and align them by following the hood with the vertexes.
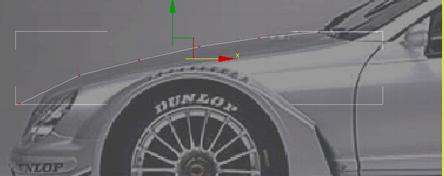
By now, you may already know how to access different view ports so, I’ll no longer tell you how to access the view ports.
At the top view port, using the cutting tool – located at the “Edit Geometry“; rollout – create the line shown below by cutting the patch. Just follow the hood edge near the headlight.
Notice: Don’t forget to zoom the area where you want to work on to increase the accuracy. If you forgot how to access the “Zoom Region“; tool, just press “CTRL+W“; on your keyboard.
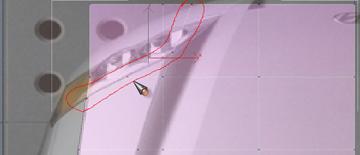
Highlight the front view port and press “V“; on your keyboard. From the popup menu that appears, select “Back View“;. You should see right now the front blueprint of the car instead of the rear one.
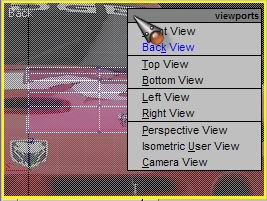
If you look carefully at the front view port, you’ll notice that the edge line you just created around the headlights almost coincides with the one from the Vipers headlights. In this case we’ll not have the hard work to adjust the vertexes around the headlights from the viper’s blueprint.
Select the three vertexes as shown below and DELETE them. (I’m sure you know how to delete them).
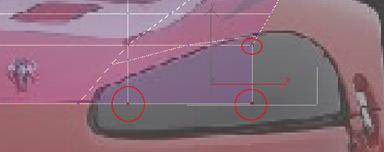
By using the cutting tool (you know where to find it), create a line shown below by cutting the patch.

On the top view port, select those two vertexes you just created and move them upwards until you see a straight wire line.
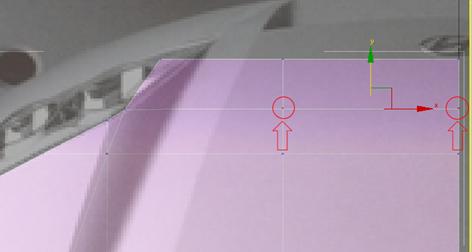
As both bumpers from Tiburon and Viper are rounded, let’s create conditions the put it rounded too. Select the same two vertexes selected before then, the other two located above and below them. Move them upwards so you can see the same as you see below:

If this is your first followed tutorial, don’t forget to learn the basics but, until that day comes, let me fulfill you with such wisdom. Let’s stop for a little so you can learn the basics, if you don’t know them already. You can skip this step if you already know the basics.
If you carefully look above the view port, you’ll be facing the main toolbar. By looking at the picture below, you’ll find there the description of the basics, only the basics:
![]()
Now, by looking on the view port’s lower right corner, you’ll be facing the menu shown at the picture below. As the previews picture, you’ll find each tool’s description.
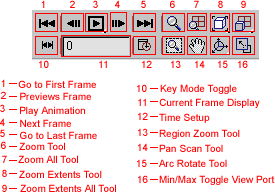
If you forget what you see on both pictures above (what is almost impossible to happen), don’t forget to scroll up. Don’t forget: If you feel a need to practice the basics for a little, feel free to save your project and then reset Max. Practice until you feel yourself capable to continue and get back here.
Now that you know how to use the basics, let’s get back to modeling already! There’s still a lot to learn with me. I’ve got all the patience needed to teach beginners and semi-advanced users like me.
If you’re using the 6th version of 3dsmax, then you’re going to use a useful tool that helps you to quickly swing through active view port. On top view port, by holding down the “I“; key on your keyboard, drag your mouse down until you get the same or identical view as mine. Just in case you’re using previews Max 6’s version, use your “Pan Scan“; tool. Consult previews steps to find it.
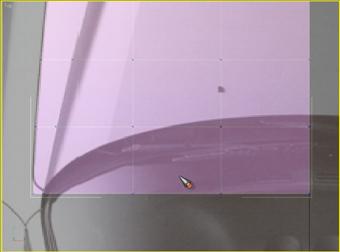
Select those vertexes shown below and move them upwards.
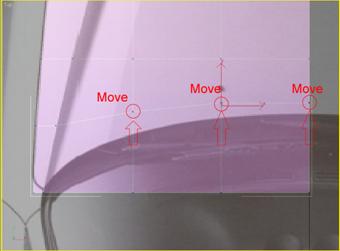
By using the cutting tool, create a wire line across the windshield.
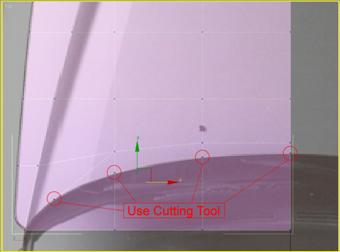
Select the three vertexes above the windshield and delete as shown below:
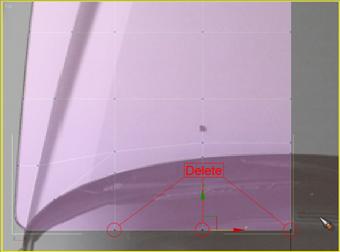
Notice that we’ll use the cutting tool more than others. By using the cutting tool cut along the hood seem (I don’t know how you call it on English):
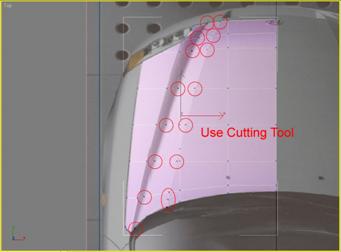
Let’s use a different tool!
Press the “2“; Key on your keyboard and you’ll be using the “Edge Selection“; tool. Select the two wires and at “Selection Rollout“; press the loop button to select other wire lines belonging to the alignment.
You’ll notice that the tool didn’t select one wire near the headlight. Select it by holding down the “CTRL“; key on your keyboard.
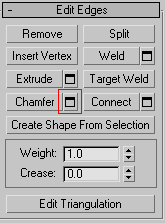
At “Edit Edges“; Rollout, click the button located on the right side of the chamfer button to personalize the chamfer amount. At the floating menu that appears, change chamfer amount to “0.25“; and hit ok. Here, we gave the hard edge we see by looking at the hood.
Select the vertexes between the hard edges we just gave to the hood. See the picture below. At “Main Toolbar“;, right click the “Select and Move“; button. At the floating menu, change the “Offset: World Z“; value from “0.0“; to “-2.5“; and hit the “Enter“; key on your keyboard then, close the floating menu.
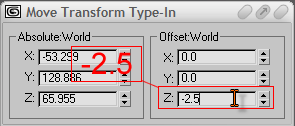
By using the “Edge Selection“; tool, select the line between the hard edges – as shown below – and chamfer it with the amount of “1.0“;. Turn off the “Edge Selection“; tool by clicking on its icon at the selection rollout.

Attention: From now on, I’ll just tell you what to do and you’ll have to use the appropriated tool. That should help you to memorize the tools and their functions. I’ll only point at the tool we never used before.
Use the “Zoom Extents All“; tool to have a complete view of the top blueprint. Select the “QuadPatch01”; and use the “Mirroring Tool“;. (Come on! You practiced with it before. Remember where to find it).
At the floating menu that appears, select “instance”; at “Clone Selection”; and hit ok. By now, you should have two patches on the screen, QuadPatch01 and QuadPatch02. As we cloned the QuadPatch01 using “instance”;, any changes we do to it, will affect the cloned patch, QuadPatch01.
Select both patches and hide the rest of objects by right clicking and selecting “Hide Unselected”; at the slide menu.
Observe the picture below:
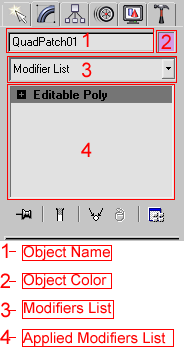
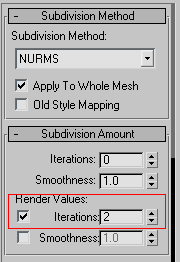
Now, by accessing the “Modifiers List”; dropdown menu, Select the “MeshSmooth”; modifier. Let’s use default settings and change “iterations”; amount from “0”; to “2”; at the “Render Values”;.
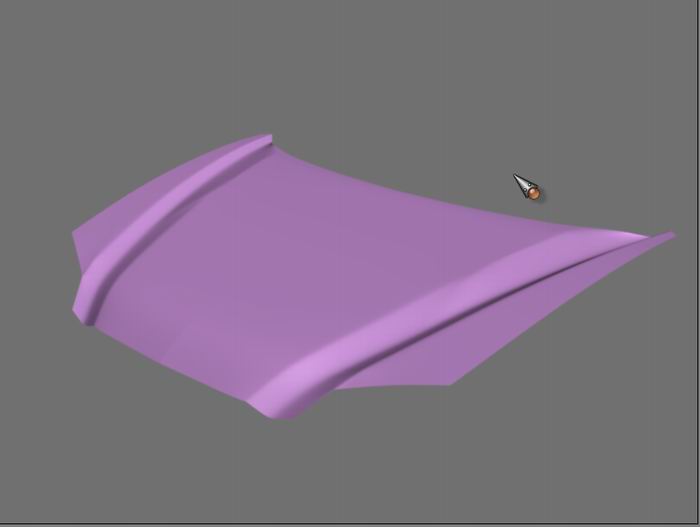
Switch to perspective view port and zoom so the hood fits the view port. Press the “F9“; key on your keyboard and watch and watch Max rendering what we did until here. Your model should look like this but with Black background:
Modeling The Front Bumper
Ok guys! Hope you modeled the hood just like I modeled until here. From now on, I’ll resume the modeling process since I ensured that you know the basics and the main process of modeling. By saying “resume”; I don’t intend to hide some features. Please, just keep reading the tutorial. When necessary, I’ll stop to explain things as I know them but, let me tell you this: My final product will be a little different from the one you’ll going to model using this tutorial. Don’t worry because you’ll learn to use new tools if you never used them before.
Ok! Off to work!
At front view port, by using “Edit Edge”; tool, select the bottom edge of the hood.
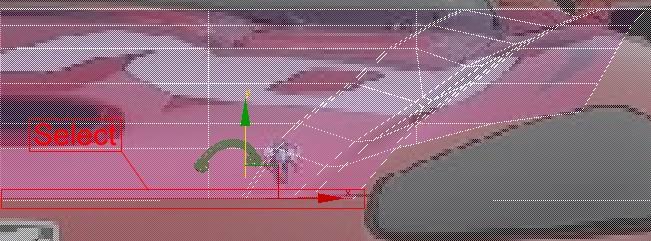
By holding down your “Shift“; key, create the faces as shown below. Don’t forget to use the left view port to follow the bumper:
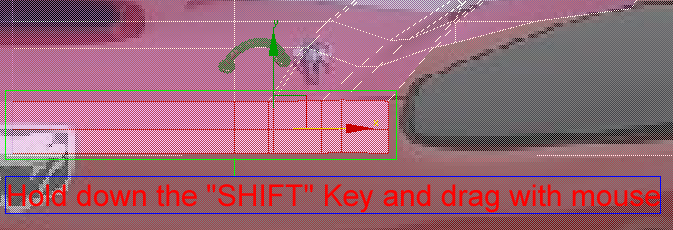
Keep creating faces until you reach what you see at the picture below:
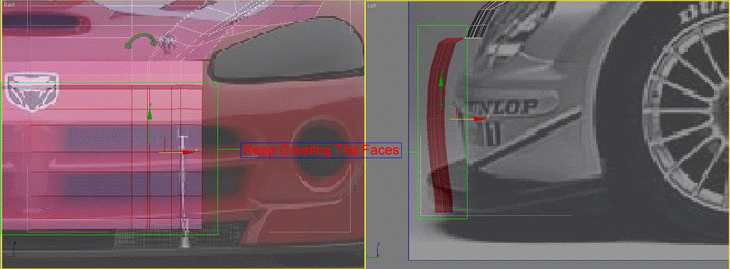
You’re doing great! Now, keep creating new faces as shown below. This time you’ll need the top view port to do this:
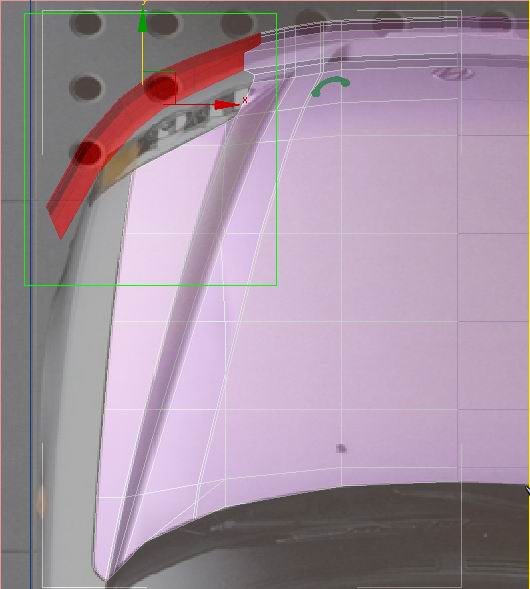
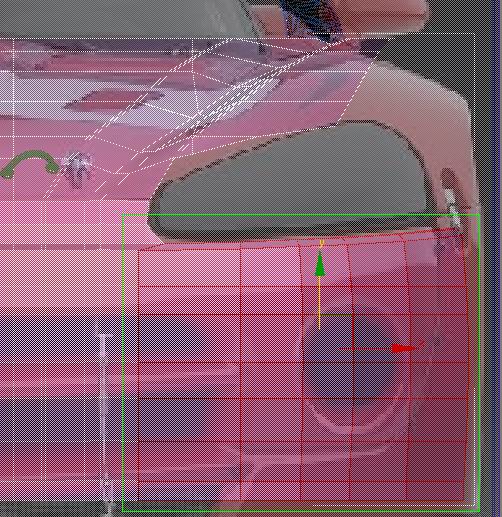
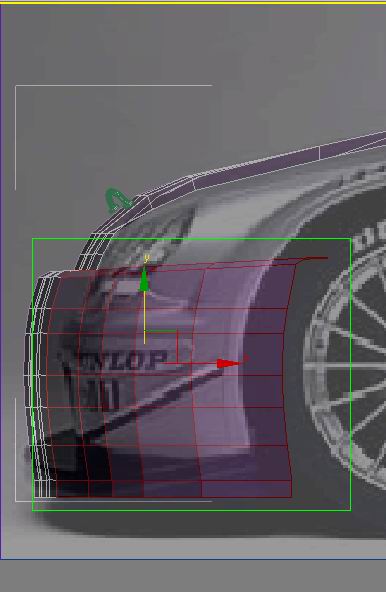
NOTE: By time to time, you’ll need to use “Vertex”; tool to align the vertexes around the bumper. This is the right time to you to recap the different editing tools.
On the front view port, the cutting method to reach what you see:
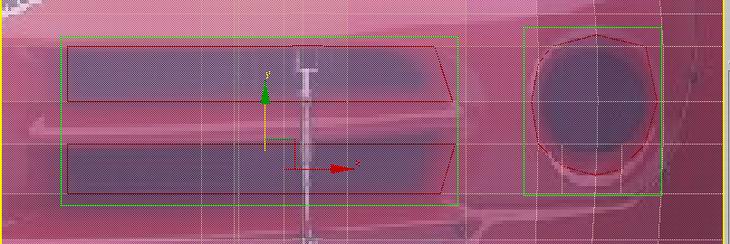
Let’s use a new tool, Extrude. Press the “4”; key to activate the “Polygon Edit”; tool.

At “Edit Polygons“; Rollout, click the button located at the right side of the “Extrude”; button to customize values. Select “Group“; at “Extrusion Type“; section. Change extrusion height from “10“; to “-1“; and hit “Apply”; Again, change extrusion height from “-1“; to “-5“; and hit “Apply”; twice. Now, change extrusion height from “-5“; to “-1“;, hit “Apply”; and delete selected faces. Repeat the process to the hole situated on the right side and don’t forget to chamfer on necessary areas until you get the following result:
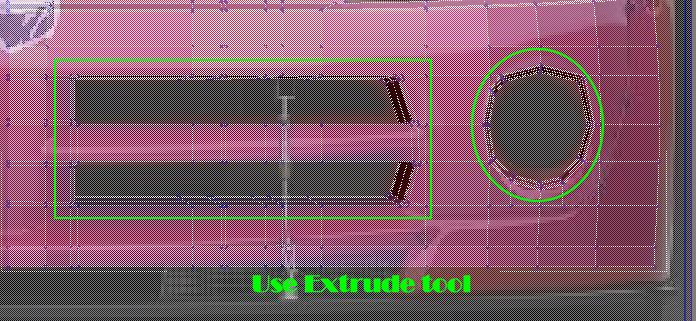
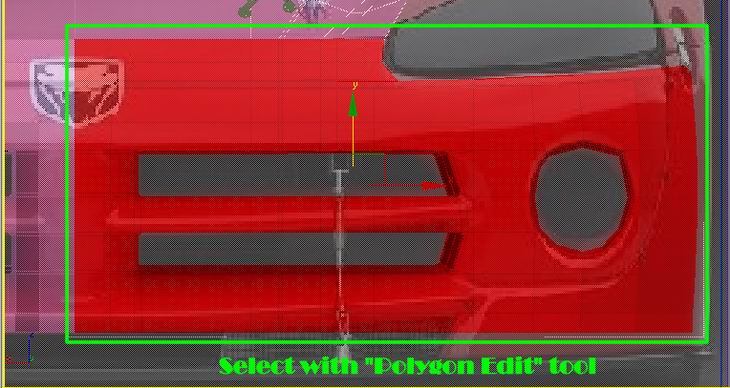
It’s time to separate the bumper from the hood. Switch to “Polygon Edit“; mode and select the entire bumper as shown below:
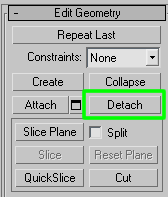
At “Edit Geometry“; rollout, click the “Detach“; button, rename the object as “front bumper“; and press ok.
Let’s create the seam.
Select the newly detached object and switch to “Edge Edit“; mode. Select the line shown below, near the head lights. At “Edit Edges“; rollout, click on the button located on the right side of the “Extrude“; button to personalize values. Change the “Extrusion Height”; from “1.0“; to “-0.5“;, change the “Extrusion Base Width“; to “1.0“;, hit “Apply”; twice and click OK. Do the same for the lines located above those that belong now to the hood. After this, use the mirroring to instance another clone of the bumper.

To model the fender you got two options: You can use the hood to start the fender and then detach it at the end or you can use a new patch object to do it. I prefer my way, using the hood as a base. See the picture below and let’s move on:
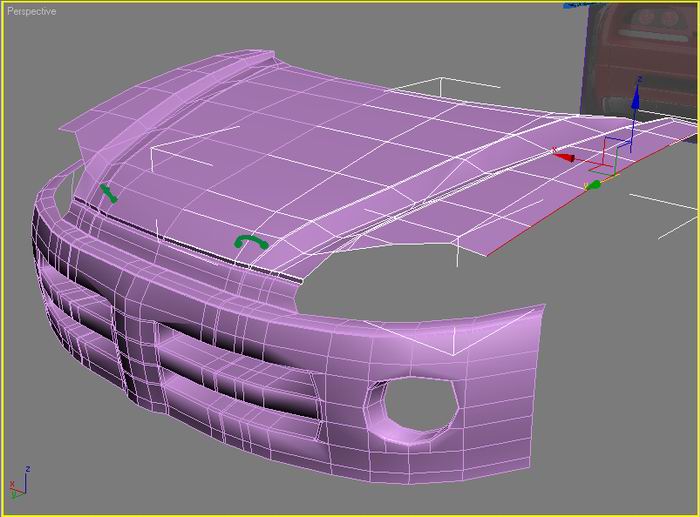
As you can see, I almost use the same polygon number on every single object. That’s why I prefer using other objects as base and then, I detach the newly created part at the end. Create an object with the same form as you can see on the picture. That should be the fender of the car and that means you should always use blueprints as references.
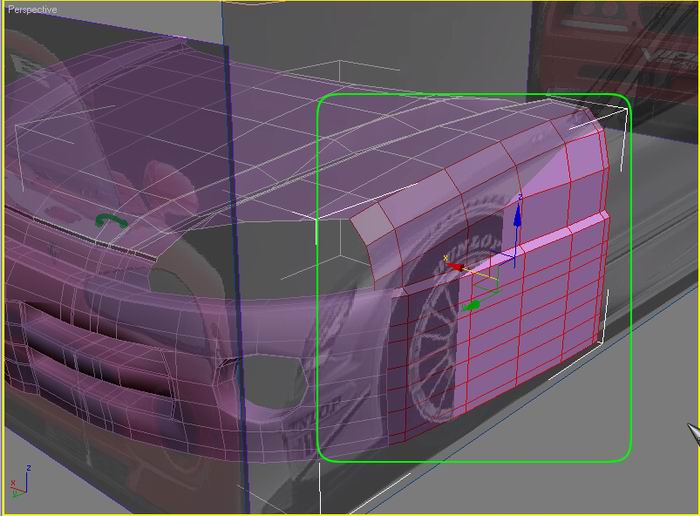
Now let’s see your ability to cut, extrude and chamfer. Try to get the shape I got on the picture below. If you do so, then, you successfully finished this tutorial:
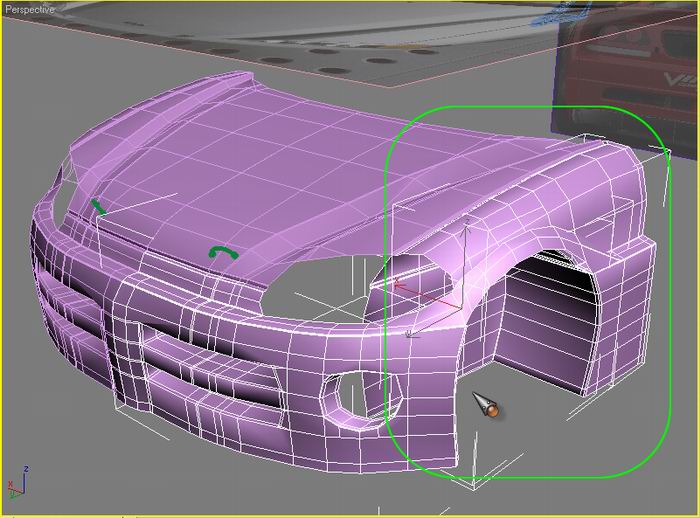
Well… this is the end of the tutorial. I guess you all learned enough to proceed with this. Please, don’t think I’m lazy to keep writing. The fact is that by now you know how to use all the tools I use to model cars.
About the materials… there are a couple of tutorials about materials over the web. If you want a specific website for the materials, look for www.3dtotal.com You can even find tutorials that help you to completely finish the car including the interior.
That’s all folks! Hope you learned enough to proceed. If you want to take a rest from modeling, then a site like 벳엔드 주소 could be a breath of fresh air.


