Ptex workflow (Mudbox -Houdini)
This week I’ve started to working with Ptex and I thought that it would be a good idea to share my experiments.
Introduction
What is Ptex?
Ptex is a texturing system which was developed by Walt Disney Animation Studio for production purposes. The point is that you don’t have to create UV-s for your models in order to paint textures on them. Let’s imagine this that way: on your model each face has its own texture and you can increase the quality of this texture on per-face basis. It depends on what is the quality that you want to use on that part of your model.

This picture demonstrates that how Ptex actually works and the quality that you can achieve with it.
Another advantage is that you can store lots of textures in the same Ptex file for multiple models.
Of course all those things sound quite good but you could ask me the usual question which sounds like: “How can I create my own ptex file?” Actually there are three software in the market which you can choose from. The first one is Mari which is quite expensive and it requires a strong hardware to perform. The second one is 3Dcoat (my personal favorite) and at least but not last Mudbox from Autodesk.
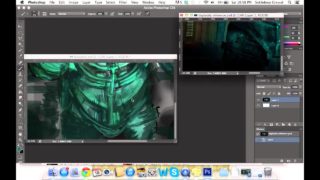
Now let’s say you got your software and have already painted your first ptex file. “How can I render it” you could ask again. Well If you are using 3D Studio Max you can render ptex files with Vray. If you are a Maya user the options are a bit wider because you can choose from Vray and Render Man. But in this article I’m going to use Houdini’s Mantra which has a quite good rendering performance and supports ptex files as well.
Ptex workflow (Mudbox – Houdini)
In the following article I’m going to explain a Mudbox-Houdini workflow which can be useful if you want to render Ptex files.
Preparing your model
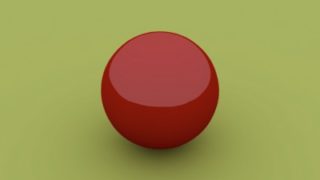
The first step is that you have to prepare a simple model for this experiment which (and this is really important) has no UV on it. A sphere will be good enough…

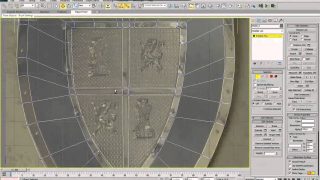
Before you start to paint your model, in Mudbox you have to prepare it for Ptex. Go to the Mesh menu and activate the PTEX Setup option.

After that you can create a simple texture and some details which will be used for generate displacement maps. In this article I’m not going to write about how to use Mudbox because you can find plenty of tutorials on the internet about this topic. I’m trying to concentrate on that what you have to do in order to export your ptex data from Mudbox.

You can export your texture with the Export Selected option on the Paint layers panel.

Make sure that you export your texture in .ptx format.

Now we have just created our diffuse color texture. The next step will be to export our displacement texture also in ptex format. In Mudbox to export your displacement map you have to use the Extract Texture Maps option which can be found in the Maps menu.

On the option window you have to choose the Displacement map. If your model is already selected Mudbox will automatically load it in the Target and Source Models panel. Notice that your Target model is the lowest resolution of your mesh and the source model will be on the highest level.
On the bottom of the window you have to choose the target directory and the file format of your displacement texture.

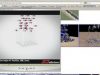
Finally export your base model as well then you will be able to import and use it in Houdini. As you can see I have the sphere.obj as a base geometry and it has two textures in .ptx format. It’s time to fire up Houdini.

In order to import your model into Houdini you have two options. The first one is that you can create a geometry node in the Network View panel (hit TAB and type “geometry”) and in it you can find a file node which allows you to import your model into Houdini. Or you can import your model through the File menu Import/Geometry… function.

After you imported your model you can see a geometry node in the Network View panel. Dive in it (double click on it) and you can see a file node which, as I mentioned before, loads your model into Houdini. Now we have to create a Reverse node and connect our File node in it.


The Reverse node can rearrange the vertex order in your model. Actually this node prepares your model to display ptex textures in the correct order.
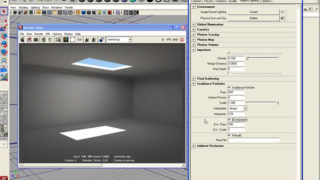
Now go back to Object level (press the U key) and make sure that you checked the Polygons As Subdivision option on the Parameters palette. With this option checked Mantra will render your geometry as a subdivision surface which is really important if you are going to use displacement maps on it.

Your model is prepared. It’s time to create our shader. In this case I created a Mantra Surface Shader which is a kind of all purpose shader in Houdini. You can use it to create a wide range of materials from simple plastic surfaces to more complex surfaces like glass or even human skin.

There is a Use Color Map check box on the shader’s Diffuse tab. Check it on and now you can load in your color.ptx file.

If you create a render you can see that there is something wrong with your texture.

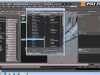
Of course there is an explanation of this. By default the Mantra surface shader is not prepared to load ptex files but you can solve this problem easily. In Houdini you can create your own shaders and edit existing ones if you want. In order to edit your shader go to the Shop network and double click on your manrtasurface node.

As you can see there are lots of nodes in it and it looks a bit frightening but don’t worry about this. We don’t want to completely rewrite our shader just going to change few things.

In a complicated network like this one a really great help the Find Node option. Which can be found on the top right corner in the Network Palette. Just start to type in the word “diffuse” then click on the Select Matches button.

When you find the diffuseColor node you can zoom in with your right muse button. As you can see this part of the shader isn’t really complicated. The diffuseColor node in this case responsible for loading textures into houdini. The main problem is that this node doesn’t work well with ptex files.

Let’s replace this node with something else. Press your TAB key and start to type in the “ptex” letters. Houdini will find the PTexture node for you.

As you can see on the picture below I connected the baseColorMap node into the ptexture node then I connected this node into the appropriate slot in the surfaceModel node. You can leave the diffuseColor node as is now.

If you check the render now you can see that your texture was rendered correctly.

We have a displacement texture as well but the trick is the same as before. You have to replace the good old textureDisp node with a new ptexture node. As you can see it on the picture below.

Now you have to load your displacement texture into the shader and tweak the Displacement Scale parameter. In my case I set it to -1.

If you create a render of your model you could get a bit unexpected result. As you can see on the picture below on my model there are areas with holes and lines and it is obvious that something is wrong.

This is because our Displacement Bound parameter isn’t correct now. The Displacement Bound just like the Bounding Box tells the render engine that where is our object in space. Because Our model has a displacement map on it now a bit larger or smaller than its original bounding Box. We have to adjust this in order to get the correct result.
Press the right mouse button on your geometry node and choose the Edit Paramter Interface option.

You will see a window with lots of options and parameters. Click on the For Rendering tab and at the bottom of the window use the filter to find the Displacement Bound parameter than select it and drop it onto the root of your geometry node.

Now if you select the geometry node in the Network View panel you can see tha Displacement Bound parameter at the bottom.

In my case I set it to 0.3 which gave me a good result. I also tweaked my shader’s specular color parameter in order to get the same result as I got in Mudbox.

As you can see on the picture above I got the same result as in Mudbox in a geometry which has no UV on it. I hope you liked my article and find it helpful.

About The Author
You might be interested in