(Reactor) (Ragdoll) And (hinge) Tutorial
Hello every one!
Creating animation and simulation of objects are very sensitive in 3ds max (Reactor), so you have to take care of every single object in the scene to simulate it perfectly as much as interesting for the viewer, that is the best Animator who take care of a small object and trying to provide a nice and neat as much as possible, for instance if you miss a single tweak in the (Reactor) settings it will unexpected error it can cause of your headache, so to avoid of these all we have to do hard work always to be trying a nice animator.
In this tutorial I will show you how to work with (Reactor) (Hinge) and (Ragdoll) I am writing this tutorial because of having allot of mails and questions from the people who was asking me that how to simulate human structure with (Reactor) (Ragdoll) as you know to build something there was never a single support to build all the structure that is I added (Reactor) (Hinge) to complete this simulation tutorial.
In the main scene we will learn that the rag doll is falling upon the stairs and then smoothly sliding down till floor, to create this animation we have to pass through some settings and some tweaking, before going to start this tutorial make sure you have the scene what you want to simulate, in this case I am going to simulate the Rag doll falling down, if you like to follow along with me you can down load the ( Starting Scene From Here ) or you think that you could do better on your own go ahead.
Ok lets start the lesson before going to start make sure you have installed the starting scene in the link Gavin above.
1-When open the scene this is nothing more then a structure of human body and the pair of stairs with the floor which you can also create it easily, as like in the picture illustrating below.

2-Now go to (Reactor) panel and then chose as in the image below.
![]()
3-Create it some where in the scene it dose not matter where you create (RBCollector), and then from its modify panel chose (Add) then from the window (All) hit (Select) as in the image below.

4-Now all of the objects are added in (RBCollection) like the image below.

5-Go to (Reactor) panel again this time chose (CSolver) as in the picture indicating below.
![]()
6-Now create any where in the scene and then go to (CSolver) modify panel chose (None) button and then click on (RBCollection), the image illustrating below.

7-If you see the (RBCollection) is added the (None) Button as in the picture down.

8-Ok when you all done select the rag doll and focus it in the (Front View Port) as in the picture below.

9-Now its time to start our joining the part of rag doll to (Reactor), ok go to (Reactor) panel and then chose (Hinge) as in the picture indicating below.
![]()
10-Now create it some where in the front view from its modify panel Check mark the (Parent) and next to it the button (None) will be high lighted chose the button (None) then chose (R Calf) when you done with the (Parent) its time to connect the child to it, under neat the (Parent) there is (Child) next to (Child) there is button called (None) click on none button and then chose the (R Foot) for the (Child), when you done with the all above you have to do some tweaking for the rotation of the foot, check mark the (Limited) the text boxes should appear for it in the (Min Angle(-3) (Max Angle(160), its help for the unexpected rotation of foots when rag doll falls down, as like in the picture below.

11-Now do the same thing for the left side also, like the
picture showing below.

12-Once again do the same process for the legs but this time chose different values for Min Angle and Max Angle, for the (Parent) chose (R Thigh) and for the (child) chose (R Calf) picture illustrating below.

13-In the front view.

14-With the same settings do for the left side like the picture below.

15-Till here we are done with foots we have to join the hands to do this go to (Reactor) Panel chose (Hinge) again and the create some where in the scene, for the (parent) chose (R Forearm) and for the (Child) (R Hand) for (Min Angle(-92) and (Max Angle(61) as in the picture below.

16-Keep going for the (Parent) Chose (R Upperarm) for the (Child) chose (R Forearm) change the values for Min and Max Angles, as like on the image illustrating below.

17-Do the same settings for the left side and connect it with (Hinge) as in the picture below.

18-Its time to create (Ragdoll) go to (Reactor) panel and then chose (Ragdoll) as in the image.
![]()
19-Now create it some where in scene then high light the (Parent) button for the (Parent) chose (Pelvis) and for the (Child) pick (L thigh) change the (Limits) values as in the picture below.

20-With the same setting do the same for the right side as like below.

21-Keep going on now for the (Parent) chose (Pelvis) and for the (Child) chose (Spine) with the (Limits) Settings below.

22-Now for the (Parent) Again chose (Spine) and for the (Child) chose (Spine1) with (Limits) settings as in the picture below.

23-Keeping ahead now for the (Parent) chose (Spine1) and for the (Child) chose (Spine2) With same (Limits) Settings blow.

24-Now we are connecting the arms with spine, chose for the (Parent) (Spine2) and for the (Child) chose (L Upperarm) as in the picture below.

25-Do the same for the right side for the (Parent) chose (Spine2) for the (Child) chose(R Upperarm) with (Limits) Settings as in the picture below.

26-This is the last setting we are going to do for the head, for (Parent) Chose (Spine2) and for the (Child) chose (Head) with (Limits) setting as below.

27-Now we are done all of our rag doll is connected with each other if you followed along with with your should look like something in the picture below.

28-Now Select (CSolver) go to its modify panel and then Add all of the (Ragdolls) with (Hinges) as in the picture below.

29-If you see the all (Constrains) should be add in (CSolver) as like in the image below.

30-Now go to Select (By Name) as in the picture below.
![]()
31-From the window chose all the parts of (Rag doll) in the scene as in the picture illustrating below.

32-Go to (Reactor) Panel and then chose (Open Property Editor) as in the picture indicating below.
![]()
33-In (Open Property Editor) Give The Mass value of ( 10 ) for all Parts of (Rag doll) in scene below.

34-Now go to (Reactor) Panel again now chose (Preview Animation) below.
![]()
35-When you hit the (Preview Animation) button it will give you some error don’t worry we will fix this error below.

36-And also the (Rag doll) bouncing very high when hits the stairs we don’t want to this at all why this is occurring this is because of the some of our (Rag doll) parts are interpenetrating with each other wehn we fix this you will see every thing will nice and neat, as image below.

37-Now to fix this problem go to (Utilities>>Reactor) then expand the (Collision) tab then hit the button called (Define Collision Pairs) as in the image showing below.

38-Now from the window select all the parts of (Rag doll) as in the image below.
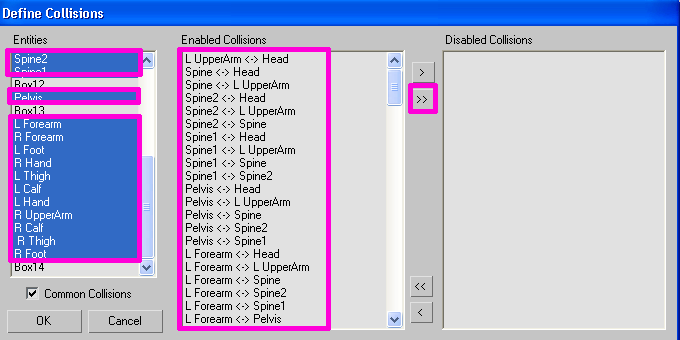
39-Now hit this sign ( >> ) you should see all parts of the (Rag doll) has shift from middle to right side its mean now we are free from error in the (Rag doll) simulation, as in the image indicating below.

40-Now Preview the animation you should see the smooth animation is occurring the preview window as in the picture down.

41-When you happy with animation just hit the (Create Animation) button in (Reactor) panel below.
![]()
We are done here and I hope you understand something about (Reactor) (Ragdoll) and (Hinge) please try it expect this and let me know from the result, use this technique in your own projects and you can inform me if you got something interesting.
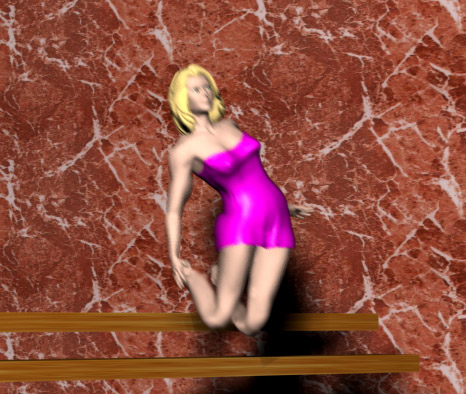
Here is my Rendered image of this tutorial which I am going to use her in my project this is not the final image she needs some more tweaking to complete the animation the images below.

If you have any comments, suggestions, feedbacks, questions please do not hesitate to write me feel free to express your ideas I will be happy to hear from you.


