Cell-Shade A Car
Hi there. This tutorial will show you how to cell-shade a car in Photoshop or in any other 2d painting program. The program you use will HAVE to have a layer option, so Window’s Paint wont work. First of all, find a picture of a car you would like to paint from the Internet or wherever. I chose this Plymouth Barracuda I found online because it looks sweet.
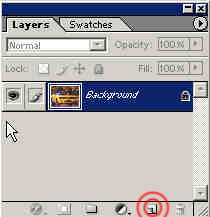
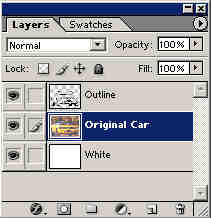
Ok, open up your image into Photoshop or another paint program, which supports layers. I’m using Photoshop 7 so I will be explaining it in terms of Photoshop, if you’re using another paint program, you will have to figure out where the buttons that I will be talking about are located. After you open your image, you will have your layers looking like the first pic. Make a new layer, and name it “Outline”; by double clicking the name.

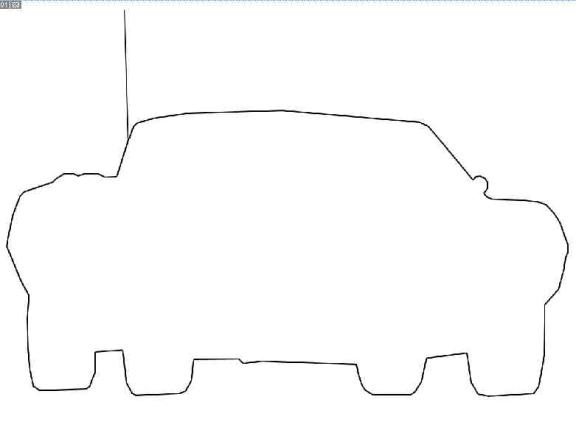
Ok, now you select the Polygonal Lasso Tool and select the entire car, be careful and go slow, you don’t want any jagged edges, you want the curves to be as smooth as possible. After you select everything this is how the edge of the car should look. It should have the marching dots going around it. Now go to the menu Select>Inverse, and then press the delete key, this should make the background white, IF you have white selected as your background color in the color palette. After you turn the background white, go to Select>Inverse again to select only the car.


Ok, now comes the semi-difficult part: (There are two ways to do this read both first) Select the “Outline”; layer, and with the whole car selected, get the Polygonal Lasso Tool again, press the “Alt”; button and go around and deselect everything inside the car and you want to leave a line outside. It is hard to explain, but you want to make an outline of the car. Remember, to make the car look more interesting, you want to make the line vary in thickness. For example, for the front of the car and hood should have a thicker line than the back of the car and the antenna. Here are a couple of examples.


Now, here’s an easier way, but you wont get those lines with the varying thickness. If you have the car selected, fill it all with black, then go to Select>Modify>Contract. You can contract it between 1-3 pixels depending on how big your image is. Then press the delete key. The end result is an outline of the car but with the same thickness all around. Doesn’t look as good as if you did it manually.
Ok, after you outline the silhouette of the car, you might want to see how you did without the original car picture in the way. Firstly, we have to get rid of the background layer. Select the original layer where the car is on, select everything on it with the Rectangular select tool, copy the selection. Make a new layer, and name it “Original Car”; and paste it into that layer, so now you can delete the “Background”; layer and it wont affect your car. Now, to put in the white layer, make a new layer, name it “White”; and put it behind the “Original Car”; layer and fill it with white color with the Paint Bucket Tool. These are what you will use to do this step, and the end result. Now, if you want to see your outline with the white background, simply click on the picture of the eye on the “Original Car”; layer. What this does is hide the layer, if you click on it again, the layer will become visible again.


If you did everything correct, you should have about what I have here in this picture.
Well, lets recap, shall we? Ok we made the outline of the car so far, but that was the easy part, believe it or not. Yes I know it was a lot of writing for making an outline, but it was very detailed and meant for n00bies. Now the HARD part starts. Well, I wouldn’t say hard, just long. Very very loooong. Lets get started, shall we?
Ok, open up your file. Right now we have 3 layers: the “Original Car”;, the “Outline”;, and the “White”; layer. The “white”; layer isn’t important, its just so if you want to view your outline with a nice clean white background, you can do so by pressing the little eye buttons on all the layers in between the “Outline”; and the “White”;. Ok, now we have to outline all the lines inside the car. This is where your artistic flair comes in. now since this part of the tutorial is going to be long, I’m not going to spend too much time and detail on it. I’m just telling you what to do with some pics. You’ll have to figure out how to use the program yourself if you don’t know how already.
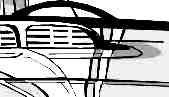
Select your “Outline”; layer, and select the Polygonal Lasso Tool. Lets start with the headlights and grill. First off, select the outline of the grill like this.


Now, do the headlights like this. Remember, you want to outline the actual lines from the photograph, but you don’t want it to become so real that it looks like a photo, you want a sense of cartoonish-ness in there. Play around with different lines and shapes until you get something that looks like the picture enough, but it doesn’t completely replicate it. Remember, you don’t want to recreate the picture, this is YOUR car you are drawing so be creative.
CAUTION: do the following on the “Outline”; layer.
Go ahead and do the rest of the body, if you are stuck or out of ideas on how to make a certain part of the car look good, feel free to look at my example and replicate it. Here are various pics of different parts of the car I made for you. Now go ahead and do the rest of the car.


Ok, howdy, did you finish? Here’s my example, yours doesn’t have to be exactly like mine, but it should be close.

Ok, we finished the long and hard part of outlining this sucker. I know I didn’t explain a lot on how to outline in details, but that’s because this is an artistic project, I cant tell you how to draw something, you have to have the natural talent and an eye for these kinds of things. If you have completed everything so far, good job. Now lets go on to the FUN part, coloring!!! :)
At this time, you should have a complete black and white outline of your car. Every line, every detail. Lets take a look at your layers. The first picture is how your layers should look now. But you have to adjust your layers to look like the second picture. So, add another layer and name it “Base”; and put it over your “Original Car”; and under “Outline”;

Select the “Base”; layer. Now, go over and select your entire car, but don’t go inside the lines and don’t go outside the line. Make your selection in the middle of the line. After you do that, press the Alt button and deselect the windows, all the chrome parts of the car, the wheels and tires, the seats, and everything else that will not be painted. So now we only have the metal of the car that will be painted. Select a color from the color palette that you want to paint the car with. Any color is fine as long as it matches the car.
For example a bright green wouldn’t go along with the car I am doing. You can even make a two-tone custom paint job. I personally went with the crimson red and cream color, a take-off of the Starsky and Hutch car. Here are the colors I used. Crimson Red (R:216 G:24 :B24) and for the Cream (R:251 G:245 B:223) I think it suits the car nicely, don’t you? Anyway, select the car like I said, DON’T GO OUTSIDE THE LINES, and fill the car in with the color you like. If you are going for a two-tone color combination, after you filled in the main color, select the places you want to be the second color and just fill it in. Be careful not to color any parts that you want to be chrome, glass, tires, or headlights.
Ok, you got the easy part down, but it looks kind of boring doesn’t it? Lets add some shadows to jazz up the car. Add a new layer and name it “Shadow”; and place it over “Base”; but below “Outline”;.

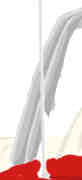
Ok great, you’re almost done with the car paint. Now we draw the shadows that will add just enough realism and detail to make it look nice. For the following part, you have to have common sense. Where would you think the shadows go? Yes that’s right, the part where the light doesn’t reach. Lets get started. Pick a slightly darker version of your body paint. It really helps if you imagine a fixed light, lets say…at the top left corner of the screen going down on the car. That will make the shadows appear on the lower and right parts of the car. This means, under the front bumper, under the Side of the car, inside the grill area, under the side mirrors, next to the air-scoop. Here are some pics to help you; I made them black and white so you could see the shadows better.


Did you remember to make the shadows on the correct layer? :) Good. By the way, don’t make the shadows black; make them a slightly darker color of your paint color. And remember, there are no gradients if you want to get the cell shaded look, its all clear crisp lines. But if you want to make your own look, you can go ahead and make a gradient shadow. Ok, you’re almost through creating your car, now we just have to make the accessories.
Create a new layer, and name it “Accessories”; and put it under the “Outlines”; layer and above the “Shadow”; layer. The accessories include headlights, fog lights, mirrors, rusty pipes under the car, antenna, and anything else that is chrome. It does not include the windows, or the wheels and tires. Ok, select your “Accessories”; layer and get the Polygonal Lasso Tool. First lets do the chrome parts and then the lights. These parts will be chrome, so select a light silver (R:240 G:240 B:240). You can either select the parts you will paint with the Polygonal Lasso Tool, or if you have a steady hand, you can use a paintbrush to paint the small parts. Paint the chrome parts in the light silver. Then get a slightly darker color gray and paint the parts of the chrome that will be dark, use your imagination. For all the chrome parts I will show picture of how you should paint them, the picture will not have the black outlines showing, the headlights will are also shown, paint them as shown.:
|
|
|
|
|
|
|
|
||||


Ok, great, we finished out chrome parts, our headlights. Now we do the interior. I personally chose to do a cream interior, the same color as the cream paint I showed you earlier that I was going to do for my exterior paint. You want to paint the base color of the seats on the “Accessories”; layer, BUT you want to put the shadows of the seats on the “Shadow”; layer. For the chrome parts, don’t worry, just put all the chrome parts on the accessories layer. HEY! You’re almost done. Now make a new layer, name it “Windows”; and put it above all the layers, but under the outlines layer. Now use your Polygonal Lasso Tool and select all the glass parts that are to become windows, HEADLIGHTS DON’T COUNT AS GLASS. Now, paint the windows a light blue, and a darker blue for the reflections in the glass. And you can also put a couple of white streaks across the window as glare. After you do all that, bring the opacity of the “Windows”; layer down until you can see things behind it. I did mine to 14 opacity, but you can try out different opacities. Here’s what I have:

Ok, now for the tires, its very simple to make tires. Make a new layer and call it “Tires”;. Put it below “accessories”;, but above “Shadow”;. Now just color the tire a dark gray, and for the shadows, heck, we’re so close to the end, just put the shadows in the same layer and color it a darker gray. VIOLA, you’re finished. If you have other objects that are not colored in because you did another car, then go ahead and finish up. Questions or comments? Email me at razorblob@yahoo.com
So anyway, here’s the finished product I have.


About The Author
You might be interested in