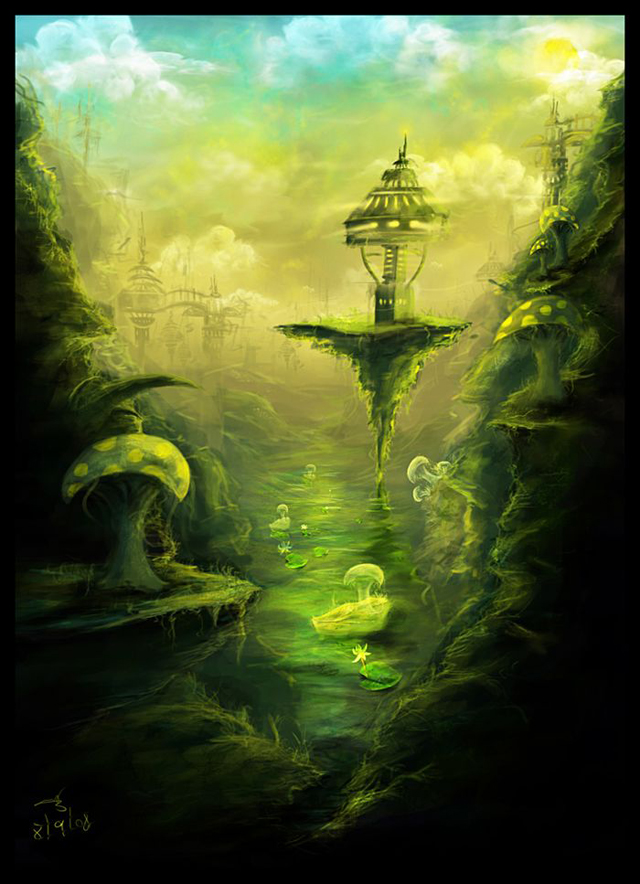
Making of Mushroom Factory
This tutorial is for people who know the basics of Photoshop. I’ll explain how I work, not every detail for sure, you probably say between each part “what the hell?! how did you do this!? You skipped the whole picture!”, anyway you will learn something, am sure. So I will talk about my techniques, some advices, tips. I will try to do it in a funny way. Each one maybe have other techniques. The cool thing is to learn from all people and then develop your own technique. So if you do it not exactly the same like me, there is no wrong in this. So have fun reading this tutorial, I’ll try to answer any comments and questions.
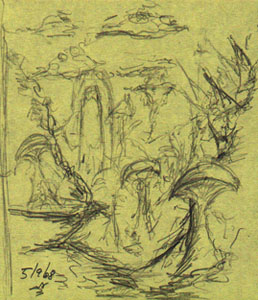
Part 1: The Idea and sketch
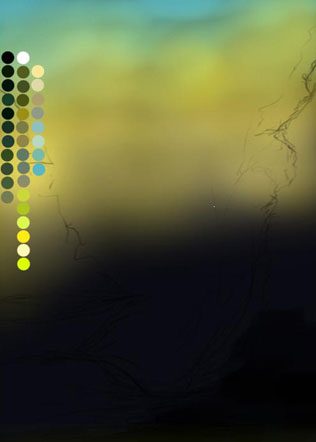
I start by thinking about what I want to paint – fantasy, landscape and others. Messing a bit around and comes up with the idea of what will be the colors and what will be in the painting. When I have the picture in my mind I start sketching on little paper, about 7*7 cm. I open the Photoshop CS3 with 1000*1400 px, it’s a bit small maybe. Anyway I make a plate of colors – swatches with a regular brush.
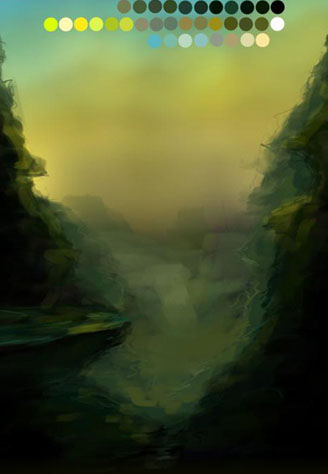
Next, I paint the background with a very darker color (but not black), and sketching again similar to the sketch in the paper. I grab the Airbrush brush with a Pen pressure on Other dynamics and start painting the sky a bit.
Part 2
Chalking everything – “Chalking ah?”.
From the Chalk brush of course I use this brush for most of the painting. I grab the Chalk brush again Pen pressure on Other dynamics, Spacing 5% and start painting the picture with the colors I choose in the start. I do it from the darkest part, in the front, bright in the edge of the mounatins, and brighter in the back untill it merge with the sky – to make the depth. As you can see I use green colors in the mountains, and the edges with a smaller brush I paint a bit of yellow – brighter green. The hard part is to think about the shade, think where the light source come from and how it will effect on the mountains or on every detail. In the middle as you can see, I work on the depth, adding some more mountains in the back. Still with the Chalk brush and a bit of Airbrush Smudge Tool.

Part 3
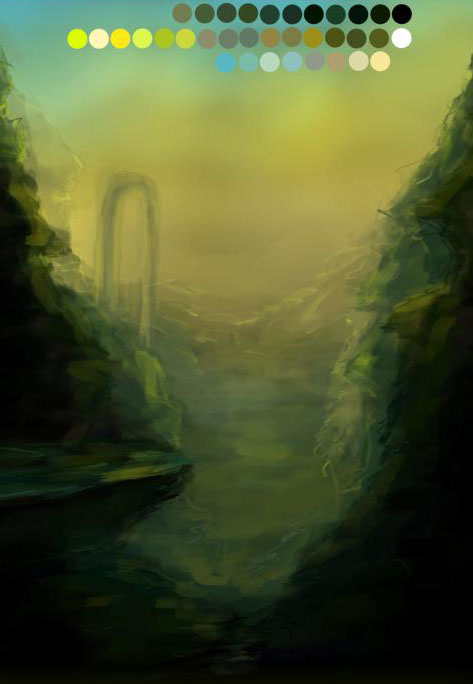
Let’s get down to details.
So details, I think that’s the part when I usually start being satisifed from the painting. I starts with the closest part, the mushroom on the mountain. continue with the chalk start builiding the shape of the mushroom, dark color in the left where there is no light, brighter color in the right where the mushroom is exposed to the light source, in this case the sun.
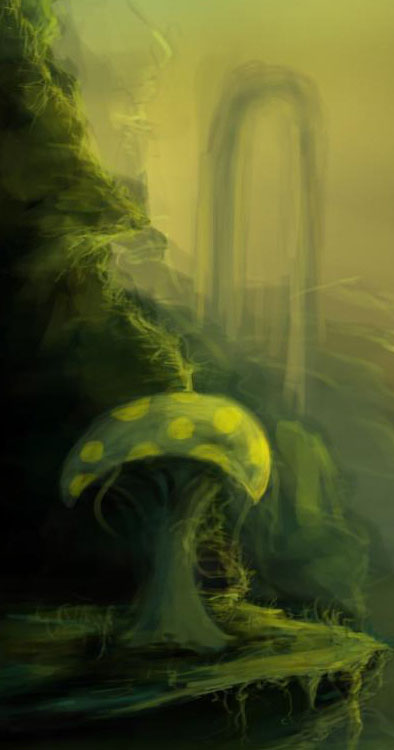
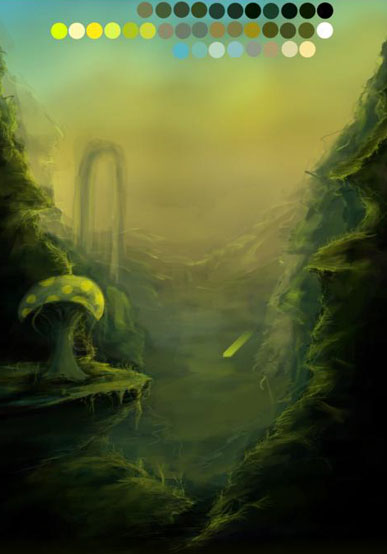
So I paint the mushroom go close to 200% and resize the brush to small one and work on the details and on the edges to make it sharp, not blur, because it’s the closest thing to the viewer and he supposed to see it clearly. When it more blur the item is far this one of the things that makes the depth besides the color. Hope you learn something from this part Ok so in a new layer I made dots in bright yellow and then turn the blending mode of the layer into Soft light. You can see the result of the mushroom on the top part of the tutorial. After that I work more on the edges of the mountains with a small brush, getting down to the details still with smaller brush making the grass combining a few green bright colors. Anyway don’t freak out when you see this, it’s just the grass.
Part 4
Go with the flow.
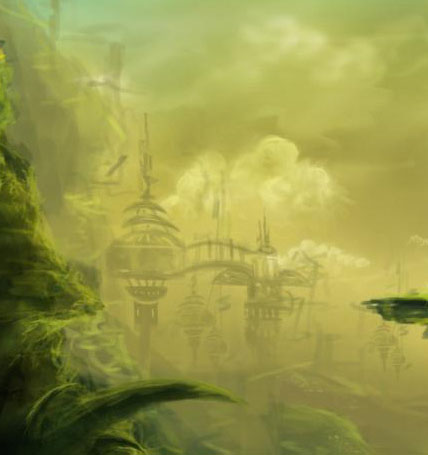
So I continue with the details and the other parts. Work on the right part of the painting, make one more mushroom. Then, I copy the 2 mushrooms to the hill there, playin’ a bit with the Free Transform and the dots, cause I dont want they will look exacly the same. Using copy – duplicate layers, it’s easy thing to do when you want to have a couple of things. With a little changes no one will notice you copy them. And you will see I use it a couple of times here in this painting. Next, adding some more details to the mountains, more work on the depth. You can see I add some sort of a building in the back – then I get the idea of call the painting Mushroom Factory, kinda’ this building is part of the factory. So the building is again with the chalk brush, some more straight lines, you can also you use the Lasso Tool and some delete in the middle of the building, to make the windows. And again I copy the building to the left side of the painting. I wasn’t sure what will be in the middle then came up with the idea of making a river, some greenish river. I do that by make one layer with combine of dark colors in the front to brightest in the back and use the Smudge Tool (again Airbrush). Start smudging it from left to right. Then I make a new layer in Overlay Blending Mode and working with a smaller Chalk with a bright color, even white, start brushing from left to right, and smudge it a bit. And here we have a river. Let’s go on.

Part5
Clouds & Flying Factory.
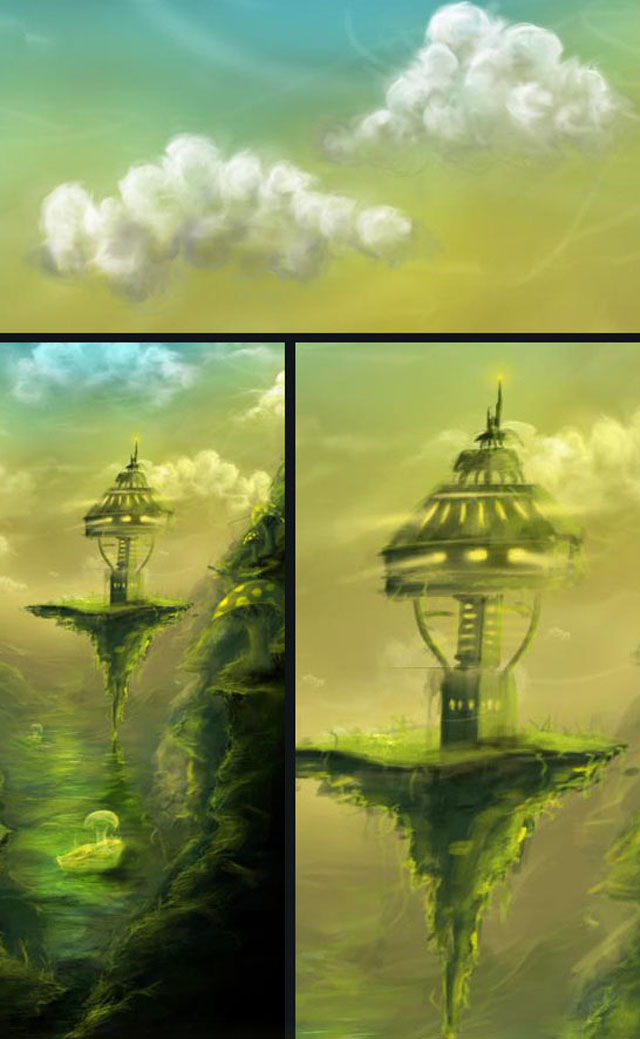
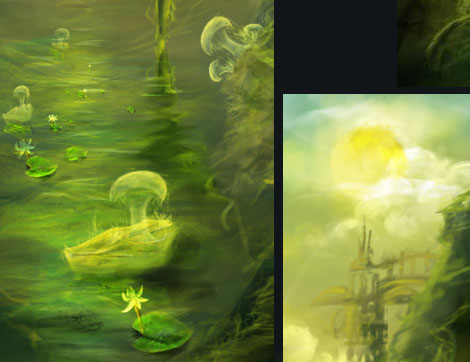
In this painting I try some new technique of clouds, something that will match the style of the painting. So the progress goes that way: first I make the shape of the cloud with the Chalk Brush, white color on the upper part of the cloud, goes brighter to the edge of the cloud. in the lower part of the clouds I make it more gray, by that the cloud have some sort of a shade. go on with the Smudge Tool, smudge it up in circles way and the clouds is done. I make one more cloud with some other shape and do it in the same way. Then I start copy those clouds all over the sky with Overlay Blending Mode and Opacity change according the place of the cloud, when it’s farther I made less Opacity and smaller clouds. playin’ again with Eraser and Free Transform to change a bit the clouds, cause again, I don’t want them to look similar. Under the clouds layers I make a new layer and brush and smudge in it some white strokes in Overlay Blending Mode, to make the sky look more like…sky. The next thing I add in the river are some leafs with a mushroom on them. I do that by brushing with the Chalk the leaf then Duplicate the layer, Flip it Vertically, Set it to Overlay Blending Mode, Erase the edges a bit, to make the leaf reflect with the water. The mushroom is the same mushrooms from the beging but on Screen Blending Mode. Look the same? Remember the cool factory I paint in the back? Ok, let’s turn it to something cool that will take some big part of the whole picture. So I start drawing some flying mountain on the middle of the painting. Again Chalk, bright colors in the edges, some grass with smaller brush and here we have a mountain. I Duplicate the layer, Flip it vertically, erase a bit, then it’s refelct in the water. Next, I take the building and new layer above the shape (It’s possible to make a Mask layer but it’s not really important) start painting with green colors, make some fixes to the shape add some yellow with Airbrush Brush behined, and this building is ready. Simple ah?
Part 6
Last Details.
This the part when I think on a little details – elements, that will fill the painting, make it more… full So I start think about some elements. the first one was adding more buildings beacuse it’s a mushroom factory, building like the one onn the flying mountain. I found that making those building is easy and fun, so I made a few of them in the back, make some copy and a bit coloring in one of the buildings on the right part of the painting. The next thing is to add more mushrooms on the mountain and on the river with leafes, again I duplicate the layers of the mushroom with a Screen Blending Mode. More element is to make a cool looking sun. I do that by chalking again, and smudge in circles. some yellow Airbrush around the sun, and that’s it. Add some more painting in the sky, nothing special to explain about. Next, Other kind of leaves with a flower on the river. Last fixes – Depth / Details / Shade, everything. And the painting almost done
Part 7
The finish.
Ok, so now it’s just the color layers. New Curves Layer with a bit “S” shape can make the differnce. I do that in all of my paintings. Playing with Color Balance it’s nice way to change the whole color and get some nice results. I didn’t use it in this painting. And the last thing, with the JPG image, when all merge, I did the Unsharp Mask Filter, that’s first time I use it, and I got some nice and improved results.
I really really enjoy making this tutorial. I hope you enjoy it too.
Comments Are most welcome

About The Author
You might be interested in