Modeling of Shark
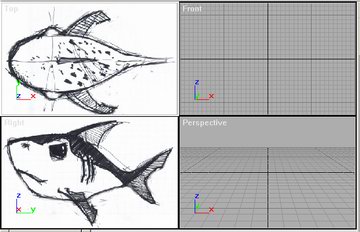
We look as to model this sweet shark.
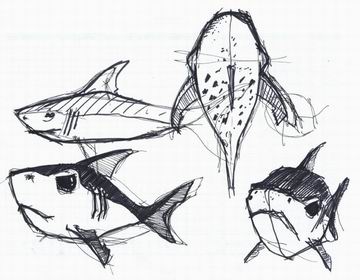 |
I got inspiration from Disney’s cartoon “Little Mermaid”. I idea was to create a shark that looks dangerous, but also has a cartoonesh look. It has small but compact body so even at first look you see that it’s strong.
and at the end it has to look funny. |
 |
To model Shark I use 3DStudioMax3.0.
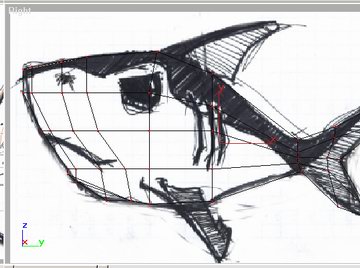
Modeling technique is same as in SadMike technique. I start with importing a reference images to right, and left view as background image. These images are going to be very helpful in modeling process. And when you importing image as background always choose “fit image”. |
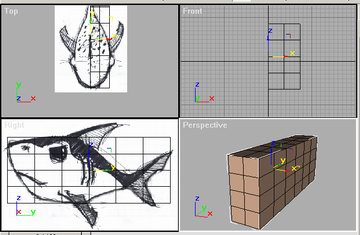 |
In right view above background draw a box so it’s not wider or higher than shark. Box has 6×4 segments and 2 side segments. This box will be one half of the shark. Maybe in top view box is not going to fit the shark. So do not move the box. Try to rescale the background image so it fits the box. After fitting lock the background so when you move box image goes with it. problem: My box has black colored edges. That is because I have white background for reference images and by default max settings edges on selected object are white and you can see them on white background. So go to customize/preferences/colors/main UI and under selection pick some dark color like black |
 |
Like I said box is just one half of the Shark. This is good because we are going to mirror this box as instance, and work only on one half of the head (box). And every time a change is made on one half it can be seen on the other too. So the whole process is cut to half. I just call this object a box, because it’s made from box, but just after I am satisfied with the dimension of the box I convert it in Editable Mesh.
Note: Shark or any other organic thing is not perfectly symmetrical, so after modeling of one half is done connect two half in one object and make some modification so the model is not symmetrical in every part. And another thing, before mirroring the box (editable mash) delete faces on the side where the mirror object is going to be. |
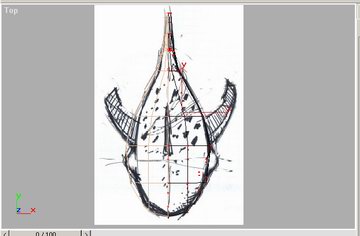 |
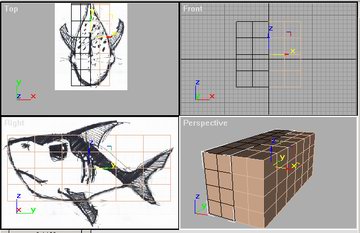
Now just jump to the top view. I start by moving vertexes of the box so the object fits the shark drawing edges.
Note: leave Ignore backfacing uncheck, so when you select vertex by rounding it you select all the vertexes below. |
 |
I did the same thing form above in right view. In making of SadMike I had only side reference image so it was difficult to see all dimension of the model and modeling was done by feeling. Here it’s easy because you know exact dimension of the model |
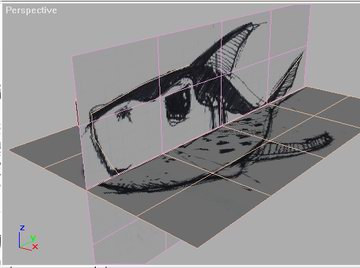 |
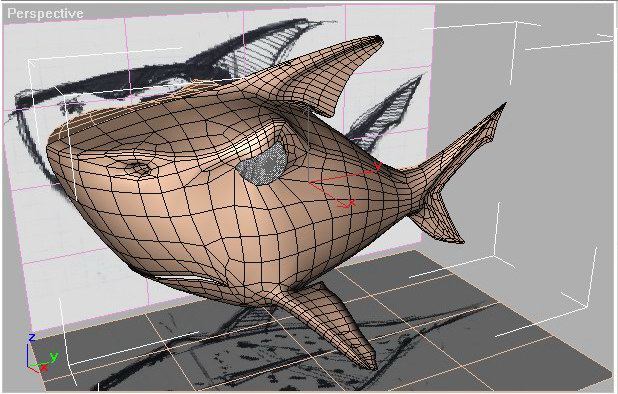
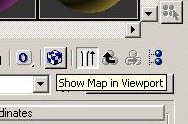
Most of the modeling was done in Perspective view port. Here you can not see reference images. So I draw two planes, exact size as reference image in that view, one in top and one in side (right) view and attach them material with reference images in diffuse. Make sure that you check show map in viewport
Now you have help in perspective view. Note: hide the model while drawing this planes to see better. |
 |
Unhide the model to see if everything fits. Now it’s going to be difficult to model with these planes in the way so move them outside the model like on the image below. |
 |
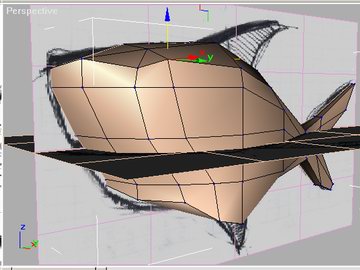
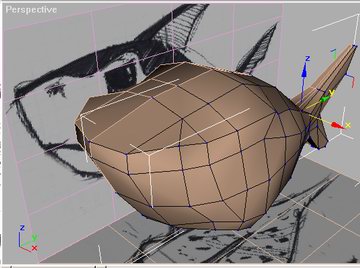
After some move here move there vertex time this is how the model looks like. You can see some big difference from the box. Most of work on this faze was moving those vertexes on the sharp edges of the box to make some smooth surfaces.
The whole thing about this box modeling is to work with much less vertexes as you can and afterwards you apply a meshsmooth modifier and get a nice smooth rounded model. |
 |
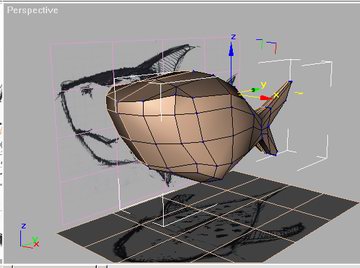
Another view of model and moving those vertexes to mach the look you want. Reference images in perspective view are just to see how the model should look like ( to have it all the time in front of your eyes ). You can not see the exact place of the fin because of the perspective. To see exact locations of parts (fins, eyes..) use top and side view. |
 |
When I was satisfied with the overall shape, I start to make some details. Fist one was tail or back fin.
sorry I forgot to make some shots between image at left and image below. So you have to imagine those. |
 |
Here is a smooth look of back fin. When you add a mesh smooth modifier model shrinks a bit so make sure that non smooth model is a little bit bigger in volume. |
 |
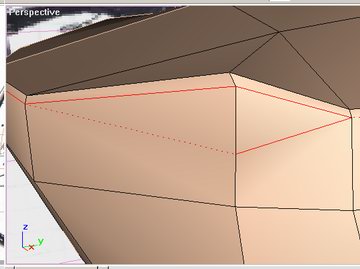
Note that there is double edge from start of the model going all the way to end of the back (the start of the back fin). I double this edge to make more visible area where back of the shark (that should be darker color, see reference image) meets rest of the body. |
 |
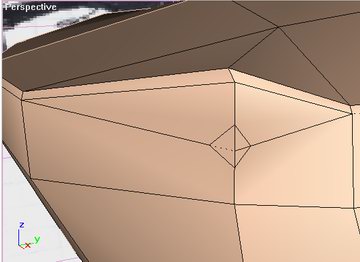
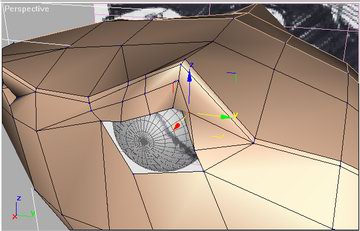
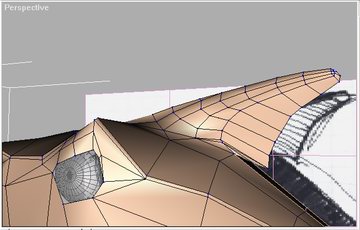
The next step is to model a nose hole. This was very easy done, by adding (cut tool) more edges. Follow images below….
|
 |
|
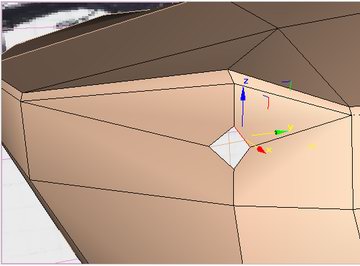 |
Delete faces where the hole is going to be. And extrude edges inside the model.
Select all edges around the hole, press and hold shift and move them inside. |
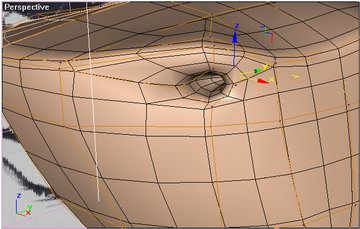 |
Now to see how this looks when smooth. Press show end result in modify panel. |
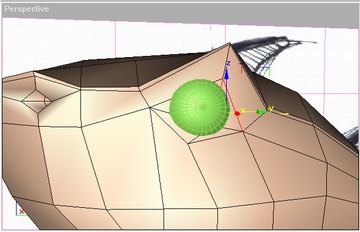 |
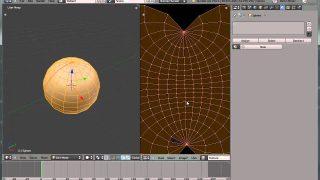
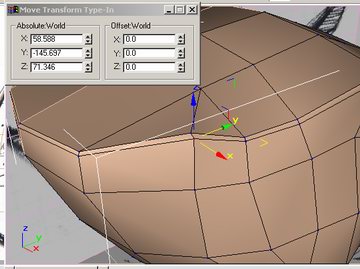
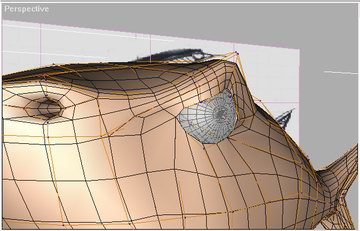
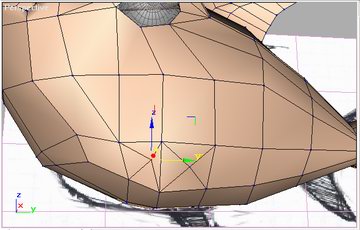
Next step was creating an eye hole. Eye would be a sphere in this phase. In side view position it and lock an eye object. Make some cuts similar to those at the nose hole. The process is the same. |
 |
And again move up and down left and right those vertexes to make that aye hole fit the eye. Go to the eye properties and check see-through. It can be useful to see better.
|
 |
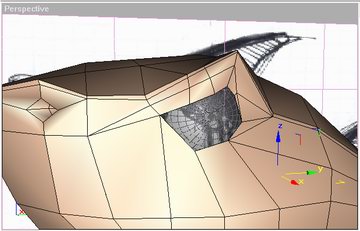
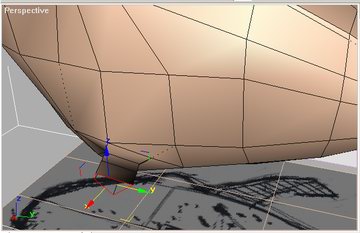
Here you can see finished eyehole and another look at smooth model. |
 |
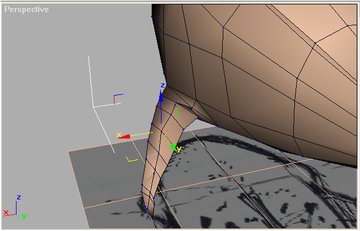
You see how in perspective view you can not see the exact place of the top fin so mark the place by looking in the side view. See image below. |
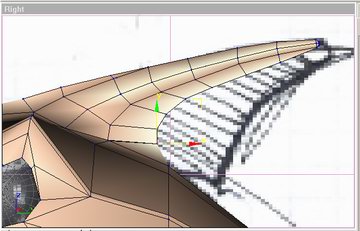 |
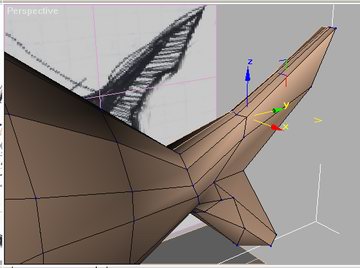
Now this is almost done top fin but see how it matches reference image in side view. Fin is done by making a hole in top of the shark and extracting edges. |
 |
See fin is done. |
 |
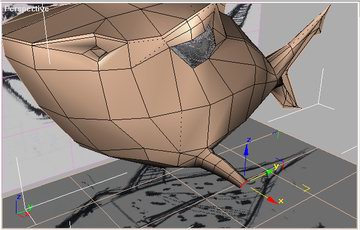
This time I was more careful with making those step by step shots so you can see nice how the side fin was created.. cutting and deleting faces.. |
 |
extruding edges around the hole by selecting them and moving them from the model while pressing shift. |
 |
O now this look like sometnih. |
 |
|
 |
Just another look at smooth model |
 |
The last thing was creating the mouth. Cut and delete in desired place. |
 |
I did not finished the mouth by the time I am posting this but soon……………… |
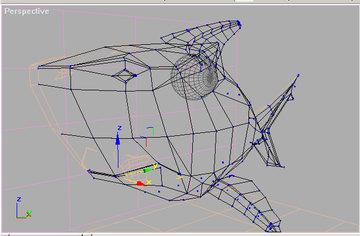 |
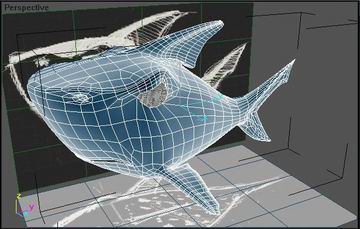
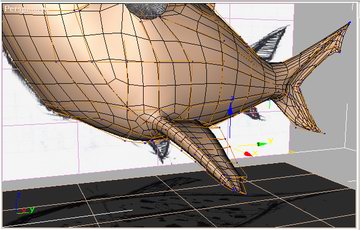
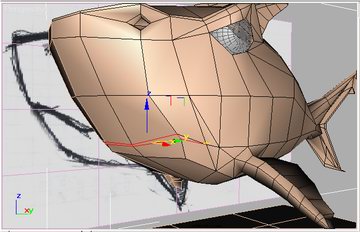
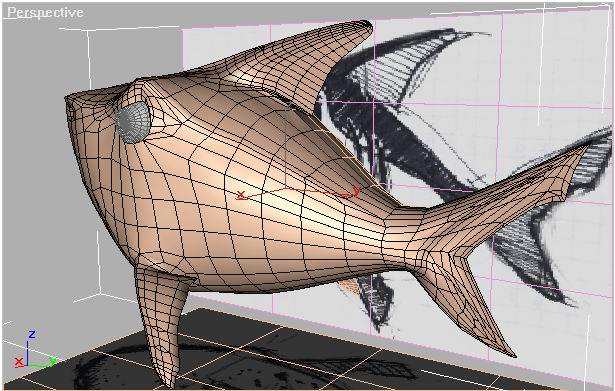
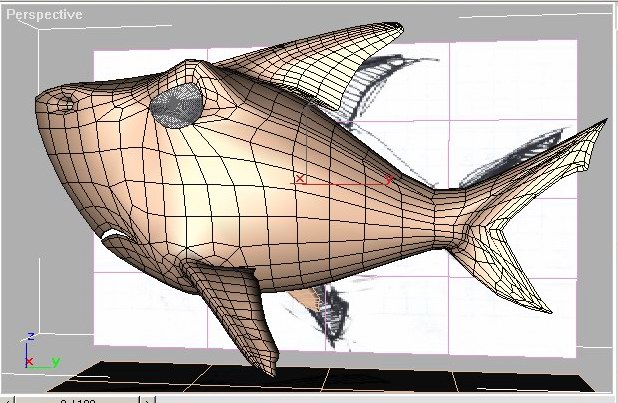
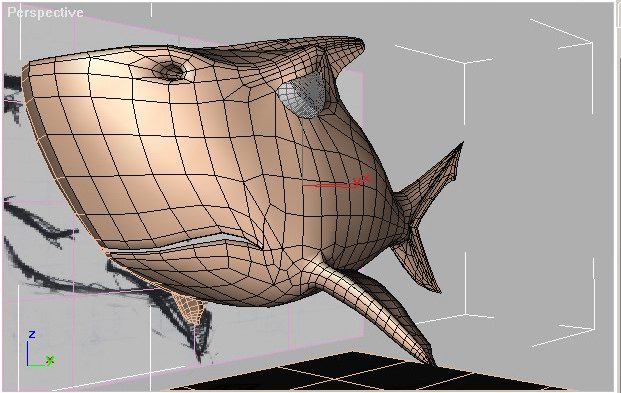
Some thing are better done in wireframe look. Like part of the mouth that is inside the model. You can move your view inside the model and see thing you can not from the outside.
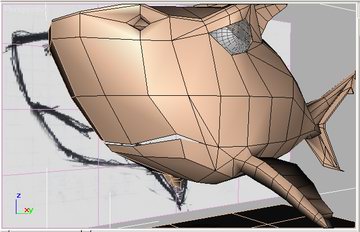
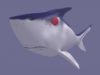
Below are 4 almost done models of this shark. Click on image for bigger view. And here is a Max 3.0 shark model scene (selfextracting winrar file)
::some images look attractive in invert mode :) |
 |
 |
 |
 |
|
This “making of” shows just modeling. I would post a texturing and animation as soon as done. |
|
.jpg) Do not wait to finish the model and than to apply the meshsmooth modifier. Apply it in process of making to see where are you going. And do not remove this modifier just go to Editable Mesh and turn off
Do not wait to finish the model and than to apply the meshsmooth modifier. Apply it in process of making to see where are you going. And do not remove this modifier just go to Editable Mesh and turn off


About The Author
You might be interested in