Tutorial “Car Paint Shader Setup”
There are a many ways to achieve an effective car paint simulation in 3D. Several companies have written high end shaders which give amazing results but most (not all) of them require fine tuning of a lot of settings to acheive a quality end result.
Using Softimage XSI and a simple Phong shader combined with some basic render tree setup and the Mental Ray render engine will give professional results comparable to using a 3rd party car shader.
STEP 1
Start by selecting your car model and assign a Phong shader, Get Material / Phong
and make sure to disable the specular. Open the render tree (7 on your keyboard)
Next select Nodes / Mixers / Gradient and plug the output of the gradient node into the reflectivity of the phong.


Now select Nodes / Illumination / Incidence and plug the output of the Incidence Node into the input of the Gradient Node. Open the Incidence Node and check invert.

(The incidence node is used to simulate the Fresnel effect. The surfaces that are perpendicular to the camera will reflect 100% and the surfaces that are parallel to the camera will reflect approx 10 % – 20 %.)
Open the Gradient Node and select the black to white Preset. Select the black color marker on the bottom of the gradient set its RGB values to approx .08 to .10. Leave the white color marker at it’s default setting. Now select the mid point blend marker on the top of the gradient and set it’s position to approx. .78.


STEP 2
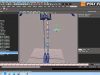
The next step is to connect a bump map, go to Nodes / Bump / Bumpmap Generator and connect this to the material nodes bump input (Don’t connect this to the bump input on the Phong shader)


Next select Nodes/Texture/Image and browse to a tileable texture map similar to the one shown below or you can generate a grayscale noise texture using a fractal. Nodes/Texture/Fractal.Set the bump factor very low – something around .15 – .2 should work well depending on the contrast in your bump texture.


If the bump is still to extreme double click the image node for the bump texture and select the adjust tab, click the enable effects button and adjust the gain and brightness of the texture to something like the image below. (This is a lot quicker than going back into your paint program and making adjustments)

Apply a cubic projection to your car if it’s one object. If you modeled the car as separate parts apply cubic projections to each part of your car and scale them so they are perfect cubes and all equal in size. When your finished your projections freeze the modeling to avoid texture swimming if you animate your model.

Connect the bump texture directly into the diffuse port of the phong shader (Make sure your viewport is set to shaded) and double click the bumpmap generator node then select the advanced tab. Change your texture repeats to 50 50 and 1. You should be able to see the repeats take effect on the surface of you model because you have the texture plugged directly into the duffuse port of the phong shader. Once your happy with your repeats unplug the bump texture from the diffuse port of the phong.
You can now adjust the color of your phong to change the color of your car or connect a texture map into the diffuse and ambient inputs of the phong.

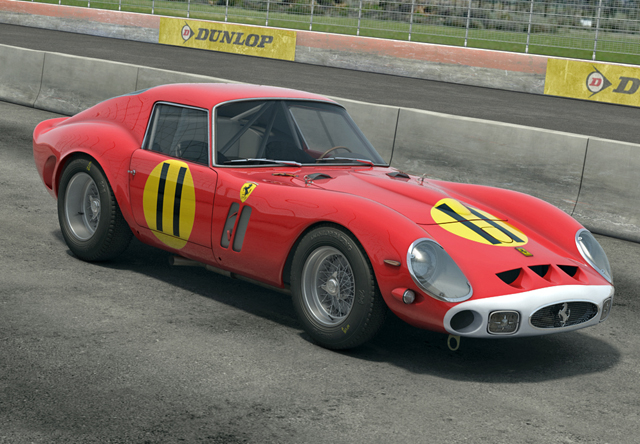
Depending on your lighting setup (I’m using GI and FG with a sky dome here) your renders should look similar to the image below.

Thanks to the shaddix at sector-41.com for his assitance in putting this tutorial together, and thanks for reading and happy shading

About The Author
You might be interested in