How to create cool tribal symbols and signs – Part 1
This is my 2nd 3dsmax tutorial, and this one should also be quite easy once you get the hang of it (hopefully very quickly.) This tutorial is about how to create some really cool logos, tribal symbols, and other cool signs and such with 3dsmax. (Some content shown in this tutorial may also have included post work in Photoshop.) This tutorial should work for just about any version of max, and is cut down into 2 different parts (one for 3dsmax, and another for Photoshop.) If you have any questions, comments, or if you want or need any help, please email me at Viper680@hotmail.com. I’m also writing more tutorials so be sure to check them out also when they come out! (You can also go to www.necksmasher3D.tk for some more information.)
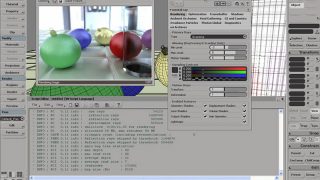
Ok, the very first thing that you need to do is to start or reset 3dsmax. Then turn on 3D snap and angle snap.
![]()
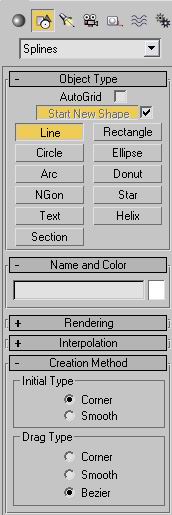
Now, go to shapes, and under splines select, “line.” (I would recommend that you make the initial type, “corner,” and the drag type, “bezier,” as show below. But it doesn’t really matter all that much.)
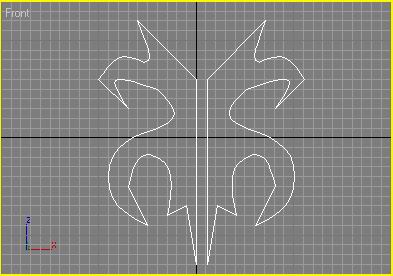
Ok, now what you need to do is go into the front viewport and create a cool shape, starting from the middle line and working your way around, and then coming back to the same line you starting drawing the shape. Here is an example:
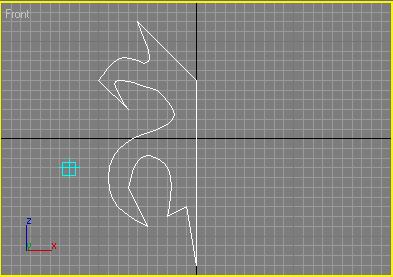
And you MUST make sure that the middle line (the line going straight down in the above example), is connected correctly. (In other words, make sure that the 2 points are aligned together to form a complete line.
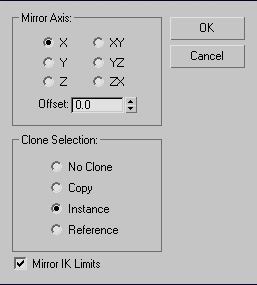
Anyways, the next step is to mirror the shape (mirror is located in the top-right corner of the main toolbar.)
![]()
Now, make the settings to where the mirror axis is selected to X, and the clone selection to Instance. (Mirroring the IK Limits doesn’t matter for this.)
Now go back to the front viewport again and move the cloned shape to where it is perfectly aligned with the original shape in a mirrored way. Here is another example of what I mean:
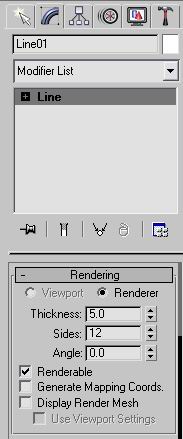
Now select either shape (it doesn’t matter which one, as long as you made the second shape an instance clone.) and go to the modify panel and under the, “Rendering,” rollout, set the thickness to 5.0, sides 12 (doesn’t really matter for the sides), and the angle set to 0.0. Now check the renderable option so that the shapes show up in the render.
Optional: This step is not required but may be easier to deal with. Go to the bottom right part of your monitor screen and select, “Zoom Extents All,” so that you can see all the viewpoints easier and so that it can render perfectly in the middle.

Next step, select the front viewport once more and do a test render. (I would definitely recommend that you use the default scanline renderer because it is the fastest.) Here is a test render that I came up with to show what it should look like so far:

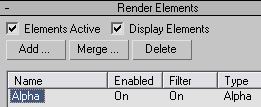
Now as you see, this is an ugly render, that is because we are not done with the steps yet. What you should do now is go to, “Render Elements,” and select Add… and choose the, “Alpha,” render element, and make sure that, “Elements Active,” and, “Display Elements,” are both checked.
Now do another test render, but this time, save the new alpha render. Here is what came out for me:
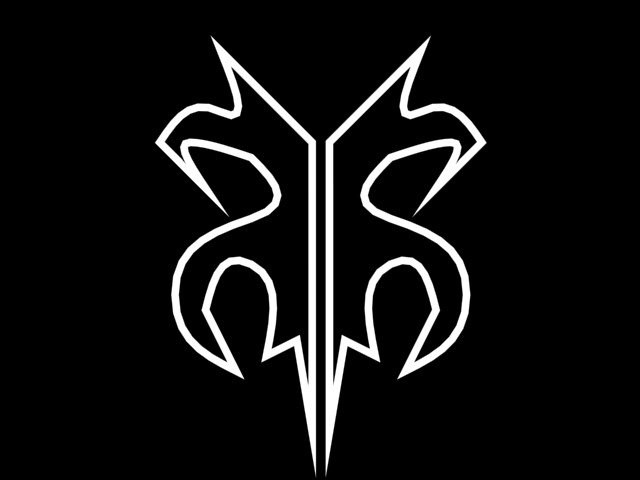
As you can see, it looks like a sort of, “drawn,” picture, and nothing to do with modeling. (Mainly because we didn’t really have to model anything.) You should also notice that this render isn’t perfect and can still use some more work.
After tweaking and moving around some of the vertexes around, this render came out:

In my personal opinion, I like this render more than the previous render because some of the areas can be seen more clearly and the vertexes aren’t crossing or tieing into each other. These signs and logos can also be great for blend maps when you want a cool mask material.
Well, that’s about it for Part 1 of this tutorial. Part 2 of this tutorial will involve Photoshop and how to make your newly created logos and signs look alot cooler. Here are some examples of what I made. (3dsmax and Photoshop combined.):
Original render (3dsmax only):
![]()
New design 1 (3dsmax + Photoshop):
![]()
New design 2 (3dsmax + Photoshop):
![]()
The next part of this tutorial (Part 2) will feature the photoshop part and how to get some cool results such as the ones above…
Well I hope you liked this tutorial, and please email me and send me some cool renders/pictures you made using this tutorial! I always enjoy hearing and receiving comments on my tutorials and it is greatly appreciated! (Email me at Viper680@hotmail.com) Thanks for taking this tutorial!
All renders/material content used are copyrighted by Necksmasher © 2004


About The Author
You might be interested in