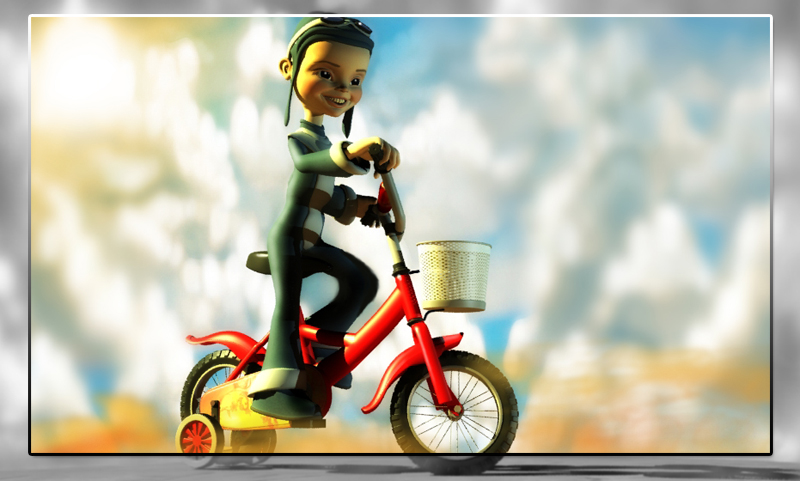
Creating Bicycle 3D Model in 3DS MAX
Introduction
This tutorial will show you how to use editable poly to create a bicycle. You will learn how to use editable poly and simple shapes like cylinder and box to create assets for the 3d mesh. I will also show how to manipulate turbo smooth modifier in your advantage – small bikes as it is easier to travel with bikes on a plane. Also, a smaller bike project would be a good start to get a nice grip on the basic steps in designing.
Step 1
First of all you will need to create a plane and apply a reference picture on it. Then right click on it, select
object properties and uncheck show frozen in grey.

Step 2
You will need to start by creating a cylinder, in the size of a front rim like on the picture

Step 3
Rotate the cylinder and mach the size of the rim then right click on it and convert to editable poly

Step 4
By holding a shift button on your keyboard and dragging the object to duplicate it, we will make a copy of the rim to create other parts of it.

Step 5
Once again adjust the new part of the rim to the centre part and make shore to use scale tool to match the height.

Step 6
After that you will need to divide the segments to bend the rim like on the picture, (to divide the polygons simply select the edges you want to divide and use connect tool).

Step 7
Here comes the tricky part, you will need to weld 2 rims together, use connect tool to divide the first rim and make shore that the edges are going along the areas where the vertices will be welded , just do the same as i did on the image.

Step 8
Right click on the object and select cut tool and simply cut along the edge of the second rim like on the picture, then select the polygons inside and simply delete them


Step 9
Attach 2 rims together and apply the see trough material to one of the objects or select wireframe view in your view port in order to see inside, then you select the target weld tool and weld the vertices like on the image, then add one more edge along the rim to make it more good looking for turbo smooth.


Step 10
Using same techniques we will do same things again in order to create other rims like on the images.


Step 11
Then holding shift and using scale and move, just add extra bends on the top of the new rim

Step 12
You need to create a new cylinder for the weal holding rim simply create a new cylinder, convert to editable poly, and make shore that it’s a little bit rotated so the weal can fit in, then divide it in the middle and move the edges a little bit to make it bend in the middle. And finally weld together like you did before. And copy same thing for other 3 rims.


Step 13
You will need to add extra cylinder underneath the bike, that will be our pedal holder and we will add the rim for seat and for wheel


Step 14
To create a wheel holder, create a box and divide like on the image, then convert to editable poly, move the edges around to make it more round.


Step 15
To create a weal, create a cylinder, divide it and move the edges to mach the shape of the wheel, then create a new rim to connect the edges like on the image.


Step 16
In order to give some more details to our bicycle create a little assets like holders and screws.


Step 17
Lets create the dirt covers. There is many ways but I gone for next one, create a cylinder, divide it and move it along the dirt holder on the reference, then add see trough material and cut along the edges, then select the polygons that you need to get rid of end delete them, after i just made extra cut along and used extrude tool to make a bend inside.


Step 18
The wheel itself won’t be hard, create a plane and then bend it in for of the wheel, then extrude the tried parts and then copy that plane and attach it to the side using weld tool, then copy again and keep doing it until it will get the right tried size, then apply bend modifier and make it bend on 360 degree.


Step 19
Make extra cylinders to make the wheel rim. Then copy the wheel for the back.


Step 20
To create a seat, simply create a box, divide it and move edges, then you can use symmetry modifier.


Step 21
Now to make a side panel, create a plane, divide it and move along the edges. Then use cut tool to delete inside cylinder. Then use extrude tool to give it a value


Step 22
Lets make some pedals now, i started with creating a cylinder, then extruding the inside and then dividing the cylinder in order to bend it like on the image.


Step 23
Now to make a pedal you will need to combine all you learned and put it all together. Make a plane, divide and cut along, then extrude the tried and then add symmetry to make it symmetrical


Step 24
Just follow the images in order to compete all the elements to make it look realistic as possible, create the head safer, handles and basket like on the images


Step 25
In order to make a basket realistic; create a material that will have the following opacity map

Finish
Here you can add your little baby character on that bicycle and it will look just super(Character was downloaded from 3dtotal.com) I hope you learned the allot from this tutorial. Next tutorial will be published really soon on environment modelling texturing and rendering with Vray using HDR maps and Global elimination so stay tuned.


 About the Author
My name is Alex Jerjomin. I’m originally from Russia but at the moment I live in UK. Every since I both my first video game I always wanted to create my own game designs and my own characters. so since 14 years old I’m leaning 3d max and other 3d applications. Now I’m 20. Starting my 3d Educations in Hertfordshire University next year and hoping to work in game industry.

Copyright © Aleksandrs Jerjomins (Exclusive Publisher)
Edit by Stryker
Source: http://www.3dm3.com


