2D Composite Grass


Why spend a bundle of money buying fur plug-ins to make grass, when you can make it yourself very easily in less than 20 minutes? You will now learn to composite 2d grass into a 3d scene, and make it look VERY believable. Every time I’ve used this technique, I’ve been asked which expensive plug-in I used to make such a nice effect. I told them “Photoshop”.
The fact is, Post-Production work is one of the most important steps in making a 3d scene. It gives it the final touch, final look and final feel. Every single still 3d image should be touched up by Photoshop or a similar program once the final rendering is done.
This tutorial will teach you the step by step process of the composition process. So please read carefully.
STEP 1
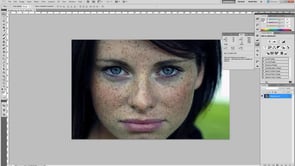
Before even starting step 1, you should have preferably a high resolution photograph with grass. Anything more that 500 pixels should work. Depending on your own 3d scene, the photograph’s terrain level should somewhat MATCH your scene’s level. Again, it does NOT have to be a perfect match. Here is the image I will be using for my scene:

Make sure it’s not blurry, otherwise this will lead to awful looking effects once finished.
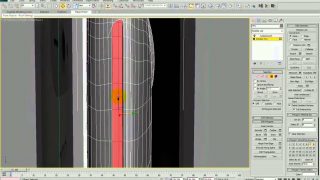
Step 1 consists of selecting the area you will be adding grass to. This doesn’t have to be a perfect selection, as grass overlaps areas in the scene. Depending on your image, you may want to use the freehand lasso tool as shown in the image below. Once you are done, make sure you add a new layer.

STEP 2
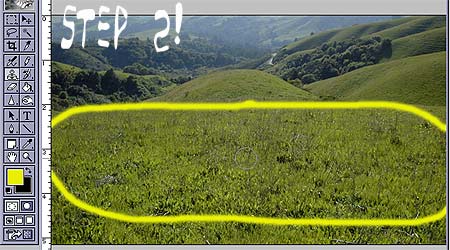
Bring your grass photograph into Photoshop. Match your grass’ image to your 3d image, so the length of the grass will fit on the same scale. Most of the time you won’t need to size down your photograph. In step 2, you will need to decide which area of the photograph you want to clone on your image. I selected the middle area, which I highlighted JUST to demonstrate where I will be cloning from. When you have decided, select your CLONE STAMP TOOL, hit ALT+LEFT CLICK once on the image, where you will start cloning.
STEP 3
Once you selected where you will copy from by hitting alt+left click, go back to your 3d image. You should still have a selection from step 1. MAKE SURE YOU HAVE YOUR NEW LAYER SELECTED, and left click and drag in the selection to start cloning the grass. It is preferable to uncheck the “Aligned” option checkbox at the top. Fill in your selection completely. Just a note, that your opacity should obviously be at 100% and mode normal. The brush size depends on your image. Once you’re done filling in the selection, you should have something that looks like this:

STEP 4
This step is very important. Hit Ctrl+D to unselect everything in your 3d scene. You will notice there are blocky edges everywhere. This step will get rid of that. You will need to grab a smaller brush and slightly overlap over these edges with the Clone stamp tool. Remember, make it look natural. If you need to, use various brush sizes, and remember, you don’t need to overlap every edge! If you look at the image below, the arrows in yellow demonstrate where you will need to go over with the stamp tool. Arrows in blue show where I have already done so:

STEP 5
Once you’re done retouching the edges, you should have something like the image below. This is a good time to change the brightness/contrast of the grass to match the scene. You can see the difference in that between step 5 image and step 6 image. I also sharpened the grass a bit to match the sharpness of the scene. All color changes shown in the step 6 image.
STEP 6
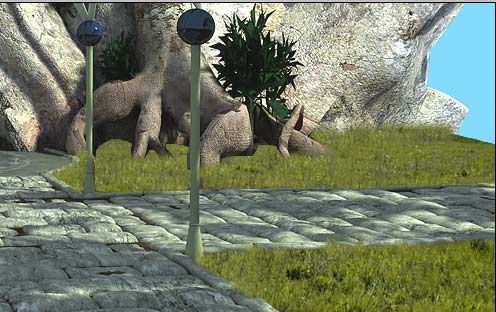
This is an important step to make the grass look BELIEVABLE. In some cases, you may skip this step, but 90% of images need shadow touch up after adding 2d grass. You will use your BURN tool in Photoshop, and the option Range should be midtones. I set the exposure on my tool at 24%, the lighter color grass, the less exposure you will want to set. As you can see from my image below, I darkened areas under the tree trunk, and I also matched shadows from the large tree shadow that you can see on the pathway. Experiment with different brush sizes to see different results.

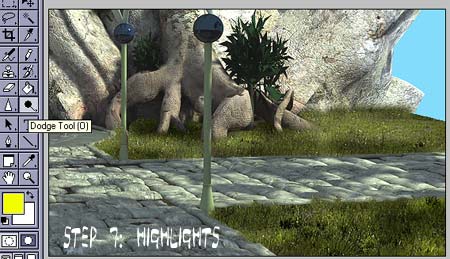
STEP 7
Step 7 is a follow-up to step 6. You will now add highlights to give more contrast to the grass. Use the DODGE tool for this step:
Finished!
Now you can grab a beer and brag about how you made grass that looks better than plug-in grass. Not only it saves you polygons in your scene, but it’s much easier and flexible. Remember you can still adjust color balance, brightness and contrast to your grass to match to your scene. Hopefully you listened and kept it all in a new layer.
If you have any questions, suggestions, corrections, please e-mail me at Amir@3d-realm.com. I’d also like to see result of your images with this tutorial, send them to the same address.
Disclaimer legal crap: 3d-realm.com and Amir Salehi are not responsible, nor liable for any damage done whatsoever by any means from this excersize. You must proceed with this tutorial at your own risk.


About The Author
You might be interested in