Occlusion pass guide
About tutorial
In this tutorial I will try to cover everything you need to know about occlusion pass in 3 simplified parts. The first part is explains what an occlusion pass is and what its good for. The second part is all the technical info on how to make an occlusion pass.
the third part explains how to use it.
What is occlusion?
To simplify the explanation, just think of a situation when all your objects have a simple white color and your scene is lit equally from all directions by a white light. Basically this should result in a blank white image, but what happens when some objects block a certain amount of rays that should have gotten to other objects ? those rays don’t reach the other object and as a result, the parts where the rays were blocked will become darker. The more rays blocked, the darker the surface will be. So basically what we get is a white image with dark areas where geometry intersects with itself.
Why using it?
The resulting occlusion pass gives very accurate and smooth shadows that resemble the result of global illumination. Compositing these shadows over your final render can significantly improve your image in many ways,it can mainly improve your shadows, give more depth to your scene and really helps to better show all the details of your models.
Where can I make it?
In any major 3d package that has mental ray (or other rendering engines that support it) basically.
When to use it?
After you decide you are finished with your scene and have rendered your image.
How
There are two simple ways to get an occlusion pass.
Both ways will usually give a similar result, the AO shader method can often be faster and gives much more control but the shader is not included by default in the early versions of some packages. experiment with both so you could decide which works best for you.
Note that these steps are demonstrated with max but they are similar in every major 3d package that has mental ray.
Skylight method
1. Save your scene as a new file to avoid losing any data.
2. Set your renderer to mental ray.
3. Set the background color to white and the global light to 1.0 (software’s default ).
4. Select all the objects and give them a standard material, set it’s color to white.
5.In the rendering options, turn final gather on (more samples for higher quality).
6. delete all the lights in your scene and add a sky light, set it’s color to white.
7. render.
tip – instead of using a white diffuse color, you can also use the AO shader in the diffuse color slot for more fine tuning.
Ambient occlusion shader method
1. Save your scene as a new file to avoid losing any data.
2. Set your renderer to mental ray.
3. Set the background color to white and the global light to zero (everything is black).
4. select all the objects and give them a standard material, set it’s color to white.
5. place an ambient/occlusion map in the self-ilumination slot (more samples for higher quality).
6. delete all the lights in your scene (they are unnecessary for this)
7. render.
quick info on the shader parameters:
samples – depending on the quality you want and the time you have, 128 is usually enough to get and high quality result.
Dark / bright – its usually best just to leave it as is.
Spread – Higher values soften the shadows between the geometry by expanding them further.
Max distance – when set on 0 it works like the skylight, any other value makes it calculate the occlusion “locally”. this parameter determines the distance of the local calculation. this is a must for indoor scenes.
Optional tips for improvement
Bump maps – If you wanna go extra with the occlusion pass, you can include the bump mapping of your objects to emphasize it more. Just make a copy of the material and put back the bump map in it’s slot for each object.
Adding / hiding geometry – sometimes you might wanna try adding some geometry outside the frame just so it would cast more shadows in desired areas. In other cases, some important areas get too shadowed because of certain geometry blocking too much of the light to it. It might help sometimes to exclude, hide or delete part of the geometry when making an occlusion pass.
Rendering more than one pass – this goes mainly for large scenes, you might wanna get different occlusion passes with different settings and different geometry (as mentioned above) so you could later on decide which pass works best with each local detail.
Applying it on the final image / sequence
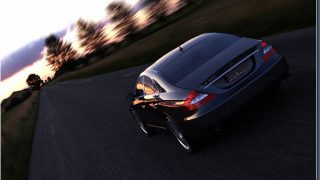
In this example I chose to start with a quick light setup for the first render which is quite flat and with very little contrast because I knew I’m going to go massive with the editing.
Take your render and your occlusion pass(es) to Photoshop and get to work.
The quick way to use the occlusion pass would be to slap it over the render, change the blending mode to overlay or multiply and adjust the layer’s opacity to the point it doesn’t get burned. But if you want to make the most of the details of your geometry, this can be taken one step further. the main idea behind it is to use it with as many different situations as you can think of (different occlusion settings, different blending modes, adjusting different colors and contrast and so on) and create masks to keep only the parts that improved on each layer. In this example I really took the occlusion usage to the extreme just for the demonstration (usually I don’t get more than a couple of quick layers). One thing you should always keep in mind is not to over do it, applying the occlusion passes quickly raises the contrast level of your image so make sure you don’t get stuff burned too much.
More examples:


