Making of: Portrait of a lady
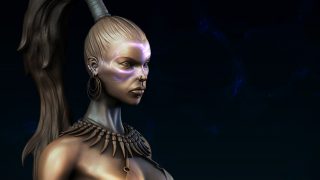
I try to make a role with Chinese traditional characteristic, woman and circumstance are all from ancient China. I collect reference from internet.
|
I try to make a role with Chinese traditional characteristic, woman and circumstance are all from ancient China. I collect reference from internet. During the manufacture process, I use 3dmax to modeling, detail in mudbox, render by brazil and hair by hair&fur. |
|
I begin to make the model of head from a sphere and then converse it to a polygon, edit the polygon according to the face muscle direction. For the role, I want to make is a women from Asia, so the outline should be mildly. Lines should be densely in the arthrosis, for example the knuckle.
When finishing outline of the head, I save the module as a .obj file, and then sculpt further more with mudbox.
|
|
Eyeball is consisted of two layers: outer simulate the reflection of the cornea, inner simulate the iris. Eyeball is not a sphere absolutely, a structure of eyeball is depicted in the figure below: it is easy to see that the front of eyeball heave a little, so I should adjust the outer sphere accordingly.
After finishing the body, there are a few small decorations to do, for instance, headwear, necklace and clothing.
About Clothing, first, edit as a polygon, and then sculpt the drape. When finishing the model manufacture totally, I use CAT to create bones, and then adjust the pose.
|
|
I use brazil advanced texture. First, I draw the diffuse map in photoshop. About extralight map, different color in different parts of face, e.g pouch, pastiness a little. Bump map can illustrate the model in detail, for example, wrinkle. At last, specular map is used to shown the wetness of face. Different specular level is used in different parts, for instance, lip is a little wetter; Nose, forehead and jaw are more bright for the reason of oil.
Scene’s textures are all standard textures or blend textures. Wall’s texture is shown in the picture below:
|
|
I use hair&fur to make the hair: first, select the face to add hair, copy and separate it out, and then add one hair& fur. Hair count: 18000 Passes: 2-3 Rand Scale: 15 |
Eyelashes are also made by hair&fur. For controlling the density of eyelashes, I add a gradient ramp for the Density parameter.
|
|
I light the scene and test texture of hair, hair tip is a little more yellow than hair root. I am good at lighting, so I do not mention a lot of it. I just use HDRI to add one lamp-house at right up side, and another lamp-house is used for compensation. |
|
|
Hello everyone, my name is Shuofei Li. I am from Beijing China. I like painting when I was a child, though I do not study art as my speciality. For some reasons of work, I begin to study 3ds max last year and fall in love with it. I know there are so many things I need to learn about 3D, I will try my best to do and make more and more beautiful works. Contact with Shuofei Li |
|


 About inner of eyeball, I create a iris map; Outer of the eyeball, raytrace is used to generate actual reflection.


