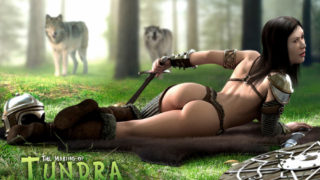
Making of Sleeping Beauty
It was obvious that a female character was an ideal subject. I knew I wanted to create a girl with an imposing beauty.
Concept and SketchesIt was obvious that a female character was an ideal subject. I knew I wanted to create a girl with an imposing beauty. As I am a huge fan of Lara Swifts photography and there was one particular photograph named endlessly in my collection really boosted my inspiration and motivated me to start. ModelingI started modeling a low poly female character in 3ds Max. After that I began to tweak, change proportions and generally fine-tune the model. I usually try to have the polygons evenly distributed on the model, and sometimes I also add some edge loops into the areas that I know will hold more detail when I move onto sculpting in ZBrush.
|
 |
UV MappingAfter my base mesh was done, then I started unwrapping the mesh. I used pelt mapping for my character. Below I have explained how we can unwrap the mesh using pelt |
|
 |
|
|
Here is an example to unwrap by pelt mapping 1. select point to point seam in the Map parameter rollout of UVUnwrap then select two points on the mesh which will define the seam from where you want to unfold |
|
 |
|
| 2. Select all the required faces select pelt in edit pelt option under command panel. Rotate the stretcher and start simulating and use relax to reduce the distortion further |
|
 |
 |

Sculpting in ZbrushI moved her to ZBrush to complete further anatomical correction. I really wanted to make her look correct, natural and very beautiful. Then I added a temporary hair to give her a better look |
|
 |
|
| Cushions: I made the base meshes in 3ds max because I need uv on them. Then I moved the base mesh to zbrush and started to sculpt. I have used inflate brush with LAZY MOUSE option turned on. I tried to follow some basic pattern of deformation that a pillow makes when its subjected to pressure. | |
 |
|
 |
 |
|
Once I had finalized the pose I moved on to the gown, created base mesh created in max .Added the details step by step as below. It was important to create an illusion that there is something under the cloth, depending on the anatomy and the pose of the subject |
|
 |
|
Texturing in ZBrushThe body texturing was also done in zbrush using Image planes. |
 |
|
|
Creating Hair in 3DS MAXFor hair making I used 3ds max hair and fur. At first I would select scalp faces and detach then to different object with renderable option turned off. After that apply hair and fur modifier and start stylizing hair. We need to play with parameters to get desired results. |
 |
|
Once I have done styling the hair, I had to render the hair into 3 different passes diffuse, alpha and shadow map. |
 |

Scene assembleyFinally I exported and assembled all the objects back in 3ds max and modeled all the rose and rose petals and jewelry. |
|
 |
|
|
I used two Vray lights for this scene. The One I wanted it o be a key light and the other one with smaller falloff as a fill light |
|
|
|
|
Rendering in 3DS MAXOnce my scene assembly and lighting setup was done, I rendered the image using Vray. Finally I did some post production tweaks in photoshop . Here is the Final Rendered image. I hope this insight into my workflow has been useful to you in some way. If you have any questions at all, please feel free to drop me an email. Related linksEmail: prashantsuyal@gmail.com Profile: http://triayami.cgsociety.org |
 |


About The Author
You might be interested in