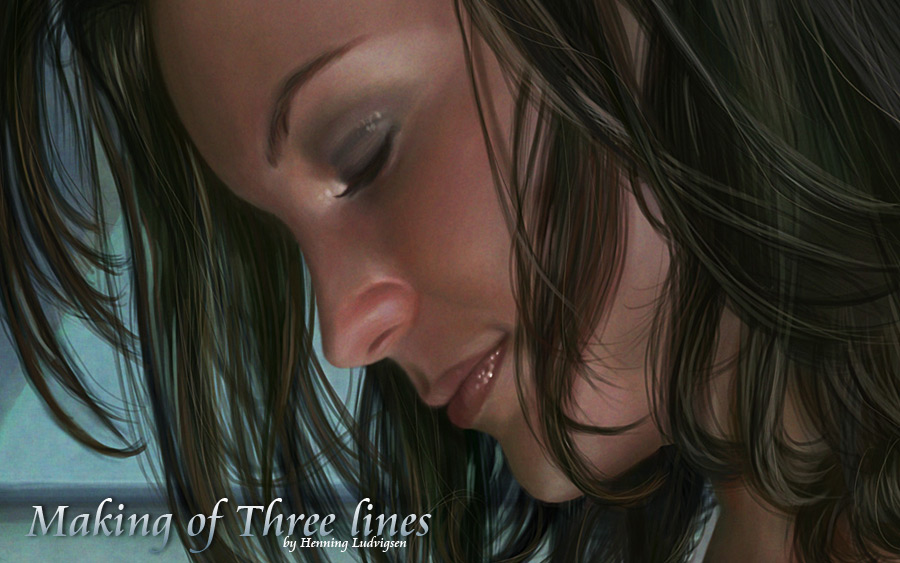
Making of Three lines
I’ve always been fascinated by realism, and because of this it is really important to me that the base line-art sketch has got proper proportions.
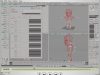
Simple bioHenning Ludvigsen is a Norwegian digital artist with basic traditional art education and with over 13 years of experience in digital art, design, and illustration. He is currently working as the Art Director at a computer game development company in Greece, and is working on personal and external projects during his spare time. He is living with his girlfriend and fellow digital artist Natascha Roeoesli. He is an awarded artist, with features in several books from Ballistic Publishing, is featured on dozens of websites, and to be found as columnist in the sci-fi and fantasy Magazine, ImagineFX from Future Publishing. He is also running Pixelbrush, a small digital art-community. www.henningludvigsen.com Step 1 – Line artI’ve always been fascinated by realism, and because of this it is really important to me that the base line-art sketch has got proper proportions. I usually use the old trick by putting a grid on top of a reference photo I’ve shot, and then I copy the same grid onto a blank canvas and start drawing grid by grid from what I see on the reference photo. I make sure to keep the grid on a separate layer so that I easily can remove the grid at a later stage, and also keep the drawing on a separate layer underneath the grid. Still, if you are focusing on mastering human anatomy, this is not the way to go as this is simply more of a way to save some time and making sure you get a result that is pretty close to your reference photography.
Step 2 – Brush usagePersonally I really like using hard edged brushes as they resemble the traditional brushes in both the way of working and when it comes to the result. On this example, the sample to the left is a basic soft brush, the one in the middle is a hard edged brush, and the one to the right is a textured pencil brush. For this painting, I exclusively used a hard edged brush (the sample in the middle). 1: Make sure you have the brush tool selected, and choose a hard edge brush (the ones that looks like a hard circle. 2: Now open the “brushes tab” (Windows/brushes). Click the “Brush tip shape” button and drag the “spacing” slider to 10%. If this is set too high, the stroke looks like a row of balls instead of one single stroke, so keeping the spacing narrow makes the strokes look nice and smooth.
|


Step 3 – Blocking in, and grey scale shadingOnce I have the line art version ready, I delete the layer with the grid, and then I make another layer behind the line art drawing which I fill with a grey value using a hard brush. Once this is done, I collapse those two layers so that I have the character outline with a solid base on a separate layer. Now I start adding shape to the character by shading with grey scale tones only by looking closely at the reference photo. I make sure to have the “lock transparent pixels” option on the layers palette enabled, as this makes sure I don’t paint outside the character. The reason why I start off in grey scale tones is because I prefer getting the shape up and running before having to even think about colours. Some like it the other way around and start out with colours. However, you should do what comes natural to you, and if you don’t know yet, why not give both techniques a try? As I go along using the new hard edged brush, I simply go over the entire character keeping the flow of the brush low (2-15%). I colour pick (get the eyedropper tool temporarily by pressing “Alt” while using the paint brush) directly where I’m painting for mixing new values directly to get smooth transitions. For example, if I have a dark grey-scale tone, and then a brighter one next to this, I will colour pick one of these tones and mix it with the other, and then colour pick the new tone and paint with this one and continue like this until I have a smooth transition. This makes the painting look a lot more interesting and dynamic than using the smooth air-brush looking brushes.
Step 4 – Rough colours Having the grey-scale version of the character in a decent state, I spend some time to find a colour-palette suitable for the skin tones I would like this piece to have. Some times I base this on previous paintings I’ve done, other times I create completely new ones. This time I wanted to use cold colours, close to porcelain values, so I made a palette with skin tones with quite a bit of blue and purple in it.
|


Step 5 – Rendering coloursOnce the rough colourized version is ready, I change the brush mode back to “normal” and start shading the entire piece all over again, using the same hard edged brush with low flow. When doing this, it’s really important to colour-pick where I am painting as I go along. Instead of mixing colours on the side, I like mixing directly as I paint, and I also introduce vague values of all kinds of colours all over where I’m working. I think this makes the result appear more dynamic and more interesting as you get all kinds of colour-variations. It also creates some imperfection which is good in my opinion, especially when working digitally.
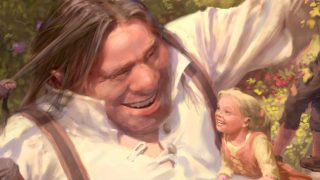
Step 6 – More details, and backgroundAfter spending quite some time shading skin tones, fabrics folds, texture work and hair, the time has come to add a background and extra elements.
Step 7 – Finishing the pieceOnce almost done, I go over the entire piece checking details and that ambient colours are right.
Step 8 – Add grainThe last thing I do is to add a noise grain on top of everything. This to make the piece look less computer painted, and to add some imperfection to the values. If you look closely at a digital photo, you will see that there are not real clean values, each surface usually has got some grain to it. I follow these steps when making a noise grain: 1: Make a new layer on top of everything. 2: Fill this layer with this value of grey: R=128, G=128, B=128 3: Set the layer blending option from “Normal” to “Overlay”. This will make the layer with the grey scale fill appear 100% transparent. 4: Now add a noise to this layer (Filter/Noise/Add noise), and set it to 400%, Gaussian. 5: Run filter: “Filter/Brush strokes/Spatter” a couple of times to break up the noise patterns. 6: Run filter: “Filter/Blur/Blur”. 7: Set the layer “Opacity” to 5-10%, depending on what looks best. Talk about this making of on our Forum >>
|


About The Author
You might be interested in