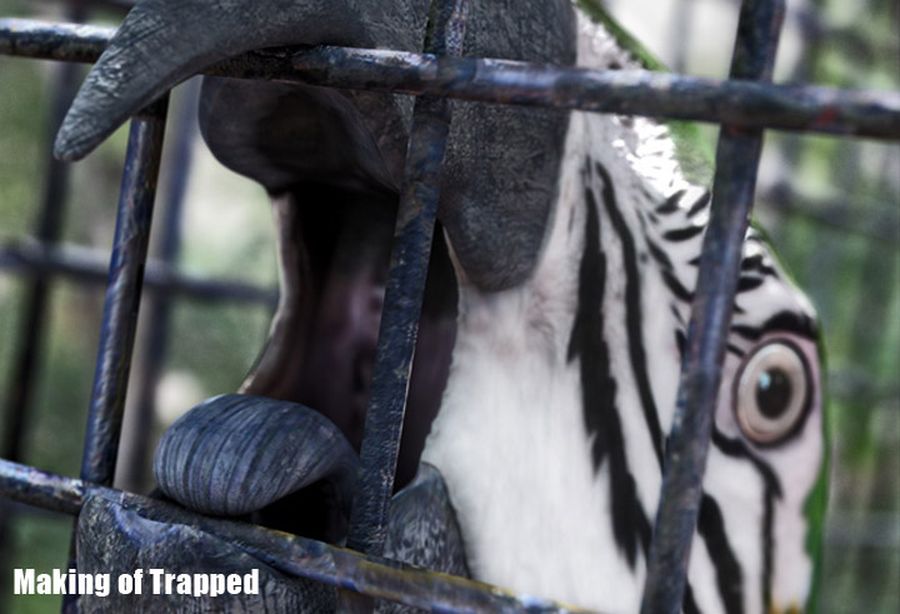
Making of Trapped
What I would like to do is to pick the animals and their characteristics that more fascinate me. During a recent travel I have taken a photo at the Bird Park of Kuala Lumpur. Immediately I’ve been captured by the expression of this parrot.
IntroductionWhat I would like to do is to pick the animals and their characteristics that more fascinate me. |
|
|
|
ModelingSome month ago, when I have modeled the Macaw, I did not have the final scene in mind, I just wanted to do practice and only to be amused. The modeling type is polygonal. First of all I have modeled the Macaw (lowpoly) in a standard position, on its tripod From that moment to the composition of the scene “Trapped” they are passed several months. Returned from the travel of the south-east of Asia I found some of the photos that I had taken and can be good motivation in order to resume the model of the parrot and to try to give it more peculiarity. To recreate a 3D scene from photograph is always a big challenge but why not to give it a chance! :-) Therefore I decide to try… I have opened the “old” model in Maya, I have divided the beak (before was joined) and I have modeled the inside of the mouth and the tongue. |
|
|
|


| I have deleted (Cut Face Tool) all the parts outside of the camera gate in order to make the scene lighter and then I have recreated the portion of cage that I needed. I have modeled (Maya Sculpt) the details after I have made the mesh denser especially close to the beak and the eyes. Then added some fur using Maya 3D Paint Tool on the head, close to the nostrils in order to render the parrot side more realistic. | |
 |
 |
Texturing
|
|
|
|
|
| Finally with Maya 3D Paint Tool I have fixed some “unavoidable” seams and refined the textures. I have used one shader for each map but the eye, for which I have used two. For the body I have tried to create a slight glow effect to help simulating the feathers. For this I have modified the value “Glow Intensity” in the attributes of the Blinn. For the beak I have modified the value “Reflection blur” in order to soften the glares of the HDRI (see right picture) | |
 |
|


| For the eye I have used a Pong shader for the textured part and a transparent Blinn for the external part to which I have applied one circular ramp as map of translucence and specular. | |
|
|
|
Lighting and Rendering
|
|
|
|
|
| The lighting system is given from an HDRI probe and two lights. One (point light) behind the parrot up with enabled "Use raytrace shadows” and the modified values in order to obtain soft shadows. The other (area light) inside the mouth so to illuminate some parts that otherwise would be remained in shadow with the only use of the other lights sources. I have finally positioned one of my photos as “image plane” of the Camera, just to have a credible background behind the cage, even if blurred because of the DOF.
The rendering settings are those that you see in the grab. Final Gather and sampling values are high enough to avoid the grain effect given by the DOF, but not exaggerated considering an output image of 4000×2250. Once obtained the final image (approximately 4 hours with a Pentium Quad-core) I have enhanced the contrast in Photoshop. |
|
|
|

I hope this brief tutorial could be in some way useful and to have satisfied some curiosity about my working way. Many Thanks for this opportunity and to everyone reading this article. |
Related Links
|
|


About The Author
You might be interested in