The Making of Aviator`s wife
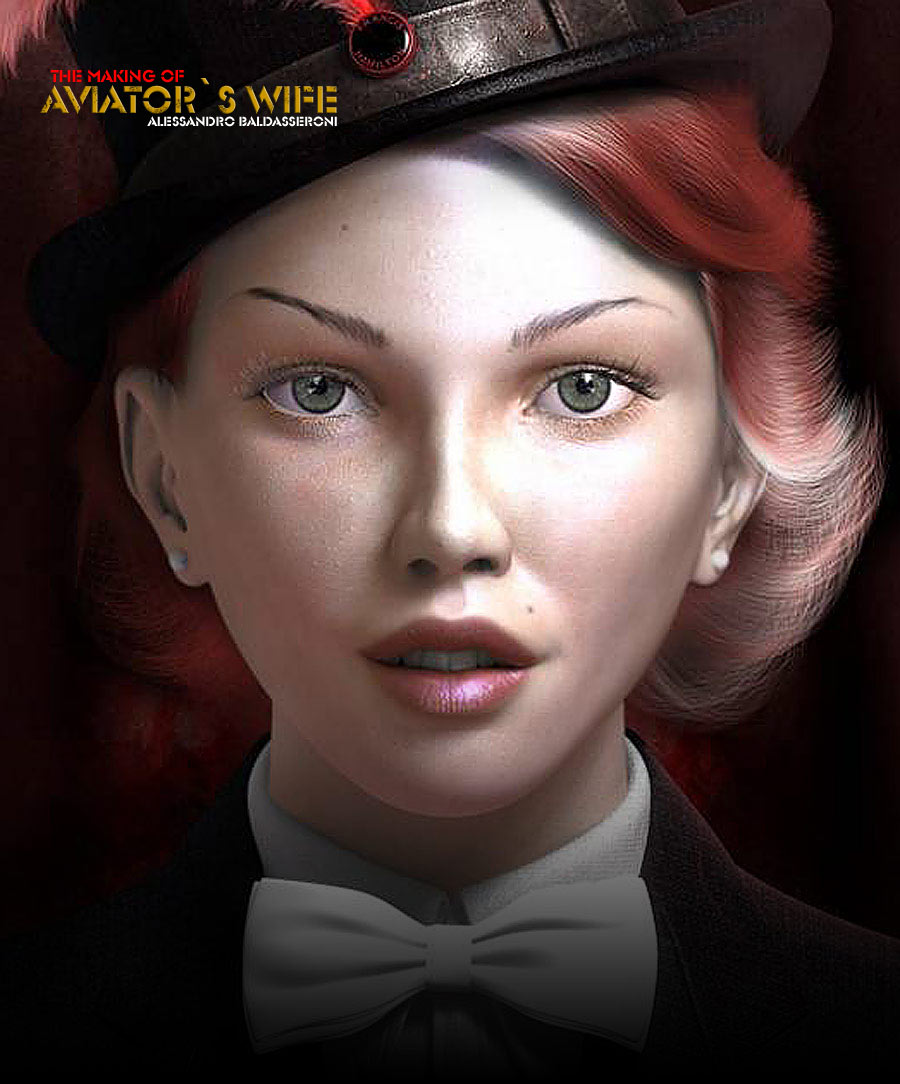
Aviator`s wife is a character made in 3d Studio Max for the upcoming short cg movie “Code Guardian” by Marco Spitoni.
|
 |
 |
 Click to view big image |
 |
 |
||||
 |

The model is made entirely in subdivision surfaces, about the modelling process I started with a very traditional approach, consisting in building a rotoscope couple of intersecting planes with a front and side female picture mapped on them, then building the geometry over, using the pictures just for anatomic and proportion guidelines, not much focusing on recreating the same outlines. My starting geometry was a plain mesh and it` s the basic topology of the face. I guess it`s very important to start with a simple and flexible topology when u work with subdivs , it gives you a great control over the face muscle flows, and helps you planning the structure of the face , working from raw blocks then going further into details. In helping to choose the right topology for your face I suggest you to read this very useful and interesting CGTalk thread then adapt it to your needs : and : |
 |
|
 |


 |
||||
|
After choosing a suitable topology, making the model is just a matter of pulling vertexes, refining edge loops and rings, according to the mapped reference pictures and of course observing a lot of other pictures, and why not, observe even your face at the mirror! Always remember to add detail uniformly, to keep the mood of the face constantly under control. Take a particular care shaping and detailing the eyes, they are one of the first thing to be noticed in a face , they catch most of the watcher attention, give a lot of character to the model, and in spite of their basic common shape they are very hard to reproduce without good references. As you can see from the picture the eyelashes are made with renderable splines, to obtain the effect of their size decreasing in their length you can apply a gradient ramp in the opacity map channel. I suggest you to take a look at this very useful tutorial by Juan Siqiuer (thanks) that helped me in building the spline distribution on the eyes edges. Moreover i choosed to model the tear duct and a tubolar geometry for the cornea liquid as separate elements (see circled yellow regions in the picture).
|
 |
|
||
 |
 |
||
|
Hair, eyebrows and the feather are made with the Shag Hair plugin by Digimation. In general the process to make them consist in defining an emitter (which can be a replicated part of the face mesh) and some guide splines , they will determine the flow of the hairs/filaments on the emitter. In order to facilitate, organize the hair flows, the emitter can be subdivided in zones , each one with a different ID, every ID will have his own distintc flow of hair (see the picture of hairs)
|
||
 |
 |
||
|
The picture above shows even a hair density map applied on the emitter in order to have a non regular hair distribution (like in real life), i applied a similar grey scale image on the emitter above the head. For very interesting walkthroughs of shag hair features and usage i suggest you too watch these tutorials by Michael Roger And Thomas Willette http://www.lizard-head.com/Tutorials/MaxHairTutorial/Tutorial_MAX_Hair_3.htm The rest of the model , (tophat, tiebow, smoking) has no particular tecnique applied, just plain subdivision modelling Here some wires of the finished piece:
|
||
 |
 |
 |
|
|
Texturing takes generally a great part in my works, I usually dedicate a lot of time in it, and it consists in some cases in manipulating existing photos and scanned pictures and sometime in painting maps directly in photoshop with default and custom brushes. The texture of the clothes and the tiebow is a manipulated cotton texture, then from the colour map I obtained the bump and specular maps too, just changed contrast/brightness values in photoshop.The leather string on the top hat was obtained scanning the leather belt of my pants :D
The material of the tophat and jacket is a brazil`s velvet shader, you can notice the suble effect of sub surface scattering on the edges of them.
But the most time consuming part in the texturing process was about the maps of the face and the relative material.After unwrapping a colidrical mapping of the head mesh I started from the bump map and i have to admit it`s a Frankenstain sort collage of scanned parts of hires pictures , noise filters and painted dots and wrinkles in Maxon Bodypaint 2.The colour map has been obtained overlaying the bump map with several painted layers of different types : skin color variations, dark spots, moles , freckles,lipstick and so on.specular map followed the colour map i just had to desaturate it , play with brightness/contrast and dodge/burn the areas where i wanted the skin to be more glossy or dry.The process has been made in Maxon Bodypaint 2 and Photoshop. The face skin shader is a simple max blinn shader, i just tried to emulate a fake sub surface scattering effect putting an orange falloff map in the diffuse and self illumination map channels. Specular color has a falloff map too, but shifted toward light blue.
|
 |
||
|
The whole scene is lit by 2 lights and rendered in Brazil`s global illumination. The first light (key light) is a white Brazil area light, with soft brazil shadows, while the fill light is a standard max omni light, with a low multiplier value (0.3) and no shadow casting, used just to lit the darker area of the image. In Brazil ‘s luma server settings i activated the skylight (plain grey colour) and the secondary illumination, with just one bounce.
|
||
 |

 |
||
|
After the rendering i made some post process work in Photoshop, i mainly sharpened a bit more the picture, then added a bit of glow and enhanced some specular hilights with the dodge tool. The b/w picture is just a completely desaturated colour rendering.I even made a very aged version of her portrait (you have it here in exclusive ;) , working a lot with filters and adjustment layers then adding scratches and wear details with traditional photoshop brushes, just a funny experiment J P.S, special thanks to Roberto Thirdeye Blasi for all the support in terms of useful resources and precious suggestions.
|
||
 |


 My name`s Alessandro Baldasseroni , I’ m a 30 year old living in Milan, born and raised. Always liked to draw since i was a child, my first experiments in cg were with an Amiga 500, then i learned Autocad working as cad operator in a telecomunication firm in 1996 .In the meanwhile i started to learn and practise with 3d studio max all on my own, I enjoyed it so much, the results were encouraging, so i started thinking to translate my passion for cg into a job in the field .So two years ago i submitted some of my cg artworks to Milestone, a leading italian videogame firm and luckily they hired me. Actually I still work there as digital artist.


