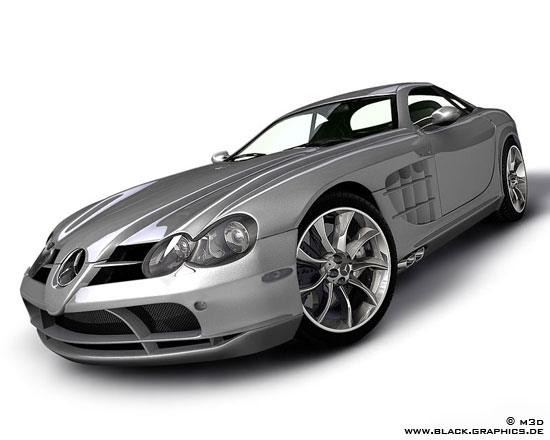
The Making of Mercedes Benz SLR McLaren
For all who are interested in 3D carmodelling we’ve documented the development of our Mercedes Benz SLR McLaren. Made with Cinema 4D R8.5
|
December 05, 2005 | Stryker |
For all who are interested in 3D carmodelling we’ve documented the development of our Mercedes Benz SLR McLaren. |
|||
|
Preparation: For reference I used a lot of photos from the web. To rebuild objects without a blueprint I usually use two computer screens – my main screen for work and a second screen to show the template pictures in different views. Before I started with modelling I took the measuremets of the original car and calulated their ratio to get the right proportions of the SLR. |
 |
|||
|
|
||||
|
Modelling and Technic: For all my 3D vehicles I use the following tools and techniques: > Subsurfacing devisions We made a tutorial for the point to point modelling with the clone function: The screenshoot on the left shows the objectstructure in Cinema 4D and the begin of the modelling with the bumper. Settings of the Hypernurbsobject: subdivision editor: 2 |
 |
|||
|
|
||||
|
I always start with the modelling at the front and develop the bodywork step by step to the backend. Working time: 2h |
 |
|||
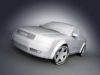
   Bodywork in the different stages of the development. |
|
Vehicle Parts and Construction As you can see at the screenshots, the bodywork exists off several single parts. Just as a real car is made, I model the different parts of the bodywork and match them together. I bend the edges of the componentes and line them up to get sharp and clear edge courses |
|
|||
|
|
||||
|
Raw body work finished and windows fitted Working time so far: 13 h |
  |
|||
|
|
||||
|
Backlights finished Working time so far: 14h |
  |
|||
|
|
||||
|
Wheels, Rims and exhaust finished Working time so far: 20 h |
 |
|||
|
|
||||
|
Last Steps: Mirrors, windshield wipers, Interieur, bottom and wheel panels |
  |
|||


[pagebreak]
|
Finished Model without textures All Textures and Materials are selfmade. I start with texturing and lighting while modelling the several parts of the car. With textures and a raw lighting set up you are able to see better any bugs in the mesh. Because every bug part shows some “crooked” reflections on the surfaces. Altogether I used 23 different materials. Some standard C4D materials were used, such as for the mirrors and the tyres. For all materials that required f. e. alpha channels, such as the windowframes, i made high res graphics in Corel. |
|
|||
|
|
||||
|
Finished Vehicle Bodywork: Wheels & Rims: Total working time: 42 h |
 |
|||
|
COPYRIGHT NOTE: The copyright for any material created by Black Graphics is reserved. Any duplication or use of objects in other electronic or printed publications is not permitted without Black Graphics written agreement. 3DM models creation   
|
||||


About The Author
You might be interested in