Making Of FAUP
This personal work was created specifically for the Evermotion Competition 2011.
INSPIRATION
This personal work was created specifically for the Evermotion Competition 2011. The digital artist could choose any interior space that inspired him. The main rule was to be photo real.
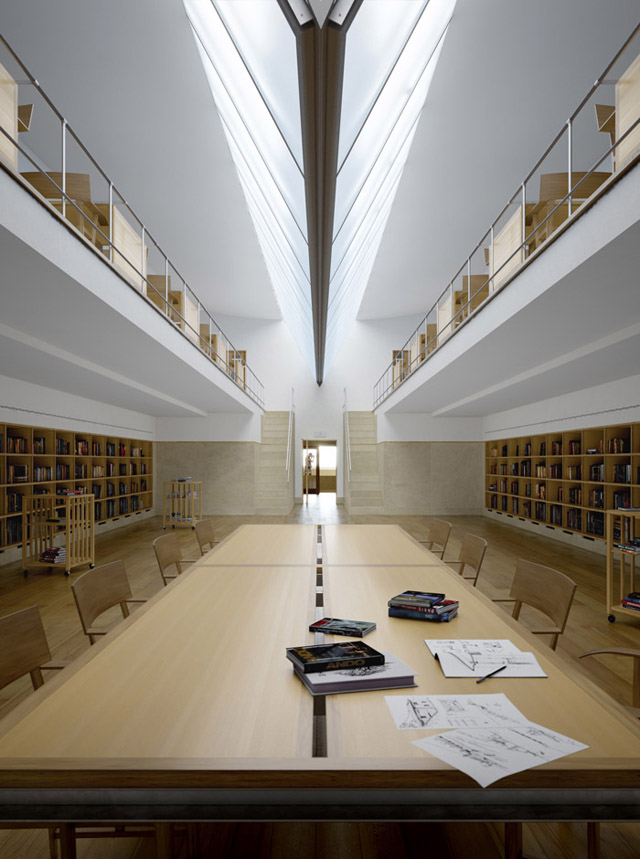
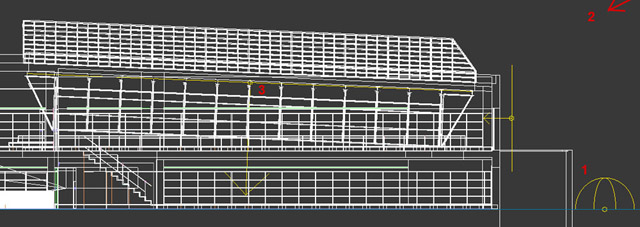
I choose the Architecture University where I studied for six years. For a long time i wanted to represent the path that goes from the street till the end of the building complex, which is the library itself. For timing reasons i couldn’t model everything of course, so I focused on a short part of that same path.
Inspired by Michelangelo, Siza created a “difficult” path that goes through several ramps/stairs, sometimes almost labyrinth routes – if you use other alternatives – , in order to reach, in the end of all the complex, the library – the place of knowledge. “Tired”… once the library is reached, an uniform interior light hits the space like in no other place. It is, in my opinion, the perfect place to read mostly because the shadow is so soft, disperse and doesn’t interfere with the reading. Great geometry knowledge, fine details and remarkable human scale rule in this space.
The goal of the work was to respect Siza?s architecture concept, simplicity, materials, light, design and obviously, make it look hyper realistic.
MODELLING
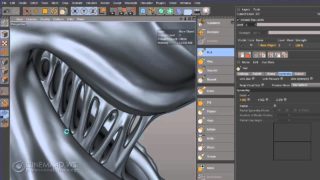
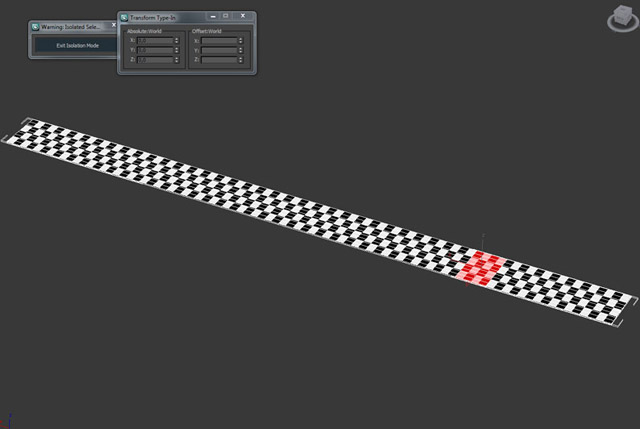
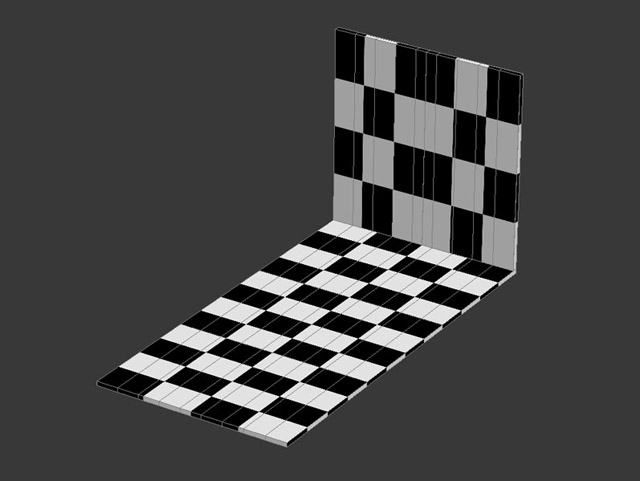
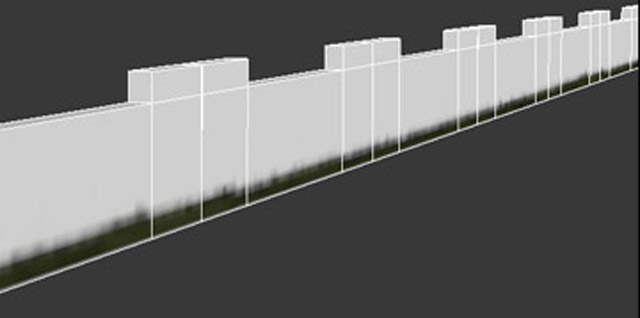
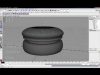
This part covers the modelling of the “museum” space. For the floor (1st image), ramp and near wall (2nd image), first I modelled simple boxes with the desired dimensions, around 1meter by 50cm . Although its seems like the floor is one big object, it is not. It?s composed by different pieces (elements) separated by only 5mm. This is very important because in the end of all this modelling process I wanted to give to each element a different ID – using the Unique Material Plugin. Once the basic model was done, I applied a Checker Material with 2,0 tiling in order to know how well was it?s distribution afterwards using RailClone Pro Plugin. In the end, I changed the Checker mat with the Marble texture – see Texturing part afterwards
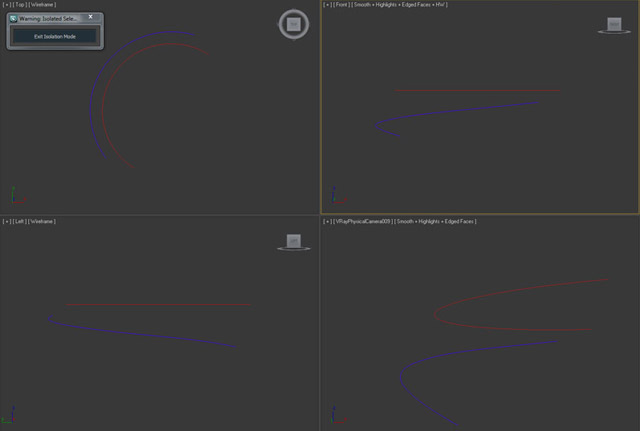
Next I created two splines, one for the floor and other for the ramp, that will determine their path when using RailClone Pro Plugin:
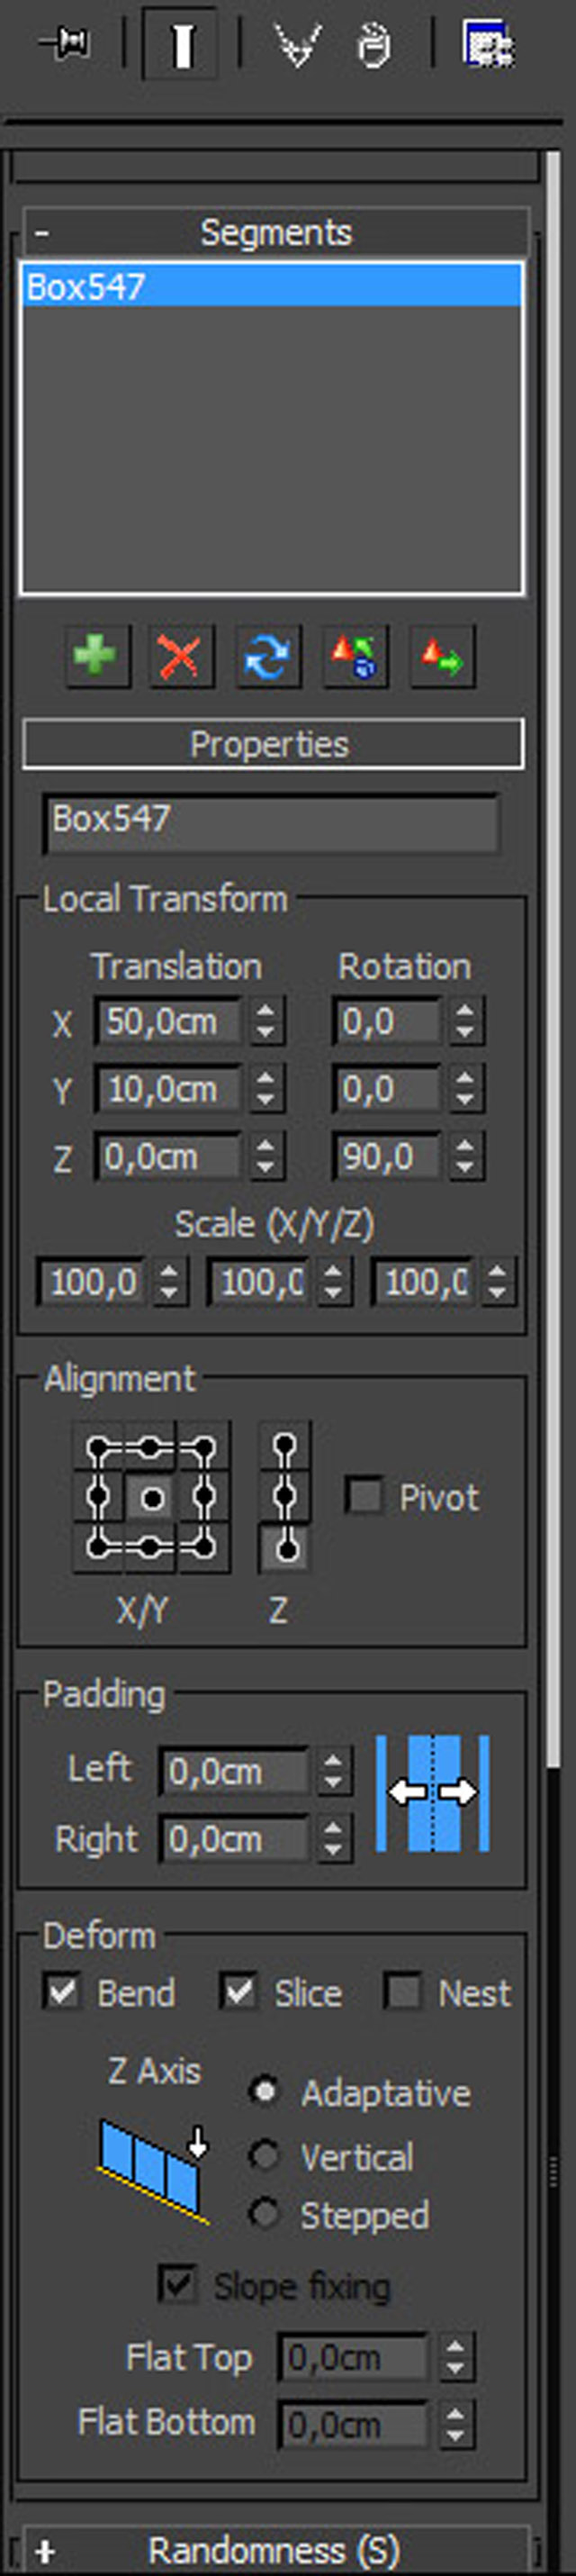
This is the final result of the model after tweaking a bit the parameters in the RailClone settings. Everything else was set as default
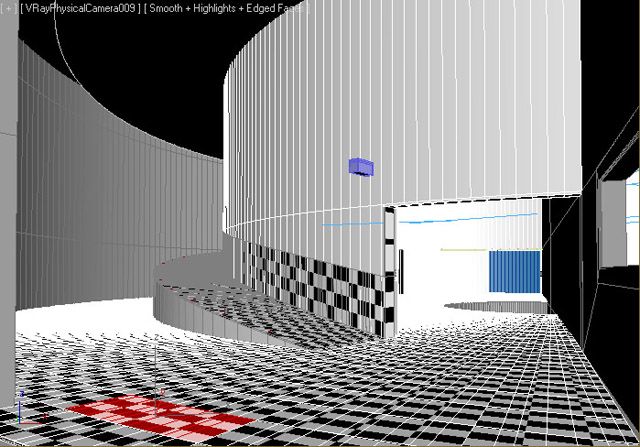
Afterwards I converted the Railclone geometry into an editable poly object. Then, using the Unique Material ID free Plugin i gave the floor and ramp objects different IDs automatically – each marble unit (element) has a different ID now. That made the Marble material (Multitexture Plugin) work perfect once it was applied to the poly object.
TEXTURING
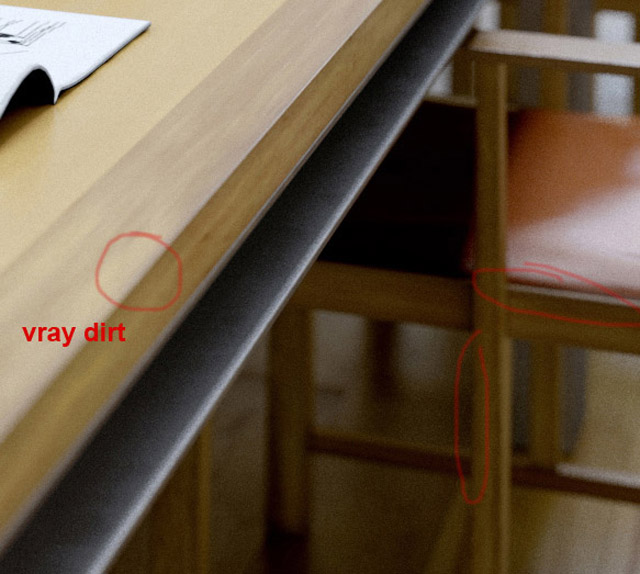
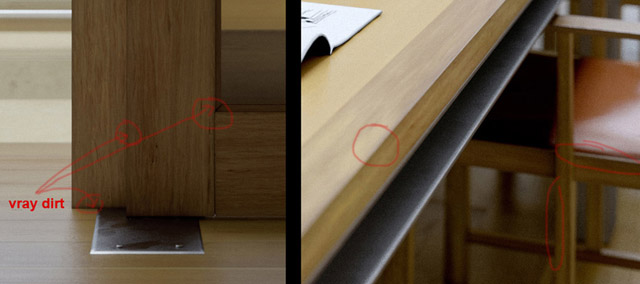
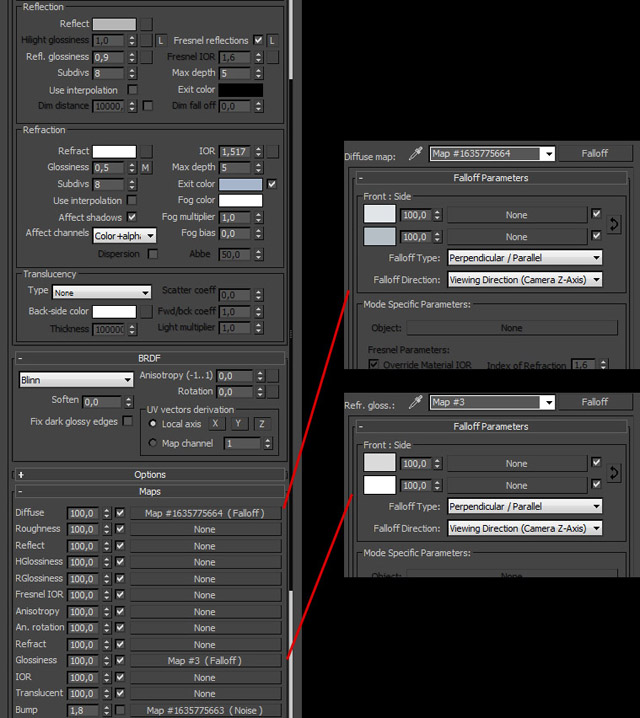
First i wanted to talk about the vray dirt present on the edge of most of the wood materials. I will focus on the darker wood. Take a look at the detailing in the following images. As you can see, over the diffuse map, there is a darker thin edge with subtle differences. That is generated by a vray dirt with noise inside the diffuse channel. It?s a little detail that can make the difference, especially in close ups.
These are the general settings of the same wood material:
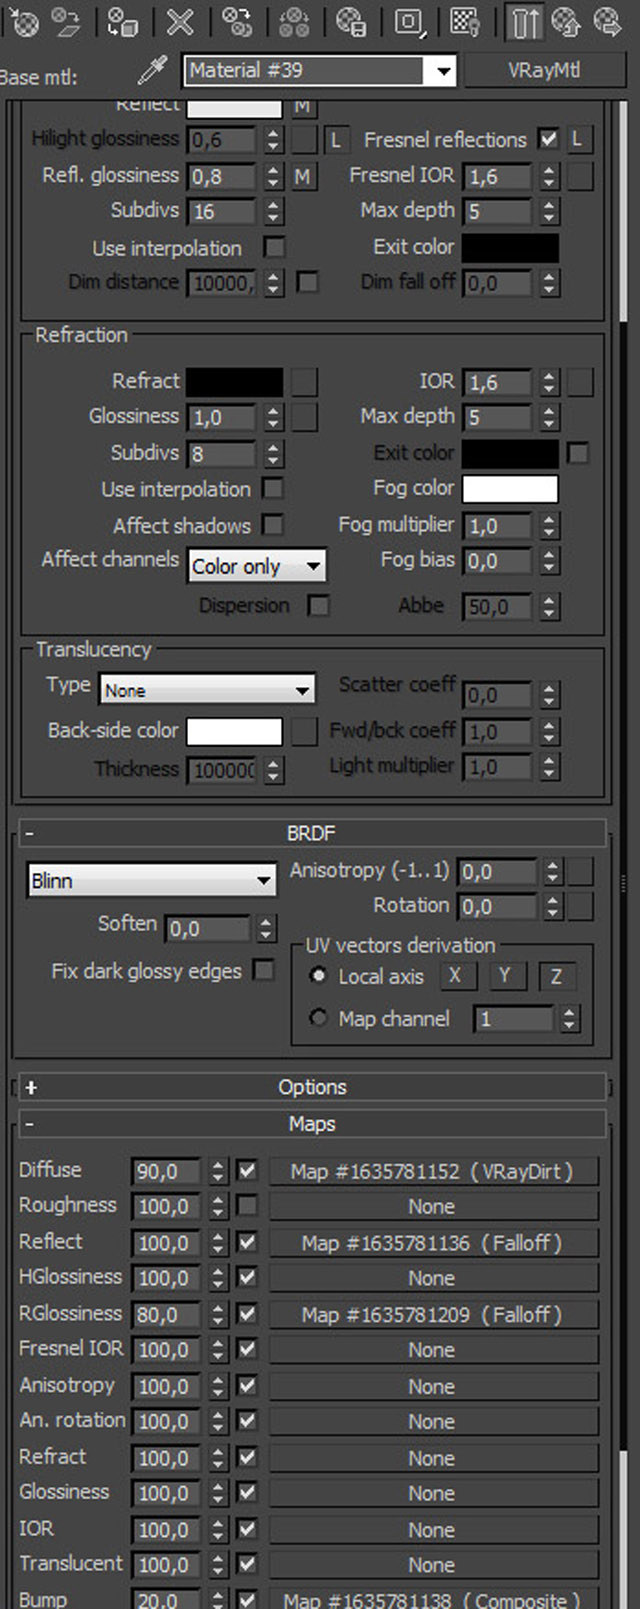
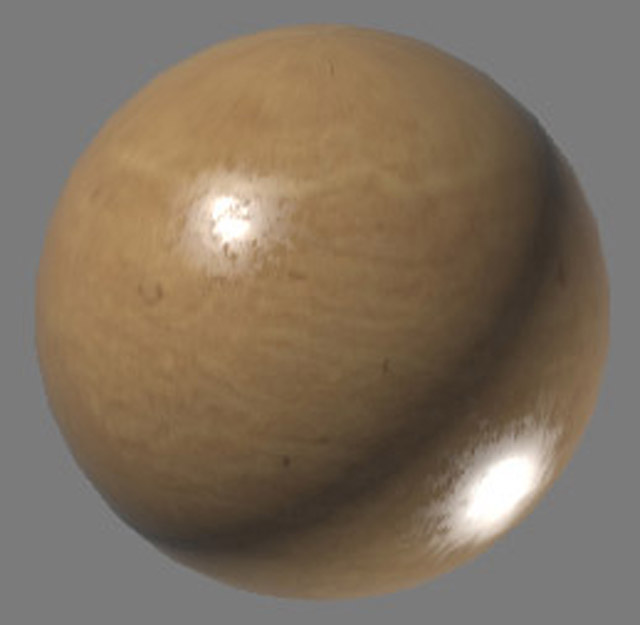
About the diffuse channel – vray dirt. Notice the small radius, so that it does not go to far over the real wood diffuse, the unoccluded color. Also by ticking “invert normal” the “parameter will change the direction of ray tracing. When it is Off the rays are being traced outside the surface, when On they are traced inside the surface”. Basically it means that the dirt areas will appear in all the edges (if bias X,Y and Z are set to zero).
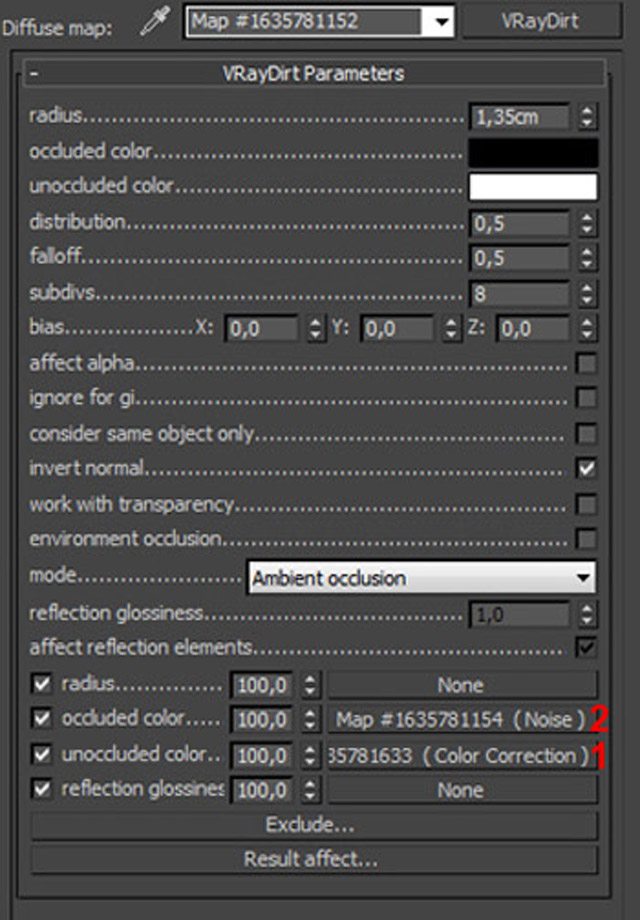
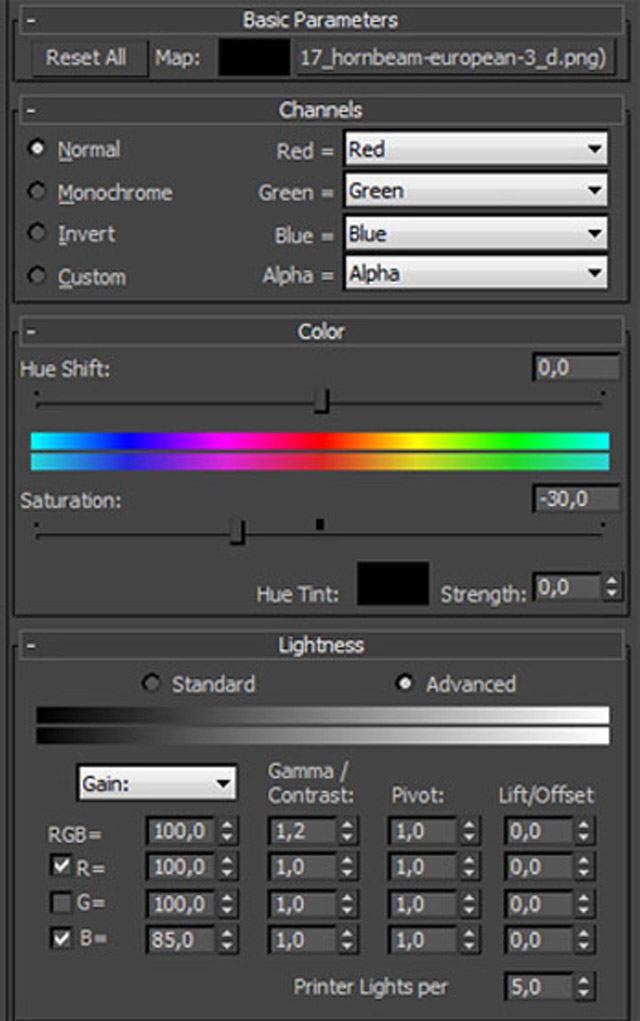
1. The unoccluded color is a normal diffuse map. In my works i always use color correction and trigger the advanced settings, changing mostly the Gamma, Red, Green and Blue values and remove a bit of Saturation (in this case -30). It?s never the same twice, as the material or scene is always different. I do all sort of tests till all the materials blend together properly.
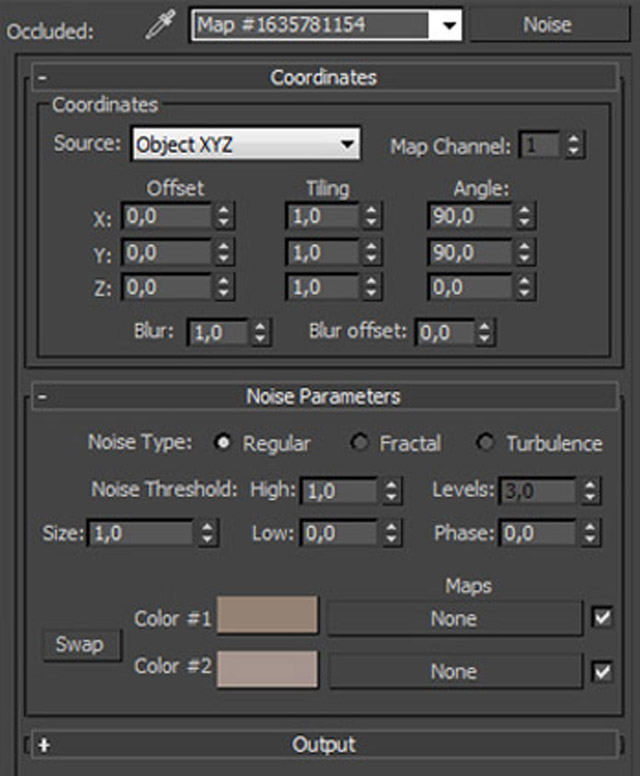
2. The noise inserted in the occluded color slot will make the edge have a more random behaviour. In this case, it was important to choose wisely the colors inside the noise so that they would blend well with the unoccluded color (diffuse map). So that the edge didn’t look too dark or too equal to the wood itself.
About the Marble material, specifically the one applied to the marble stones that touch the wood floor. In some photos of the place, I noticed that the marble gained with time a thin edge (soft green) probably due to humidity of some sort. And so I took that into count. In the image below you can see i used the famous multitexture plugin, in a subtle way:
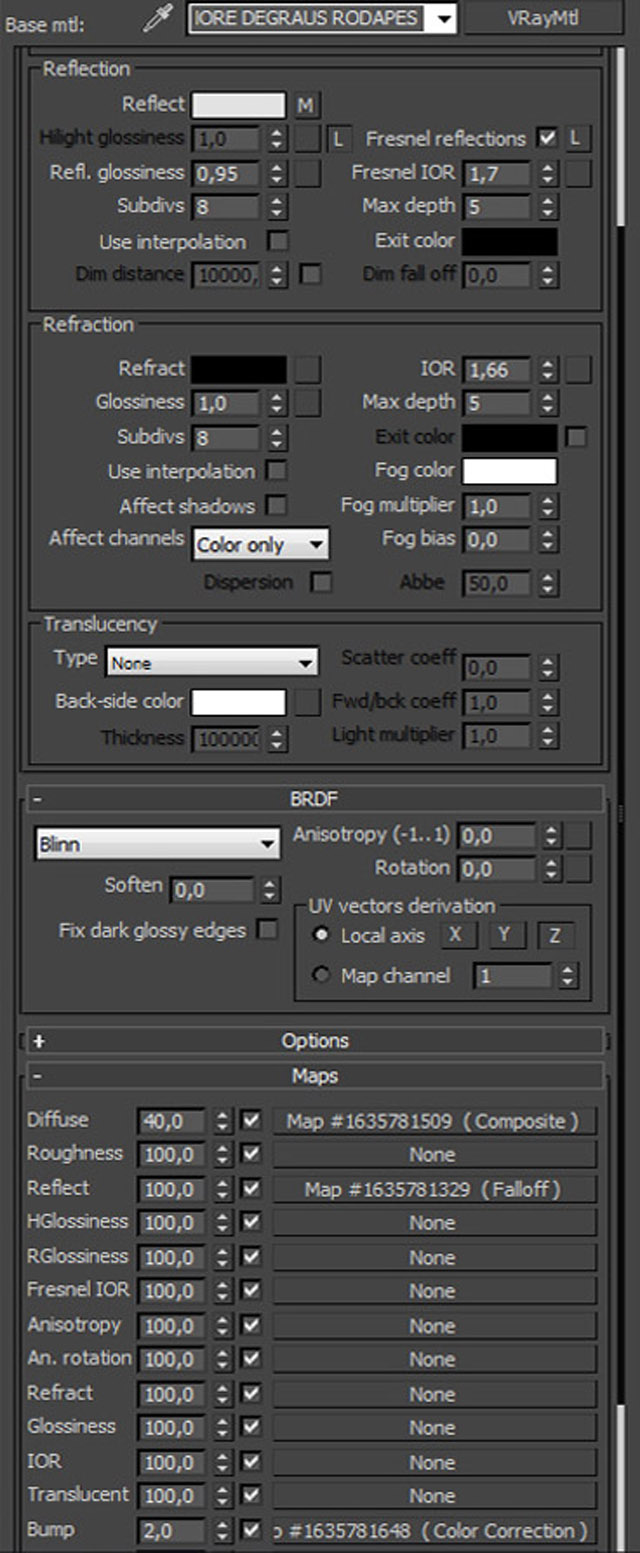
And here are the general settings of the vray material. Nothing too fancy:
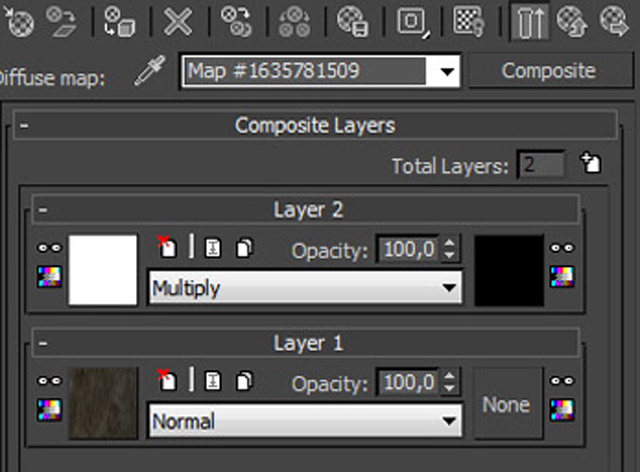
The diffuse channel is a composite with two types of maps. Layer 1 is the mentioned multitexture, and layer 2 is the dirt map set to multiply. Dirt map was painted in photoshop.
Composite:
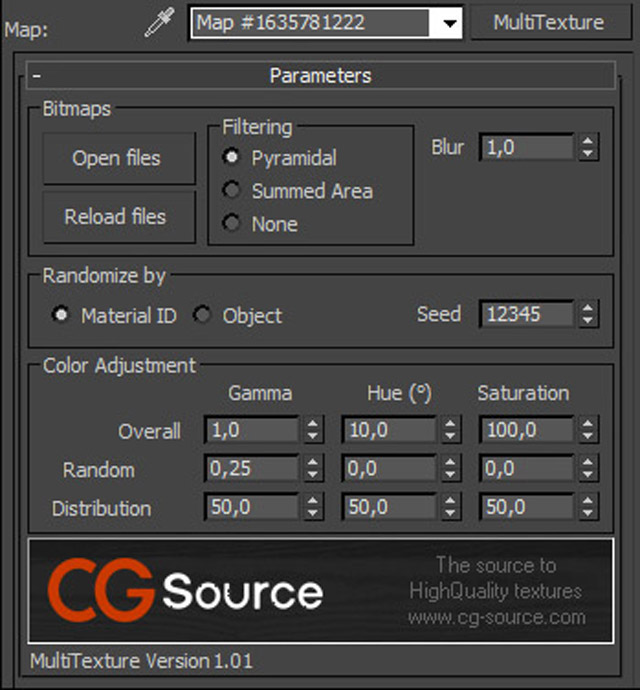
Layer 1. Multitexture settings. I used about 8 types of different marble maps for this multitexture, acquired in CG Source.com.
Layer 2 maps of the composite. Dirt map and it?s mask. And also the same map observed in the viewport already with uvw map applied (rotated 90 degrees):


LIGHT
The light system used was basically an HDRI inside a Vray Light Dome and a Vray Sun. The big difference here, or perhaps the little secret, is the skylight glass and what happens inside that same structure. At first, I wanted to have only a vray light dome but i wasn’t having the same results as in the photographs. So I decided to boost the light inside the skylight and give the glass a special treatment as if it was being hited by bounces of light that would eventually pass to the interior, filtered by the frosted windows.
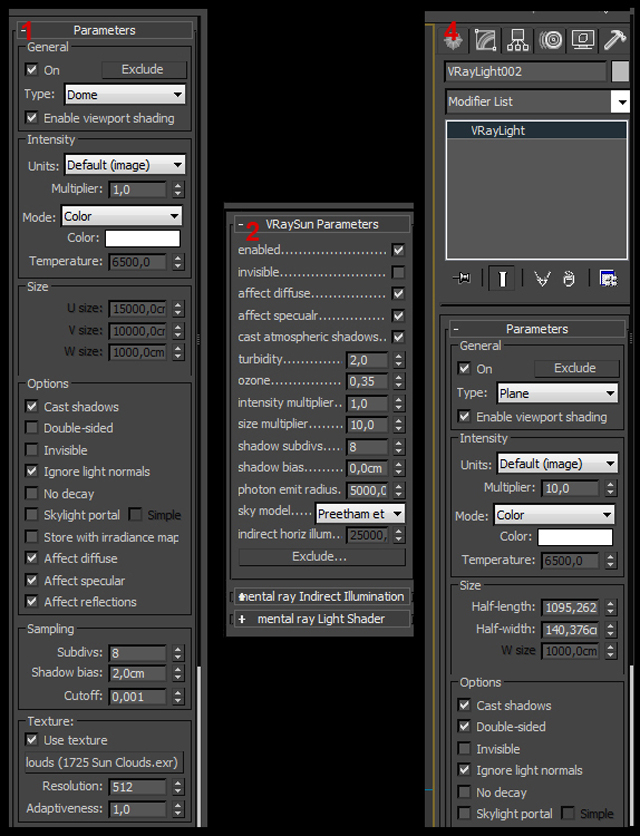
The settings of the Vray Light Dome (1), Vray Sun (2).There is also one vray (3) with skylight portal On in one of the windows, but it had zero effect on the scene and is just there for testing purposes, so don?t take that into consideration. And one Vray light (4) with 10,0 of intensity and set to visible, placed inside the skylight:
I wanted the frost glass to have that glossy look and at the same time have a nice refraction so that it would be possible to see the metal structure inside of the skylight. The glass was made using a vray blend material – a glossy glass combined with a vray light material (1) – intensity 100, color RBG (57, 95, 153) and a blend amount (2) with a grey value equal to 5:
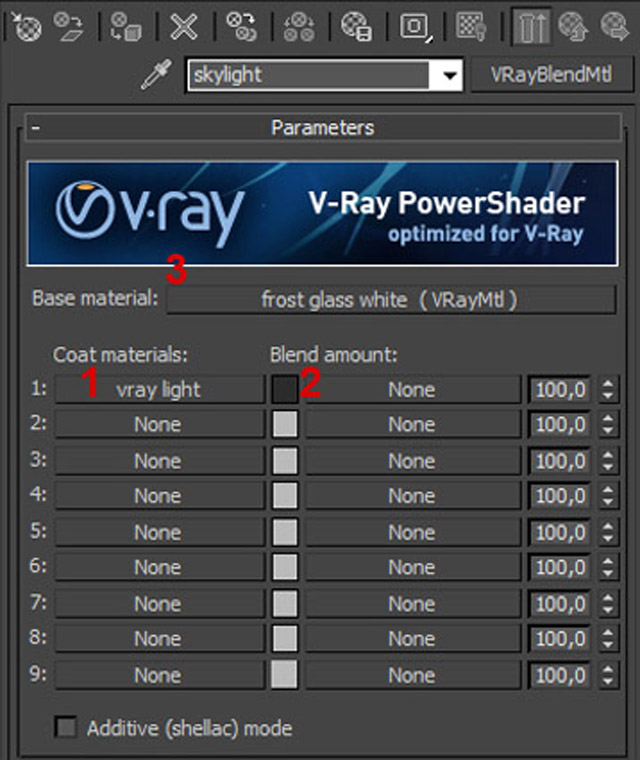
And the frosted glass material (3) settings:
RENDERING
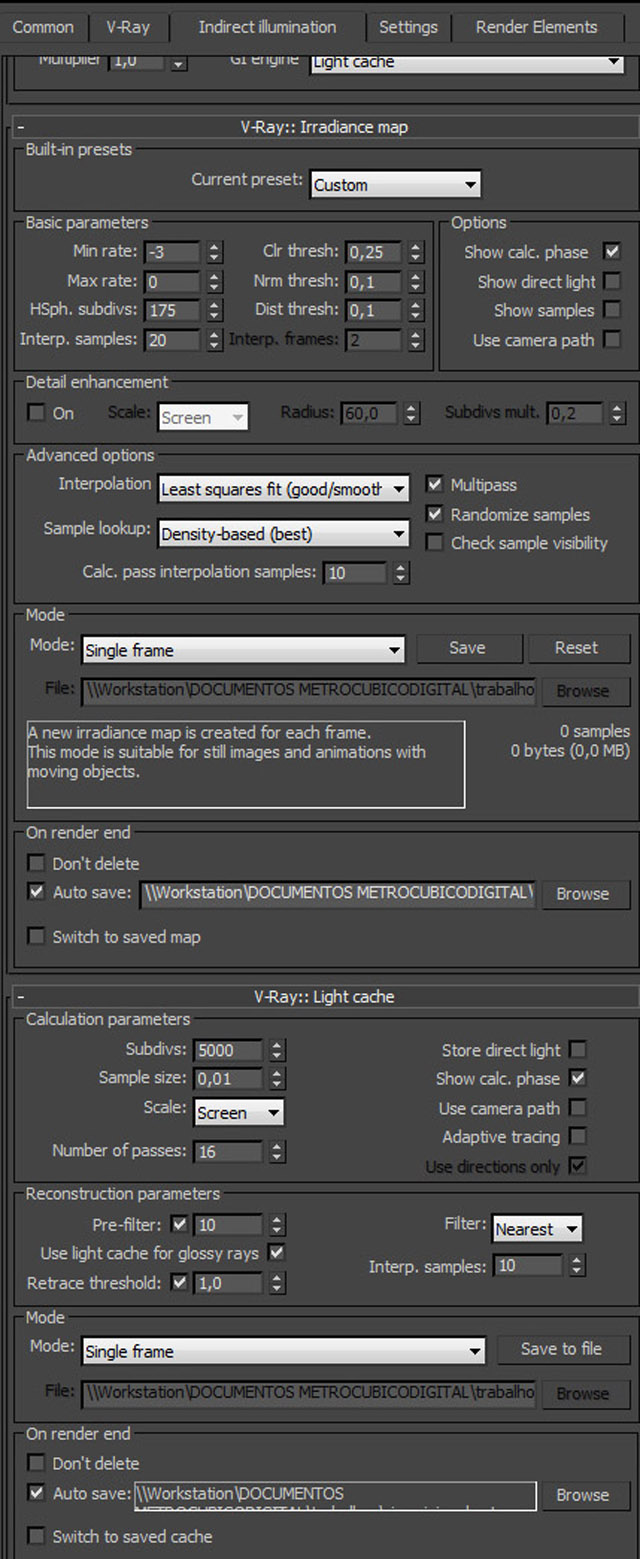
During the testing period i used universal settings (brute force method) but in the end, i decided that i wanted to creat 3500 pixels and higher images and so universal setttings weren?t a choice anymore for me. For the final images i used Irradiance map + Light Cache. I wont explain much about the settings except that i rendered first the images in a smaller resolution (4 times lower that the final output – in my case it would be 875 x 619 pixels) and saved the irradiance map pre passes (*.vrmap) plus light cache map (*.vrlmap) to use afterwards for the final image. By using this maps, when you render your final image, you will skip the Irradiance and Light cache process and go straight to the render itself.
Take a look at the GI settings below used for the 875 x 619 pixels resolution – exactly four times smaller than the final image resolution. In the IRR Map settings, i set the Min and Max rate to -3 and zero respectively. That means an High quality Irr Map. If i would render a final image with this settings it would be impossible, but since I am rendering at a lower resolution just to save the irr and light cache maps it wont take much more than 1 hour in a 8-core computer. After the Irr map and light cache maps are calculated and saved i go back to the render settings and set the resolution to 3500 x 2625 pixeis. Also, in the Irr map settings, in Mode part, i changed Single Frame (the one saved previously) to From File, and choose the saved *.vrmap file. I also did that for the light cache *.vrlmap* file. For a much better theory about this process, check out the Vray Complete Guide written by Franscesco Legrenzi.
Here are the GI settings used for the low resolution image:
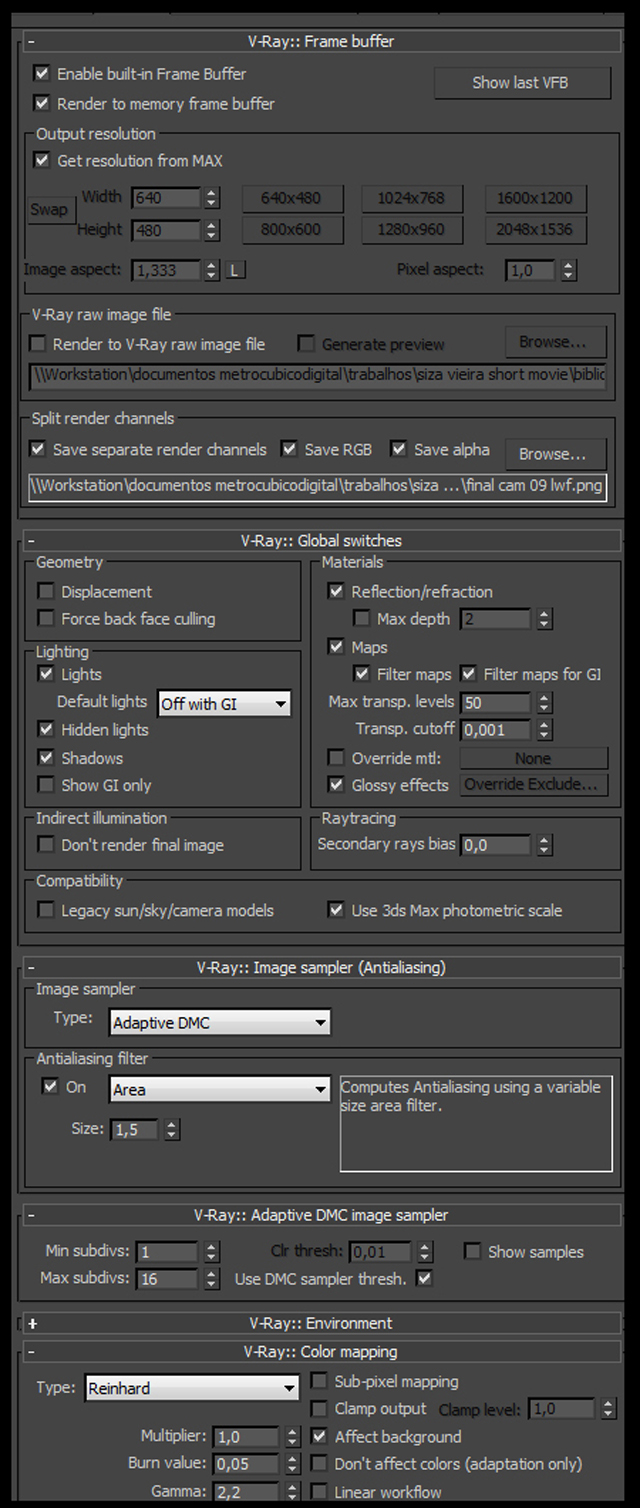
And finally here are the Vray render and color mapping settings:
POST PRODUCTION
Everything was done in Photoshop, except the last part where i used After Effects – Magic Bullet Misfire Vignette.

COMPOSITION

About The Author
You might be interested in